How to Block and Stop Windows 11 Update on Windows 10?
Updating to latest operating system is not everyone's cup of tea, especially when the latest OS Windows 11 has nothing special, compared with Windows 10. Therefore, it's quite reasonable that many a user chooses to stick with Windows 10 and are reluctant to update to Windows 11 from Windows 10.
Though you're not willing to upgrade to Windows 11, Windows 10 automatically attempts to download and install Windows 11. In such cases, the crowd searchs on google concerning how to cancel the Upgrade to Windows 11 (download/installation) process that initiated on its own without user consent. Needless to look somewhere else for scattered solutions, here this post gathers top common yet effective ways to stop and block Windows 11 update forever. Check the details below:
Top Ways to Pause and Stop Windows 11 Update
1. Turn Off Windows Update Service to Block Windows 11 Update Permanently
Turning off the Windows Update Service is the permanent way to stop Windows 11 update on Windows 10. Certainly, you need to aware that this will stop any and all Windows updates (including security and cumulative update patches) from installing on your Windows 10 PC. You need to manually turn the service back on when you are inclined to install the Windows 11 updates later on.
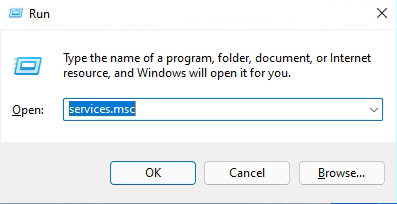
- Press Windows + R keys simultaneously on your keyboard to activate a Run dialogue box.
- Type services.msc on the pop-up Run dialogue box and hit Enter.
- Locate and double-click on the Windows Update service after you enter the Service window.
- On the Windows Update Properties dialog box, locate to Startup type section > change the default Manual to Disabled.
- Tap the Stop button under Service status > hit Apply/OK to save the changes. Now the auto Windows 11 update is disabled.
Simply follow the steps mentioned above again and choose Automatic as the Startup type if you need Windows auto update later on. Then click on the Start button and hit OK.
2. Pause Windows 11 Update Temporarily
In case you only want to pause the Windows 11 update for a short time, the easiest method to do so is via Windows Settings. This method will allow you to put the update on hold for 7 days or more. Here is what you need to do:
- Press Windows + I keys simultaneously on your keyboard to open Windows Settings.
- Hit Update & Security on the Settings window > select Windows Update from the left panel on the next window.
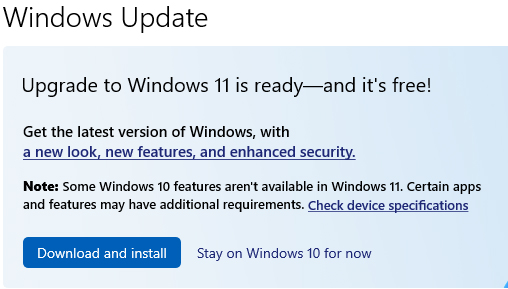
- Your screen should now display if Windows 11 is ready to be installed on your PC. If it is, click on Stay on Windows 10 for now.
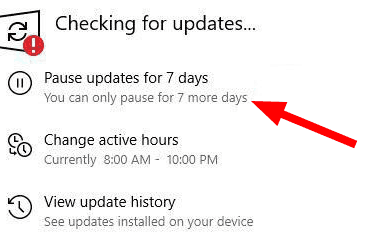
- Alternatively, tap Pause updates for 7 days. This should temporarily put the updates on hold for a week.
- To pause Windows 11 update more than a week, click on Advanced options > expand the dropdown menu under Pause updates.
- Opt for a date of your choice under Pause until.
3. Modify the Registry Editor in Windows 10 to Stop Windows 11 Update
Temporarily pausing Windows 11 update is not the ideal way to decline Windows 11 update once and for all. Most of you might still tend to the permanent solution. On top of turning off Windows Update Service, you can still resort to Registry Editor in Windows 10 to block Windows 11 update. Here's how to:
Note: this method is comparatively complicated, more suitable for those with certain programming knowledge. Skip to the 4th method if you're not interested in this complex way.
- First of all, check the current version of Windows that you are using. Press Windows + I keys simultaneously on your keyboard to open Windows Settings > select System > choose About and scroll down to the 'Windows specifications' in the right window.
- Check the current version of Windows 10. Here, you have the choice to keep using the same version or upgrade to the latest one if one is available.
- Press Windows + R keys simultaneously on your keyboard to open a Run dialogue box.
- Type regedit in the text field and hit Enter to activate Windows Registry.
- Once the Registry Editor is open, navigate to the location below: Computer\HKEY_LOCAL_MACHINE\SOFTWARE\Policies\Microsoft\Windows\WindowsUpdate
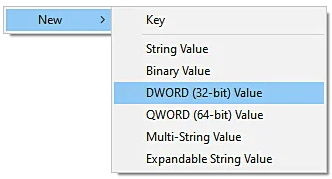
- Select the New > DWORD (32-bit) Value option and rename this value as TargetReleaseVersion.
- Double-click on the TargetReleaseVersion value, and type 1 under Value data.
- Right-click anywhere in the same window again and opt for the New > String Value option.
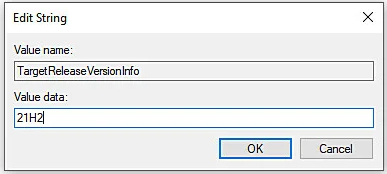
- Rename this value as TargetReleaseVersionInfo and double-click on it.
- If you are on Windows 10 version 21H2, then type 21H2 under Value data and hit Enter.
- Afterwards, restart your Windows 10 computer to cancel Windows 11 update.

4. Cancel Windows 11 Update using Group Policy Editor
If you find using the Registry Editor hard, then try canceling the Windows 11 update using the Group Policy Editor. In the Group Policy Editor, administrative-level information about the Windows programs and processes is stored in the form of policies, and by modifying the relevant policies, we can customize the operating system processes. In this method, we will be modifying a Windows update policy to make the desired changes. Here is all that you need to do:
- Open a Run dialogue box still via the above-mentioned Windows + R keys simultaneously press.
- Type gpedit.msc and hit Enter to launch the Group Policy Editor.
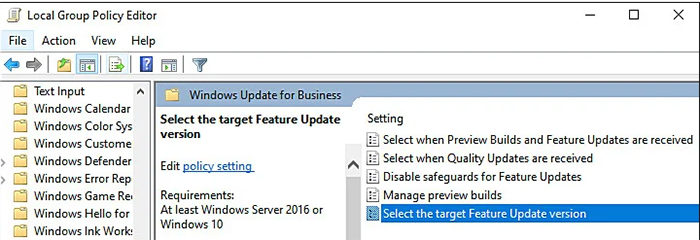
- As long as GPE is running, navigate to the location below:.
Local Computer Policy > Computer Configuration > Administrative Templates > Windows Components > Windows Update > Windows Update for Business - Locate and double-click on Select the Target Feature Update Version.
- Choose the Enabled option. Then, under Target Version for Feature Updates, type your preferred version.
- Tap on Apply and then OK. This is supposed to block Windows 11 update.
