How to Add Subtitles and Closed Captions to YouTube Video Automatically or Manually
Subtitles and captions are essential not only for viewers who are deaf or hard of hearing but also for those who speak different languages. However, the advantages of adding subtitles to your YouTube videos extend further. They can enhance your video's visibility and engagement on the platform. Subtitles also make it possible for viewers to enjoy your content in situations that require muted audio.
So, how can you add subtitles and closed captions to your YouTube videos? There are multiple methods to achieve this, and we'll detail them one by one below. You might be surprised to discover that you can even add subtitles after your video has been uploaded, and you have the option to add subtitles to videos created by others on YouTube.
Table of Contents
Method 1. Add Subtitles and Captions to YouTube Video with YouTube Studio
YouTube Studio is offered by YouTube to help content creators manage their channels. With this tool, YouTube uploaders can view analytics data, read and respond to comments, manage live streams, and edit YouTube videos. The built-in video editor offers options to trim video, blur video, add audio, add end screen, add info cards, and add subtitles to YouTube video. Now, we'll walk you through the steps to add subtitles and CC to YouTube video with YouTube Studio.
Prior to adding subtitles to YouTube video, you may need to download subtitles from sites like YIFY Subtitles.
Step 1. Sign in to YouTube Studio.
Step 2. Select Subtitles in the left column.
Step 3. Click the YouTube video that you'd like to add subtitles to.
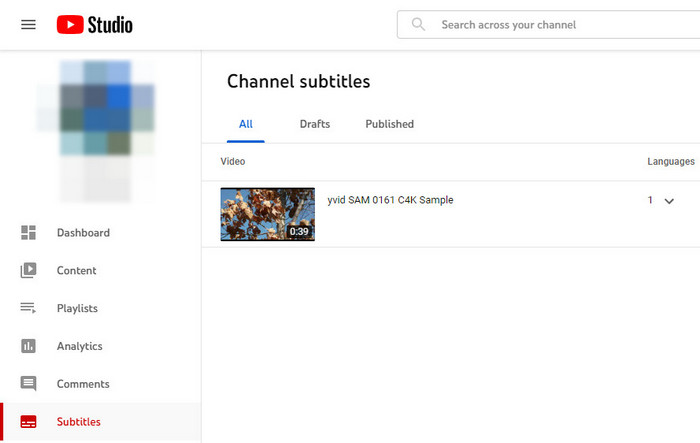
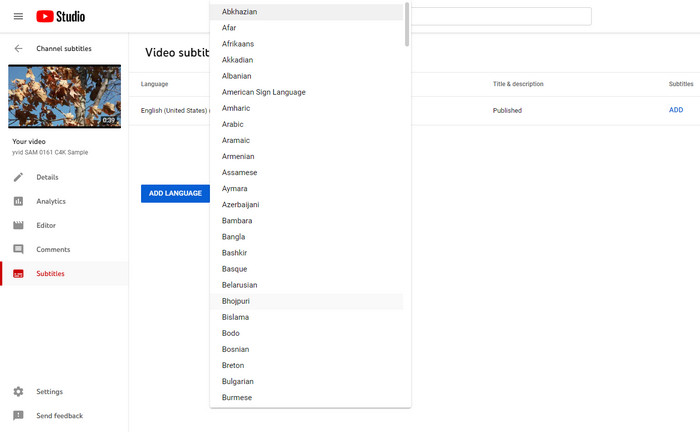
Step 4. Click ADD LANGUAGE and choose which language your subtitles will be.
Step 5. Click the ADD link under Subtitles. Now you'll be asked to select how you want to add captions: Upload file, Auto-sync, Type manually, or Auto-translate.
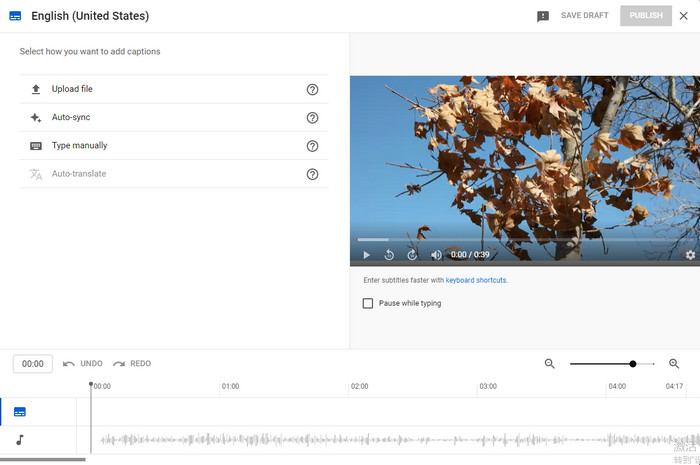
To use "Upload file" feature, you need to make sure that your file type is supported by YouTube, your file contains the text of what is said in the video and timestamps for when each line of text should be displayed.
If you choose "Auto-sync", you simply need to type or paste in a full transcript of the video. Subtitle timings will be set automatically. But make sure your transcript uses the same language that's spoken in the video and a language that is supported by YouTube's speech recognition technology. This option isn't recommended for videos that are more than one hour long or have bad audio quality.
Choosing "Type manually" means that you need to create subtitles and closed captions by entering them in as you watch the video.
As we mentioned above, YouTube supported speech recognition technology. This way YouTube can automatically create captions for your videos. But to use auto-translate, you need to publish captions in the original video language first. It isn't available for auto-generated captions.
So above are the steps on how to use YouTube Studio to add subtitles and captions to YouTube video that is already uploaded. We also want to remind you that you can also add subtitles and captions during the upload process following these steps:
- Sign in to YouTube Studio.
- Click the CREATE button at the top right corner and then select Upload Videos.
- When Upload videos window pops up, click SELECT FILES to choose a video to upload.
- Check the details and click the NEXT button.
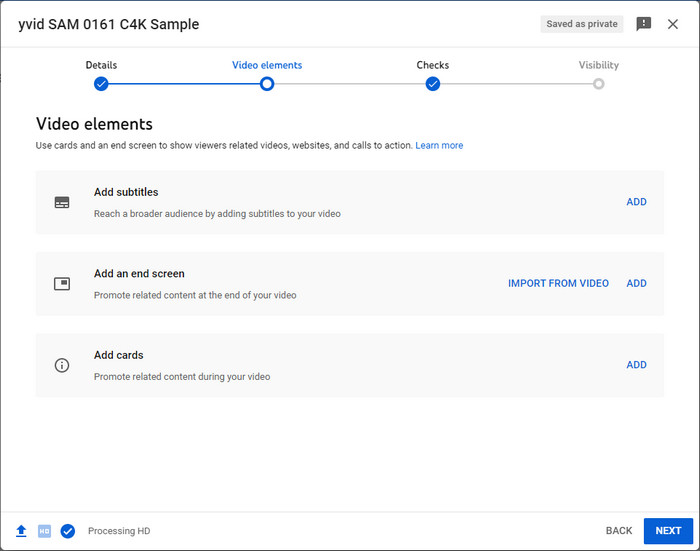
- Under Video elements, you'll see Add subtitles. Just click the ADD button and then select how you want to add captions.
If you are wondering how to add a video to YouTube, click here >>
And that's it! You've successfully added subtitles to your YouTube video. Subtitles not only make your content accessible to a wider audience but can also improve your video's search visibility and engagement.
Method 2. Add Subtitles to YouTube Video with Winxvideo AI
In addition to using YouTube's built-in subtitle feature, you have the option to enhance your video content with subtitles through third-party software. This flexibility allows you to effortlessly integrate subtitles into your YouTube videos using a variety of tools and applications.
Winxvideo AI is mainly designed to change video format, but it also comes with a few basic video editing features including adding subtitles to video. In this guide, we'll walk you through the step-by-step process of adding subtitles to your YouTube video using Winxvideo AI.
Step 1. Download and install Winxvideo AI on your computer.
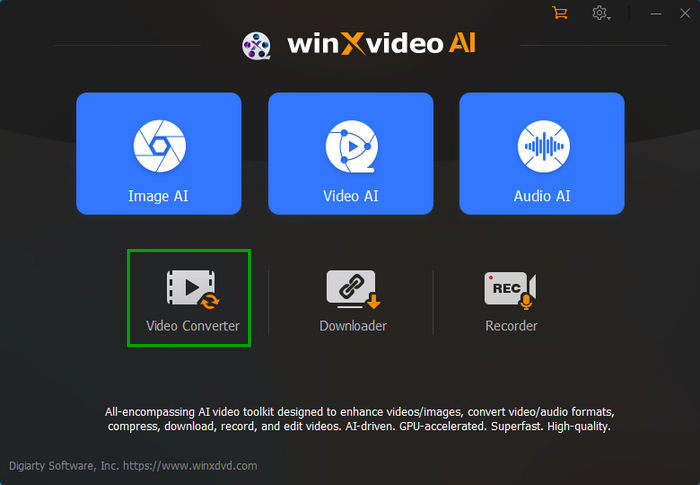
Step 2. On the main UI, click on the "Video Converter" button to navigate to the video conversion window.
Step 3. Click the + Video button to import the video you are going to upload or have already uploaded to YouTube.
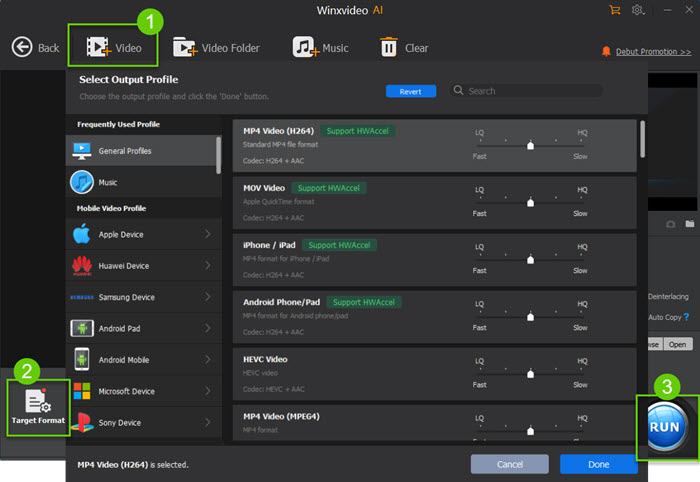
Step 4. Pop up the Output Profile window by clicking on the Target Format option at the bottom and then choose an output profile. You're suggested to scroll down to YouTube Video and select MP4.
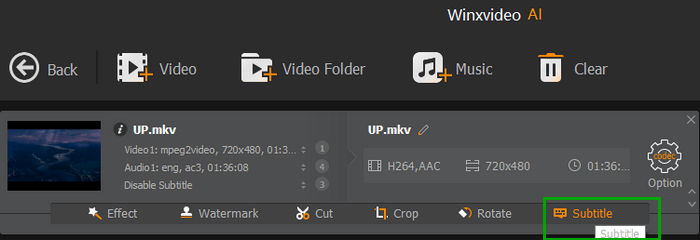
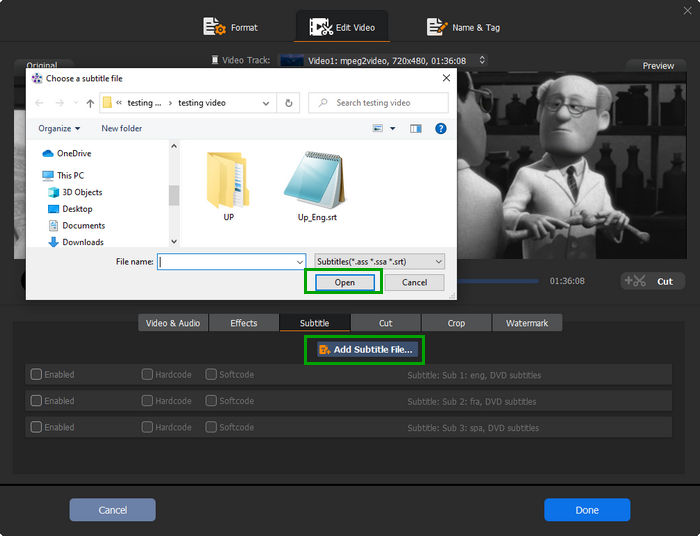
Step 5. Click Subtitle, check Add Subtitle file, and import subtitle file for your YouTube video. Then, click Done. If you haven't got any subtitle files beforehand, you can also click Search Subtitle file to download subtitles as you like.
Step 6. Click the RUN button. Then, Winxvideo AI will process your video and deliver a video with subtitles.
Method 3. Add Subtitles and Closed Captions to YouTube Video with Rev
If you're not good at adding subtitles to YouTube video, you can leave that to professionals. Look no further. Rev has human professional captioners and subtitle translators to help you captioning YouTube videos. How it works? Just follow us.
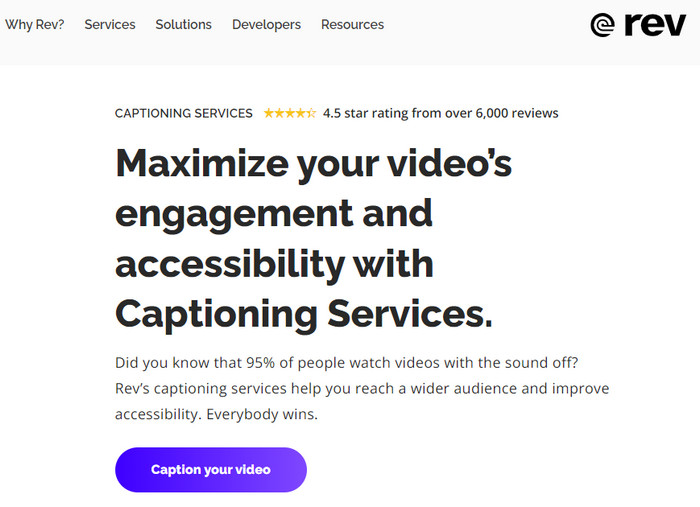
Step 1. Go to Rev's captioning service page and click the Caption your video button.
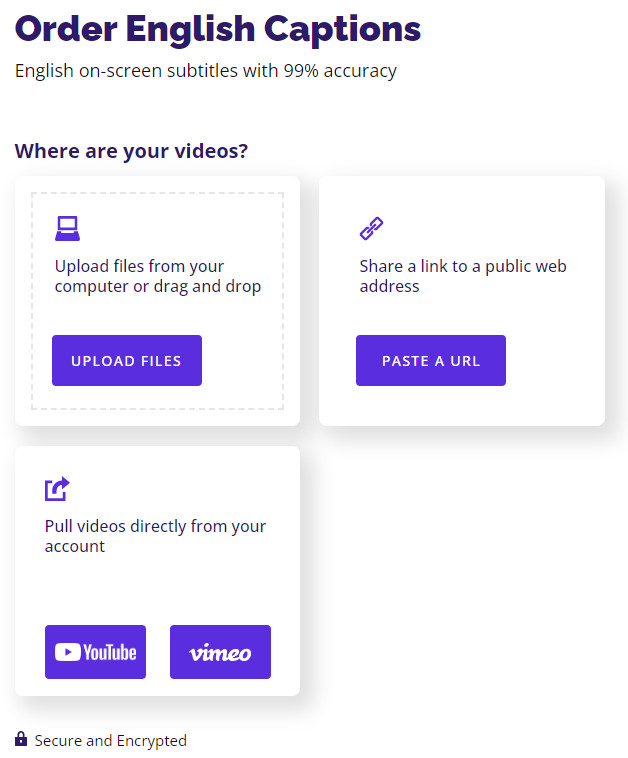
Step 2. On the Order English Captions page, specify where your videos are. You are allowed to upload files from computer, paste a link, or pull videos directly from your YouTube or Vimeo account.
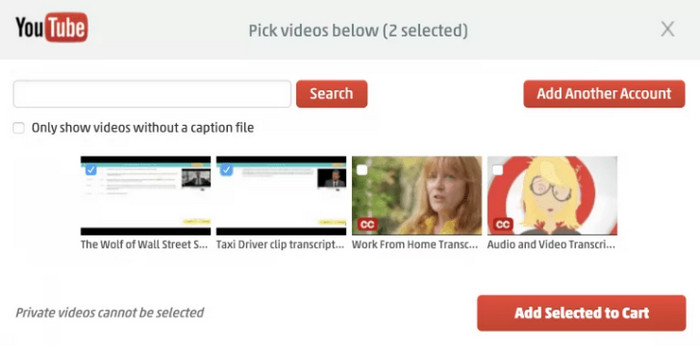
If you click the YouTube button, you need to select the YouTube video you want to add subtitles or captions to and click "Add Selected to Cart".
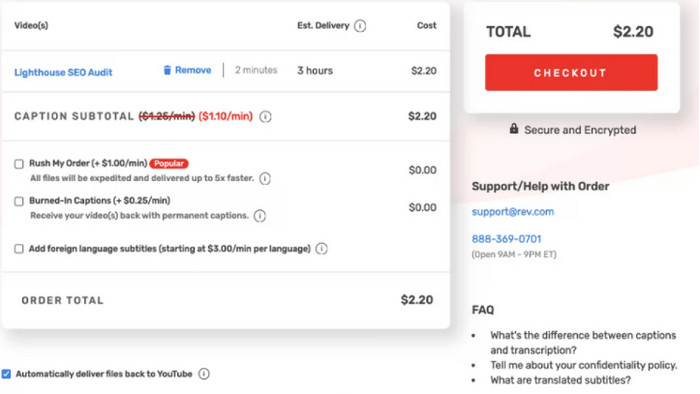
Step 3. Click CHECKOUT button. Then, Rev will do the rest. It usually finishes captioning within 24 hours.
Ultimately, the choice of method depends on your specific needs, budget, and the quality you aim to achieve. Regardless of the method chosen, providing subtitles not only makes your content accessible to a wider audience but also enhances the overall user experience and SEO for your YouTube videos.
FAQs about Adding Subtitles to YouTube Video
How to add subtitles to someone else's YouTube video?
You can select the … button under the target YouTube video and see if there's an option named Add translations. If there is, just click it and then you'll see auto-generated subtitles or creator-publishing subtitles on the left-hand side. Then, you can click Edit, go through the subtitles, and add your own subtitles.
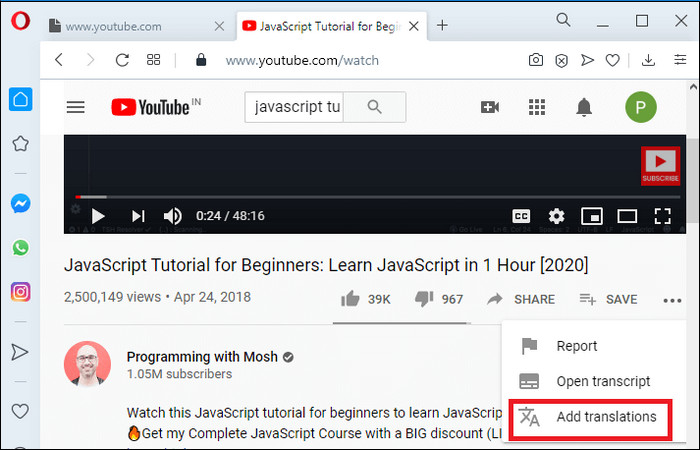
If you can't see Add translations option, it means that this video doesn't support community contribution. Not all videos support this. In this case, you can create subtitle file and send it to the YouTube video owner.
How to add subtitles to a YouTube video on iPhone or on Android mobile?
Currently, subtitling/closed captioning cannot be performed from the YouTube mobile app.
How to add subtitles to YouTube video automatically?
YouTube can use speech recognition technology to automatically create subtitles for videos in Dutch, English, French, German, Indonesian, Italian, Japanese, Korean, Portuguese, Russian, Spanish, Turkish, and Vietnamese. However, YouTube auto-generated subtitles are not 100% accurate because of mispronunciations, accents, dialects, or background noise. You're suggested to review the automatic captions and make changes if needed following the steps below:
- Sign in to YouTube Studio.
- From the left menu, select Subtitles.
- Click the video you want to review the automatic captions or subtitles of.
- Under Subtitles, click three dots icon next to the subtitles you want to review.
- Review automatic captions and edit or remove any parts that haven't been properly transcribed.
Why does my added subtitles not appear?
If you add subtitles to other people's YouTube videos, they need to be approved by the community first.


