How to Transfer Home Movies to DVDs (VHS & Videos)
I found a huge box of VHS tapes in my garage and am interested in converting those home videos to DVD so we can watch them on my DVD player. I also have tons of videos that I would like to transfer. However, the local company asks for $15 to $35 per video tape to DVD transfer. Services online are not cheap either! Can I transfer home movies to DVD cheaply at home?
DVD is still an important way to store videos. If you have a lot of homemade videos containing precious family memories, it won’t hurt to transfer them onto physical copies. In this post, we will show you a free way to convert home videos to DVD, regardless of the video formats or length.
Get the best home DVD authoring software

How to Transfer Home Videos to DVD?
- Step 1: Prepare your home videos
- Step 2: Get a free converter
- Step 3: Start to burn home videos to DVD
Step 1 Prepare Your Home Videos
1. If you would like to transfer VHS tapes to DVD:
Note: this guide works with digital formats only. If you want to transfer home movies stored on VHS, VHS-C, Video8, MiniDV, Hi8, etc. to DVD, you need to convert them to digital files first. In this case, you can use a VCR to record the VHS to digital video:
* You can connect the VCR to a digital video camera, and record the VHS video with the camera. After the digital video camera records the home video, connect it to a computer and transfer the videos from the camera to the computer.
* You can also connect the VCR to a computer, but you will need a capture card and recording software to help receive and decode the video signal from your VCR.
2. If you would like to convert phone videos to DVD:
If you need to transfer phone recorded videos to DVD, you need to move them to the computer first. For Android users, they can use a USB or Android’s free app named Android File Transfer to move videos to PC or Mac easily. It’s a little bit tricky to transfer iPhone videos to the computer, which involves the Finder or iTunes.
Related reading: How to burn iPhone videos to DVD
Step 2 Download the Free Home Video to DVD Converter
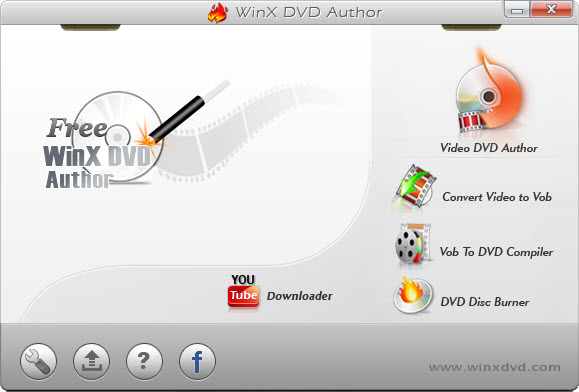
Now the VHS or other home videos are ready for transfer. You need to get a program to help you transfer the family videos to DVD. The free program named WinX DVD Author will help. It converts home videos in any formats to DVD, including MP4, MKV, AVI, FLV, ISO, MOV, etc. You can create DVD title and chapter menu, add subtitles, adjust the aspect ratio, cut unwanted parts, etc. Your home videos will be stored on DVDs with excellent video quality and Dolby Digital AC3 audio.

Step 3 How to Convert Home Videos to DVD?
Prepare: blank discs based on the size of your home video (Up to 2 hours of video can be put onto a DVD. Check DVD capacities here>>); disc drive; and the free home movie to DVD transfer tool.
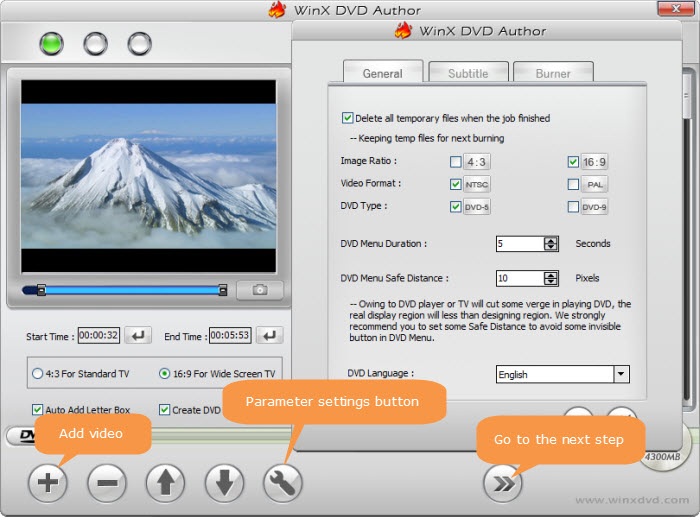
Step 1. Insert a blank DVD into your computer's DVD tray and run the converter. Then click the Video DVD Author button and click the + icon to import the home movies. Click Settings to set the desired aspect ratio, language, subtitle, format, type, etc. based on your needs.

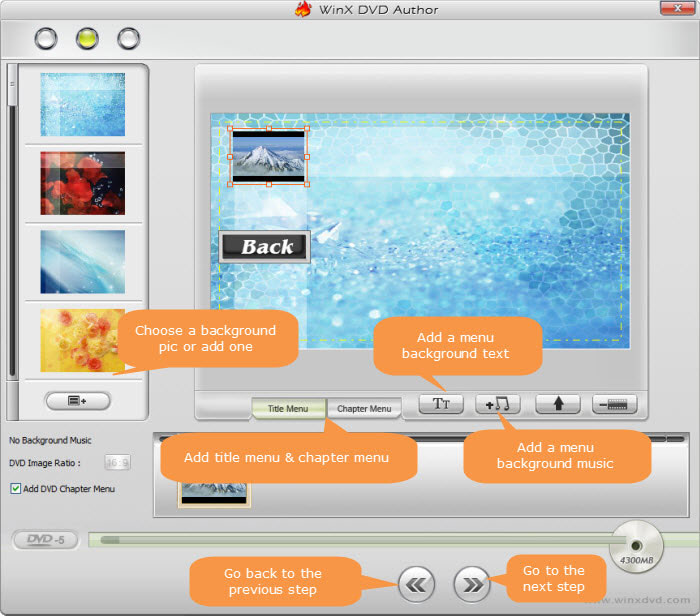
Step 2. Click the next button to the next window. Enable Add DVD Chapter Menu and then you can create personal title menu, chapter menu, and customize background picture and background music.
Step 3. Then click the Next button and there you can specify the device, write speed, output folder, output format, and encoder engine. Once done, hit Start and it will convert home videos to DVD.


