How to Copy and Burn iPhone Videos to DVD for Free
You may have recorded tons of home videos with iPhone. Sometimes, you will want to save them to DVDs to free up more space on iPhone, watch them on a regular DVD player or PC, or send a copy to family members/friends as a keepsake. There are iPhone videos to DVD services online, for example, QuickFlics, which charges you $8.99 per month for one DVD per month. They also have limits on the imported files, for example, the iPhone videos to DVD service on DVD Walmart accepts video files in MPEG1, MPEG2, AVI, Quicktime, WMV only.
In this post, we will show you how to transfer iPhone video to DVD for free with easy steps. No expensive subscription fees, no limits on format, length or others.
Step 1. Transfer iPhone Videos to PC/Mac
iPhone video to the computer transfer involves the use of Finder or iTunes. On macOS Catalina and later, you will use Finder to move the video. On macOS earlier than Catalina and Windows systems, you need to use iTunes.
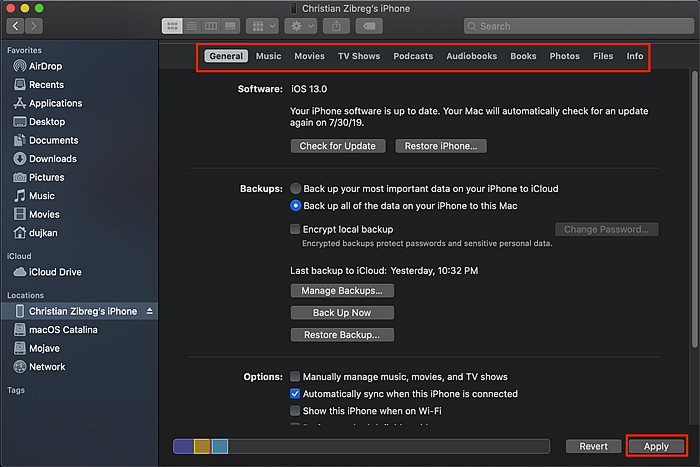
- Open a Finder or iTunes window and connect your iPhone to the computer using a USB cable.
- Select your device in the Finder or iTunes from the left column.
- Click the Movies tab and you will see all you videos here.
- Check the Sync Movies box and choose to sync all or selected iPhone videos you want to transfer to DVD. Then click Apply.
Here is a more detailed guide on how to transfer iPhone videos to the computer >>
![]() FYI:
FYI:
Transfer iPhone videos using Finder or iTunes can be complicated for some users. Improper operations may cause data loss either. If you want a faster and easier way to transfer 4K/1080P iPhone videos to the computer in a flash or in batches, just try other third-party tools like WinX MediaTrans.
WinX MediaTrans is specially designed to transfer files between iOS devices and computer. The supported file types include video, audio, ibooks, and more. It can finish transfer job at super fast speed. 1GB iPhone video can be transferred to computer within one minute. Download and install it on your computer, and you'll find more amazing and useful features.
Now, let's show you how to transfer videos from iPhone to computer for later burning to DVD.
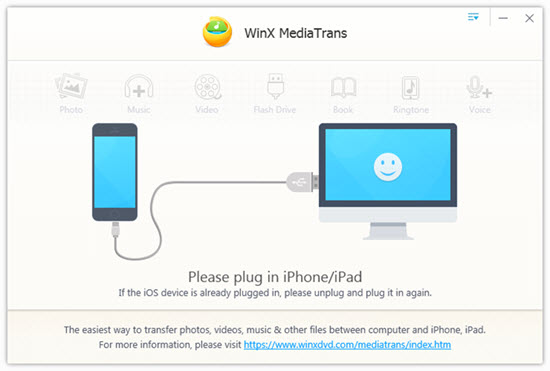
Step 1. Launch WinX MediaTrans and then it will ask you to plug in your iPhone. Just connect your iPhone with your computer via a USB cable, so that this program can read and transfer the files in your iPhone.
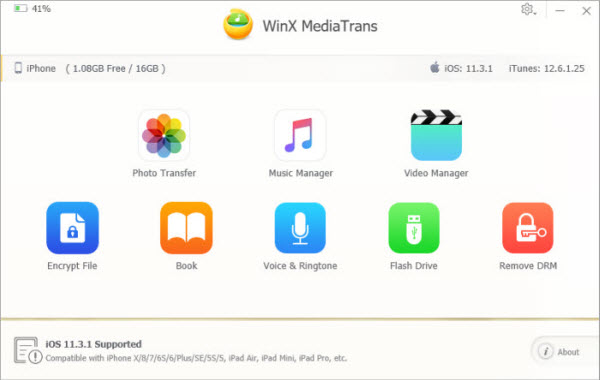
Step 2. When you come to the main interface where you can see 8 icon shortcuts, you should click Video Manager. And now, you’ll find all your iPhone videos will appear.
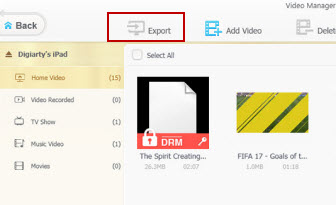
Step 3. Choose the iPhone videos you want to transfer and burn to DVD, and then click the Export button. Then, all selected iPhone videos will be quickly transferred to your computer. Once done, we can move to the next step – burn iPhone videos to DVD.
Step 2. How to Burn iPhone Videos to DVD for Free
After the iPhone videos are transferred to the computer, you can start to burn them to DVD. Instead of online iPhone videos to DVD services which are not cost-effective, the free iPhone video to DVD converter named WinX DVD Author will help. It will burn iPhone videos from HEVC, MOV, MP4, M4V, other formats into DVD with excellent video quality and Dolby Digital AC3 audio. You are allowed to create DVD title and chapter menu, add subtitles, adjust the aspect ratio, cut unwanted parts, etc.
Prepare: before you start, make sure you have:
- A blank disc (select a DVD5 or DVD9 based on the size of the iPhone video you want to burn. Check DVD capacities here. It supports DVD±R/±RW, DVD DL+R, DVD DL±RW);
- A computer with disk drive or an external DVD drive that can be connected to your computer;
- The free iPhone video to DVD burner - WinX DVD Author.
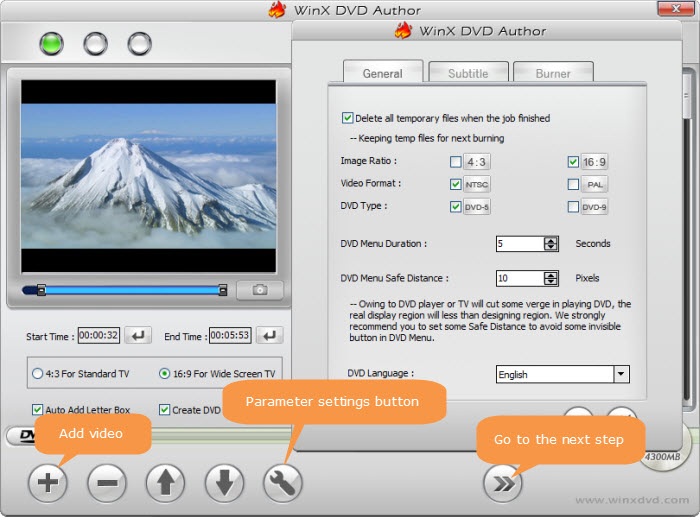
Step 1. Open the DVD burner and insert the blank DVD into the disc drive. Then click the Video DVD Author button > + icon to import the iPhone videos you just transferred to your computer. Once the videos are loaded, you can click the Settings button to set the desired aspect ratio, language, subtitle, video format NTSC/PAL, DVD type, etc.
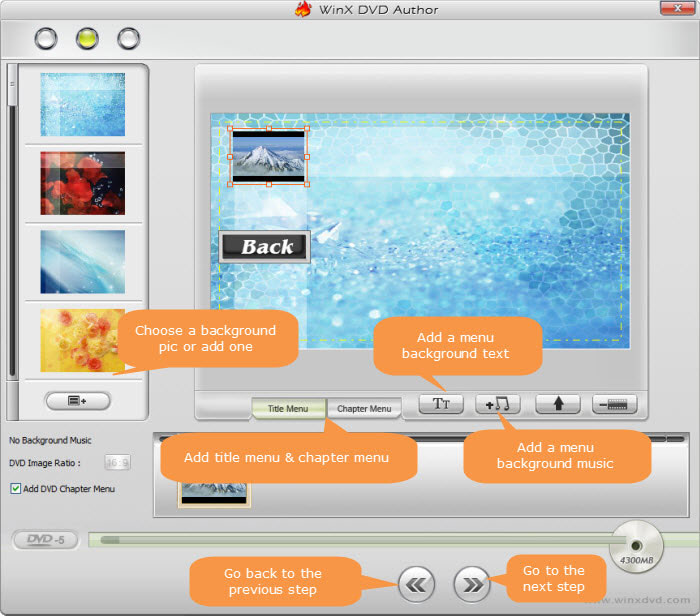
Step 2. Click the next button to the next window. Here you can add a background picture, background music, and text. Enable Add DVD Chapter Menu and then you can create personal title menu, chapter menu.
Step 3. Click the Next button and there you can specify the device, write speed, output folder, output format, and encoder engine. After all the settings, click Start and it will transfer iPhone videos to DVD now.
In wrapping up this guide on burning iPhone videos to DVD, you've embarked on a journey to bridge the digital and physical realms of memories. As smartphones capture our most cherished moments, the ability to immortalize them on a tangible, shareable format like DVD adds a timeless dimension to your personal archives. Whether it's for creating a thoughtful gift, preserving a special occasion, or simply organizing your digital life, the process of transferring iPhone videos to DVD provides a tangible connection to the digital age.
So, as you embark on turning those iPhone videos into lasting mementos, remember that this simple yet rewarding endeavor not only safeguards your memories but also offers a tangible bridge between the modern convenience of smartphones and the enduring charm of physical media.


