


How to Split a Clip in Premiere Pro: A Step-by-Step Guide for Every Editor
 Mike Rule
Updated on
As a professional video editor with over a decade of experience, I’ve split thousands of clips in Premiere Pro. Whether you're trimming interviews, refining transitions, or isolating key moments, mastering how to split a clip in Premiere Pro is essential for you.
Splitting clips allows you to remove awkward pauses or mistakes, apply effects to specific sections—like color grading a sunset scene—create multicam sequences or parallel storylines, and even export individual scenes as separate files. This guide will walk you through three foolproof methods to split clips in Adobe Premiere Pro, plus an easier way when Adobe’s tool isn’t the best fit.
Part 1. 3 Ways to Split a Clip in Premiere Pro
Splitting a clip in Adobe Premiere Pro is a simple but essential skill for video editing. Follow these steps to split a clip efficiently:
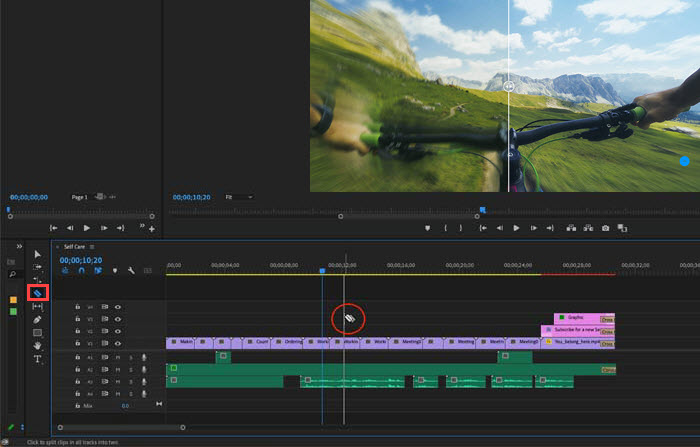
Method 1. Split a Clip Using the Razor Tool (Shortcut: C)
This way is ideal for frame-accurate cuts in complex timelines.
Step 1. Import Your Footage.
Open Premiere Pro and create a new project. Then, drag and drop your video into the Timeline.
Step 2. Select the Razor Tool.
Press C on your keyboard to activate the Razor Tool, or click on the Razor icon in the toolbar.
Step 3. Click on the Clip to Split.
Move the playhead (blue vertical line) to the exact point where you want to split the clip. Click once on the clip to cut it at that point.
Pro tip: Use Left/Right Arrow keys for frame-by-frame adjustments.
Step 4. Switch Back to the Selection Tool
Press V to return to the Selection Tool. Now, you can move, delete, or edit the separated clips independently.
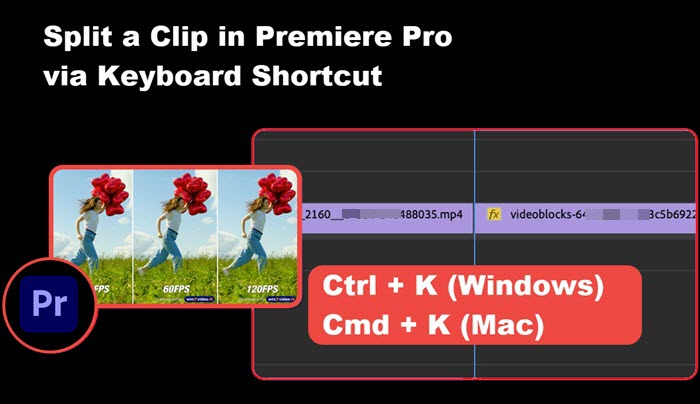
Method 2: Split a Clip Using Keyboard Shortcut (More Efficient)
This way is ideal for rapid edits during timeline playback.
Step 1. Move the playhead to the point where you want to split.
Step 2. Select the clip you want to split in the Timeline.
Step 3. Press Ctrl + K (Windows) / Cmd + K (Mac) to cut the clip instantly.
Step 4. The clip is now split into two, and you can edit each part separately.
Part 2. Try Winxvideo AI - An Easier Way to Split a Clip
While Premiere Pro is a powerful editing tool, it does come with certain limitations. Beginners often struggle with its complex interface, particularly when using features like the Razor tool and track targeting. Moreover, working with 4K projects requires at least 16GB of RAM, which can be challenging for lower-end systems. On less powerful computers, processing high-resolution videos—especially 4K or larger—may lead to performance issues or even crashes.
For quick social media cuts or low-spec machines, you can use a simpler way to simplify the splitting process without advanced setups. Luckily, Winxvideo AI, an AI-powered video enhancer and converter, is an ideal choice for casual editors to split clips, add effects, merge clips, and so on.
Step 1. Free download Winxvideo AI, install and launch it.
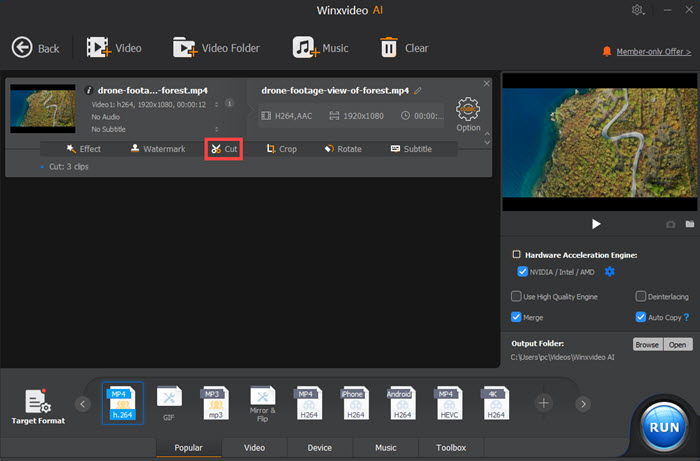
Step 2. Click on the Video Converter button on main UI.

Step 3. Drag and drop your video to it, and click the Cut icon.
Step 4. Drag and knob to set cut time position, and then click the Cut button. If you want to split more, you can do this multiple times. Then, click Done.
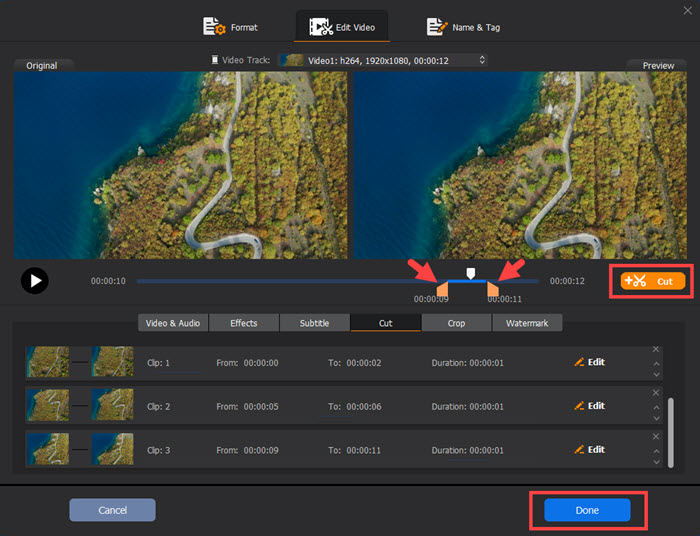
Step 5. Now, click the RUN button to export the clips.
 Free Download
 Free Download
 FAQs
FAQs
Cutting part of a clip in Premiere Pro is simple using the Razor Tool.
Step 1. Import Your Clip. Drag your video onto the Timeline.
Step 2. Select the Razor Tool. Press C on your keyboard or select the Razor Tool from the toolbar.
Step 3. Cut the Clip. Click on the points where you want to split the clip.
Step 4. Delete the Unwanted Section. Select the part you want to remove and press Delete.
Step 5. Close the Gap. Drag the remaining clips together or press Shift + Delete to remove the gap automatically.
Splitting a video into individual frames in Premiere Pro can be done by exporting each frame as an image sequence. Here’s how you can do it:
Method 1: Export Frames as an Image Sequence
Step 1. Import Your Video. Drag your video onto the Timeline.
Step 2. Set In and Out Points (Optional). If you only need a portion of the video, move the playhead to the start, press I (In point), then move to the end and press O (Out point).
Step 3. Open Export Settings. Go to File > Export > Media (Shortcut: Ctrl + M / Cmd + M).
Step 4. Choose Image Format. In the Format dropdown, select PNG, JPEG, or TIFF Sequence.
Step 5. Adjust Frame Rate (If Needed). Under Video Settings, make sure the frame rate matches your project settings.
Step 6. Set Export Destination. Click Output Name, select a folder, and ensure the filename is set to export as a sequence (e.g., "Frame_0001").
Step 7. Export. Click Export or use Adobe Media Encoder for batch processing.
Method 2: Manually Save Frames (For Specific Frames Only)
Step 1. Move the playhead to the frame you want to export.
Step 2. Click the Export Frame button (camera icon) in the Program Monitor.
Step 3. Choose PNG, JPG, or TIFF, set the save location, and click OK.
Step 4. Repeat for additional frames.


