How to Convert Video Frame Rate Like A Pro?
 Mike Rule
Updated on
The frame rate, measured in frames per second (fps), determines the number of distinct consecutive images shown in one second of video playback. A higher frame rate typically leads to a smoother perception of motion, particularly important for specific types of content like sports broadcasts or high-definition films. Nevertheless, not all devices are compatible with every frame rate, and there are instances where content creators must adjust video frame rates to align with the requirements of various playback devices or platforms. So, this detailed guide explores how to convert video frame rates in different ways to help you get the desired video FPS.
Part 1. Use Video FPS Converter to Convert Video FPS
1. Winxvideo AI
* An AI-powered video/image enhancer to upscale and stabilize video, and convert video FPS.
Winxvideo AI, developed by Digiarty Software, Inc., is presented as a comprehensive suite for enhancing and converting both videos and images through the use of artificial intelligence. The software offers several key features aimed at improving digital media quality for content creators and enthusiasts alike.
As for video frame rate conversion, Winxvideo AI offers a built-in video converter to let users convert videos to 60fps and an AI Frame Interpolation feature to improve video fluidity by converting videos from 24/30fps to smoother 60fps, 120fps, or even higher, which is great for decreasing motion blur and making it possible to create slow-motion videos.
 Free Download
 Free Download
Winxvideo AI is for PC, while Macxvideo AI (from our MacXDVD brand) is for macOS.
Guide: How to convert video frame rate with Winxvideo AI?
1. Convert video FPS via its video conversion function.
Step 1. Download Winxvideo AI, install, and launch it.
Step 2. On the main UI, click the "Video Converter" button and then click "+ Video" to add your source video file.
Step 3. After loading your video, choose an output format by clicking on the "Target Format" button at the bottom. Of course, MP4 H.264 is suggested as the best choice.
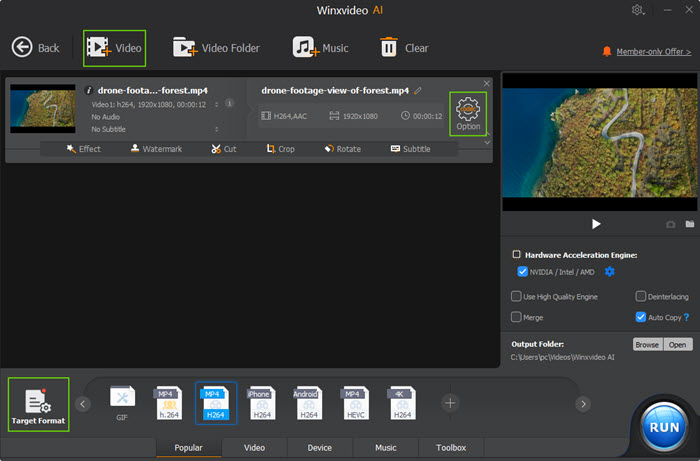
Step 4. Now, click the "codec" option to pop up a new window, and then choose the FPS you need from the drop-down menu of "Frame Rate". Then, click "Done".
- Also, you can adjust video codec, bitrate, resolution, aspect ratio, etc. here.
- If needed, you can switch to the "Edit Video" section to cut, crop, rotate, add effects/watermark/subtitles, etc.
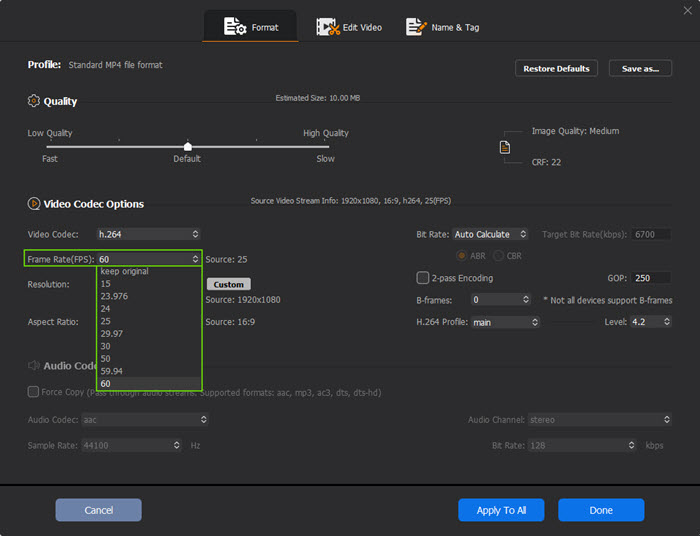
Step 5. When everything is OK, choose a destination folder by clicking on the "Browse" button. Then, hit the "RUN" button to start changing the video frame rate with Winxvideo AI.
- You are suggested to check "Nvidia / Intel / AMD" option to turn on the hardware acceleration mode to speed up the whole conversion process.
2. Change video FPS via its frame interpolation function.
Step 1. Go back to the main UI and click on the "Video AI" button to open a new window.
Step 2. Import the video you need to convert the frame rate.
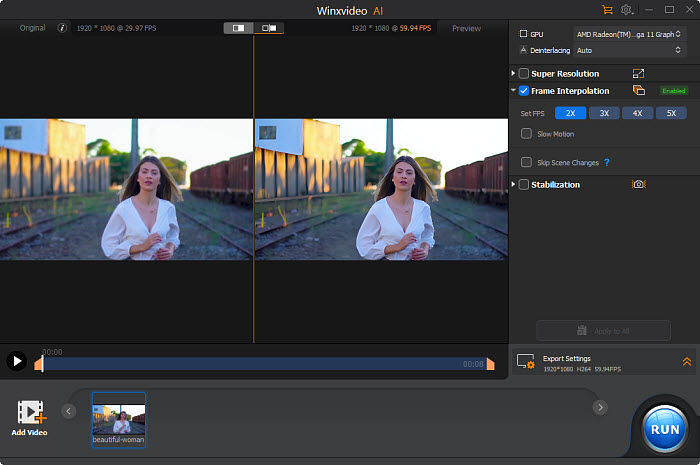
Step 3. On the right part, check the "Frame Interpolation" box and choose from 2X, 3X, 4X, and 5X to set the desired FPS. For example, if you have a 30fps video, you can choose 2X to turn it into 60fps.
- If needed, check the "Slow Motion" box to create a slow-motion video.
Step 4. Specify the export settings, choose a destination folder, and then hit the "RUN" button to start interpolating your video to change FPS with Winxvideo AI.
2. Adobe Premiere Pro
* A professional video editor for video creators to change frame rates of videos during video editing.
Adobe Premiere Pro stands out in the realm of video editing software, celebrated for its nonlinear editing interface, unparalleled suite of tools, and robust capabilities. Designed for professionals, it excels in adjusting various video parameters, including frame rate, bitrate, codec, resolution, color, speed, and more. As a video frame rate converter, it effortlessly handles videos of any frame rate, allowing for seamless conversion between any FPS.
While it is an exceptional tool for seasoned video editors to control their video projects, newcomers might find its interface daunting. To navigate this software effectively, especially when converting video FPS, beginners will benefit from a comprehensive guide.
How to change video FPS with Premiere Pro?
Step 1. Download Adobe Premiere Pro from its official website, install and launch it.
Step 2. Import your video clip to Premiere Pro and drag it to the timeline.
Step 3. Go to the "Effects" tab > select "Video Effects" > "Time" > "Posterize Time".
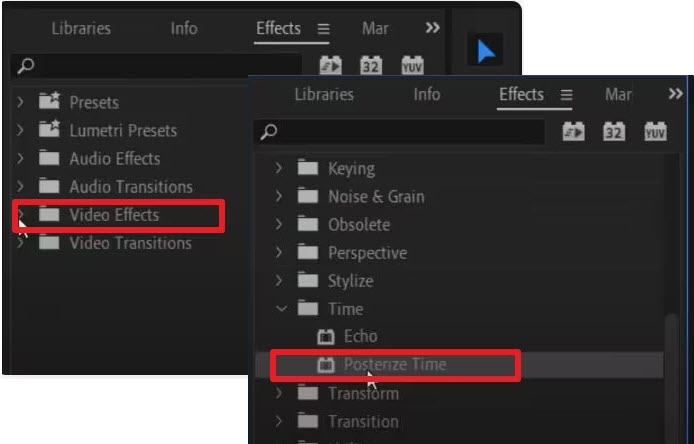
Step 4. Drag and drop the "Posterize Time" effect to the video clip whose frame rate you want to change.
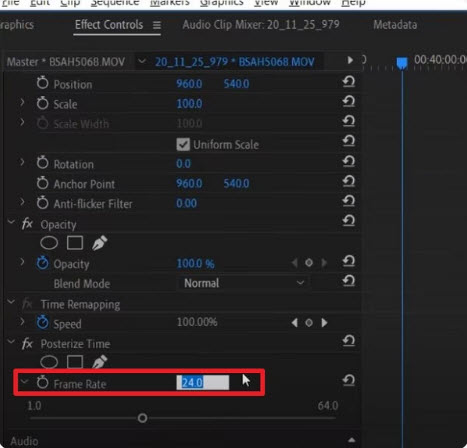
Step 5. Double-click the "fx" icon on your video clip to bring up the "Effect Controls" panel.
Step 6. Go to "Effect Controls" at the top left of the screen, and select the small "arrow" button next to the "Frame Rate" text under "Posterize Time".
Step 7. Now, you can change the frame rate by typing specific number to change the video FPS.
Step 8. Click "Sequence" in the menu bar and choose "Render Selection".
Step 9. After rendering, export your video.
Detailed guide: How to change frame rate in Premiere Pro >>
3. VLC
* The best free video frame rate converter for VLC users.
VLC stands as a cornerstone in the realm of media playback, boasting an impressive achievement of over 4 billion downloads worldwide. Renowned for its user-friendly interface and extensive features, VLC transcends the confines of a mere media player, earning accolades for its unparalleled format compatibility, robust capabilities, and a treasure trove of hidden features waiting to be explored.
Beyond its role as a simple media player, VLC emerges as a powerhouse, capable of handling a diverse array of media formats with seamless ease. Its prowess extends further with the ability to manipulate video formats and convert video frame rates, offering users a level of control and customization unparalleled by its counterparts.
How to convert video FPS with VLC?
Step 1. Go to the official website of VLC to free download VLC. Then, install and launch it.
Step 2. Click on the "Media" tab, and select "Convert / Save".
Step 3. In the new popup window, click on the "Add" button to add your video and click "Convert / Save" to continue.
Step 4. Now, click on the settings icon next to "Profile". Also, remember to choose a video output format from the drop-down menu of "Profile".
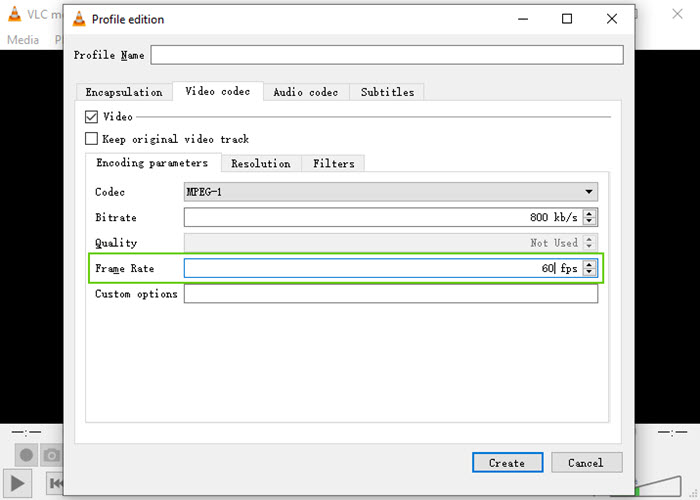
Step 5. In the new window, navigate to the "Video codec" section.
Step 6. Check "Video", and input a video FPS in the box of "Frame Rate". Then, click on "Save".
Step 7. Click on the "Browse" button to choose a destination folder to save the converted video.
Step 8. When everything is OK, hit the "Start" button and VLC start to convert video frame rate for you.
4. HandBrake
* Open-source and free video format and frame rate converter.
HandBrake stands as a versatile, open-source video transcoder renowned for its ability to seamlessly alter the frame rate of videos across a multitude of formats, effortlessly transforming them into MP4, WebM, or MKV files. Boasting an extensive range of frame rate options spanning from 5 to 120 FPS, Handbrake emerges as an indispensable tool for a myriad of video production requirements.
Beyond its frame rate conversion capability, Handbrake offers a plethora of additional features aimed at enhancing video quality. These include various filters designed to reduce noise, sharpen images, rotate, or flip videos, add subtitles, and more. With HandBrake at your disposal, changing the frame rate of your videos to meet your specific preferences becomes a simple and streamlined process.
How to adjust video frame rate with HandBrake?
Step 1. Free download HandBrake from its official website, install and launch it.
Step 2. Click on the "Open Source" button in HandBrake to select the video file you want to convert from your computer's file system. Alternatively, you can drag and drop the video file directly into the HandBrake window.
Step 3. In the "Output Settings" section, select the output format for your converted video. You can choose from options like MP4, WebM, or MKV.
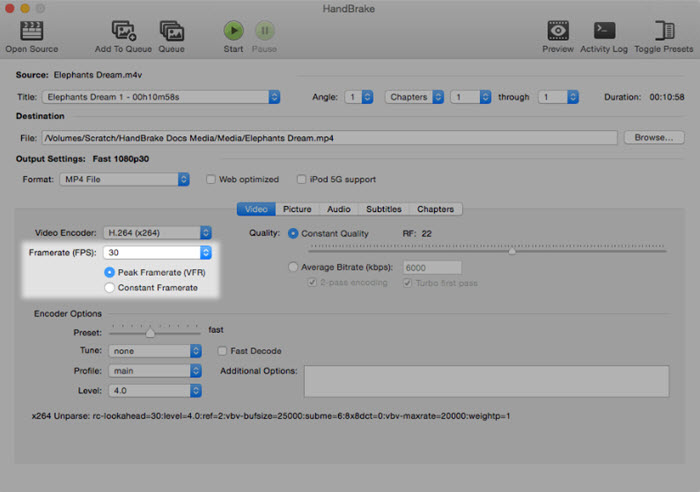
Step 4. Scroll down to the "Frame Rate (FPS)" section in the "Video" tab. Here, you can manually enter the desired frame rate for your output video. Alternatively, you can select a predefined frame rate from the dropdown menu.
- Optionally, HandBrake offers various additional settings to customize your output video further. You can adjust parameters like video codec, quality, resolution, filters, and more according to your preferences.
Step 5. Once you've configured all the desired settings, click on the "Start Encode" button at the top of the HandBrake window to begin the conversion process. HandBrake will convert the video with the specified frame rate and save it to your chosen output location on your computer.
5. SVP (SmoothVideo Project)
* An AI video frame interpolator capable of changing the video frame rate to 60fps, 120fps, 240fps, and beyond.
The SmoothVideo Project (SVP) is a suite of tools designed to enhance the playback of videos on personal computers by increasing their frame rate through motion interpolation. This process involves generating intermediate frames between existing ones in a video sequence, creating a smoother motion appearance. Essentially, SVP analyzes the motion in videos and uses algorithms to predict and insert new frames in real time, making the video playback look more fluid.
Check Best SVP(SmoothVideo Project) alternative >>
How to increase the frame rate of video with SVP?
Step 1. Go to the official website of SVP: https://www.svp-team.com/ to download this software, install and launch it.
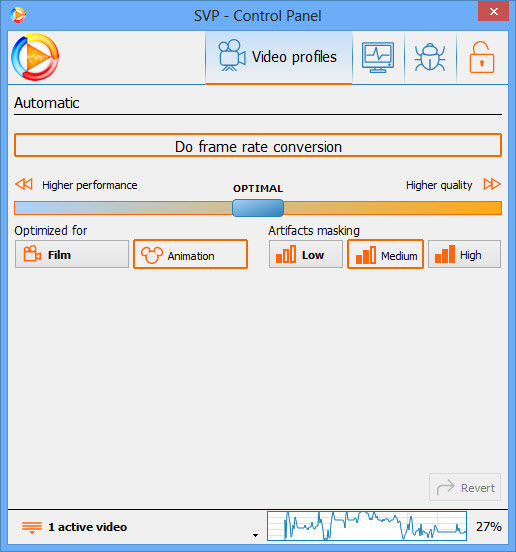
Step 2. On the main user interface, choose "Video profiles" and click on the "Do frame rate conversion" button.
Step 3. Add the video you want to convert frame rate.
Step 4. You can choose x2, x3, x4, etc., or directly choose an option like "Fixed frame rate 60 fps" to change the video frame rate.
Step 5. Once done, start interpolating your video with SVP.
Part 2. Use Online Frame Rate Converters to Change Video FPS
For those who prefer not to download software, online video frame rate converters offer a convenient alternative:
1. VEED.IO Video Frame Rate Converter
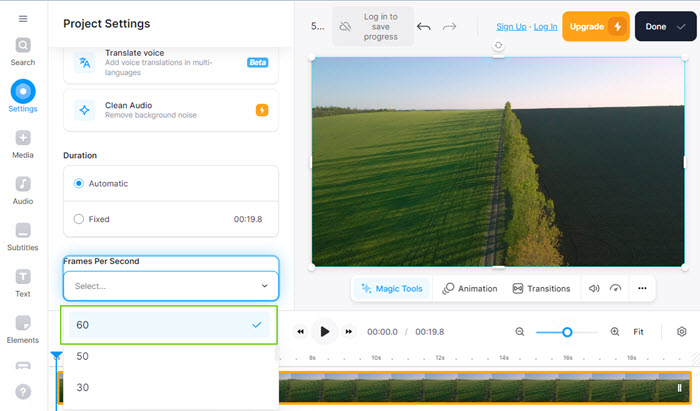
VEED.IO is an online tool that offers a wide range of video editing capabilities, including the ability to convert the frame rate of videos. This feature is particularly useful for content creators, video editors, and anyone who needs to adjust the smoothness or motion characteristics of their video footage without the need for complex software installations.
VEED.IO simplifies the frame rate conversion process through its user-friendly interface. Users can upload their video files directly to the platform and then choose their desired output frame rate. The tool supports a variety of video formats, ensuring broad compatibility. Once the conversion process is complete, the video can be downloaded in the new frame rate configuration. This online solution is ideal for those who require a quick and straightforward method to adjust their videos.
2. Ssemble Online Frame Rate Converter
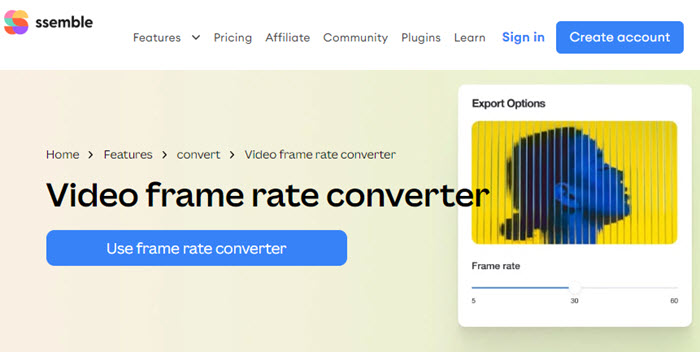
Ssemble Online Frame Rate Converter is generally designed to be a tool that allows users to easily increase or reduce the frame rate of their videos. This can be particularly useful for various purposes, such as creating stop-motion videos, GIFs, or adjusting the smoothness and playback speed of video content. The tool aims to support a wide range of frame rates, typically from as low as 5 frames per second (fps) to as high as 60 fps, accommodating most users' needs for different projects.
For specific features, capabilities, supported video formats, and how to use the Ssemble Online Frame Rate Converter, I would recommend visiting their official website or looking for user guides and tutorials that may be available online.
3. VIDEO2Edit
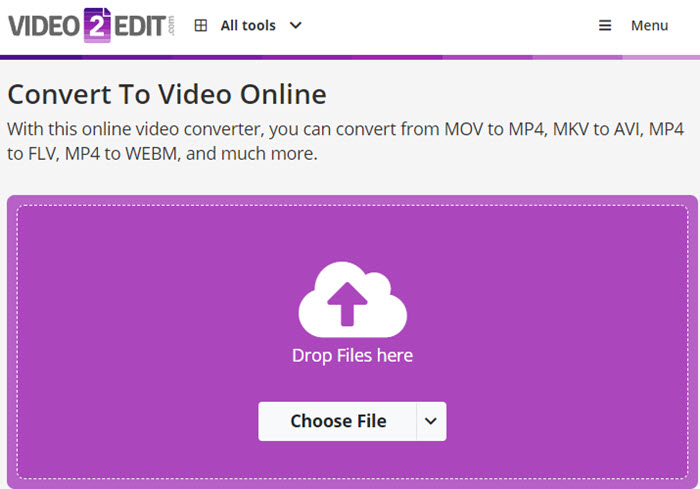
VIDEO2Edit, as an online video frame rate converter, offers a versatile platform for adjusting the frame rates of video files to anywhere between 1 and 120 frames per second. This capability makes it suitable for various applications, from creating high-frame-rate videos for smoother playback to reducing frame rates for specific stylistic effects or compatibility reasons. The service supports a wide array of video formats, including MP4, 3G2, 3GP, AVI, FLV, MKV, MOV, OGV, WebM, and WMV, allowing users to convert their videos to and from these formats while adjusting the video frame rates.
Utilizing VIDEO2Edit's frame rate conversion feature is straightforward. Users can upload files directly from their computer, Dropbox, Google Drive, or even via URLs, providing flexibility in terms of file sourcing. The platform's interface is designed for ease of use, allowing users to select their desired output format and frame rate within a few clicks. However, it's important to note that for free members, there's a maximum file size limit of 100MB, which might require upgrading to a premium account for larger video files.
4. Neural Love
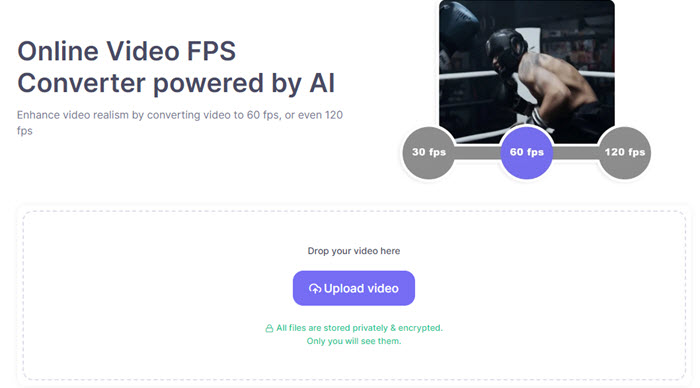
Neural Love offers an AI-powered online video frame rate converter that enhances video realism by enabling conversion to popular frame rates like 60fps or even 120fps. This tool allows for the creation of smoother, more realistic videos or slow-motion versions, catering to a variety of needs and preferences. Like any other online video FPS converter, it lets users upload a video to change video FPS without downloading software.
Part 3. Tips for Video Frame Rate Conversion
1. What’s a good frame rate for a video?
24FPS is the standard for cinema, while 30FPS is common for TV and online content. For high-action sequences and slow-motion videos, 60FPS can offer smoother playback.
- 24fps: This frame rate is the standard for movies, cinematic shots, and streaming video content, offering a visually appealing and cinematic experience to viewers.
- 30fps: Commonly utilized in Live TV broadcasts such as sports and news, as well as in most TV shows and soap operas. It's worth noting that frame rates higher than 30fps are typically employed for capturing slow-motion videos.
- 60fps: Ideal for shooting action-packed movies, fast-moving sports events, and recording video games. Additionally, standard slow-motion footage is often captured at 60fps to achieve smooth and detailed slow-motion playback.
- 120fps and above: Reserved for recording videos intended for playback in slow motion, providing the capability to capture high-quality slow-motion footage with enhanced clarity and detail.
2. Does the frame rate affect the video quality?
Yes, a higher frame rate can result in smoother motion, but it also requires more data, potentially affecting file size and playback compatibility.
3. Does FPS affect the video speed?
No, changing FPS without adjusting playback speed will not alter the video's temporal length, though it can impact motion smoothness.
4. What is the best video frame rate for social media platforms?
Most social media platforms support up to 30 FPS, which is a safe choice for broad compatibility. If you need more details, please check the following information.
YouTube
- Standard: 24fps or 30fps for most content, offering a balance between cinematic look and smoothness.
- High action: 60fps for gaming, fast-paced action, or slow-motion playback clarity.
Facebook & Instagram
- Standard: 30fps is widely supported and ensures smooth playback.
- Stories and Live: 30fps, aligning with the platforms' native recording features.
- Standard: 30fps, though Twitter is less specific about frame rates, focusing more on video resolution and file size.
TikTok
- Preferred: 30fps, with an emphasis on mobile-friendly, quick-loading content.
- High Quality: 60fps for high-action videos to maintain smoothness and detail.
5. How to convert video to constant frame rate?
Using tools like HandBrake, you can select the "Constant Frame Rate" option during the conversion process to ensure smooth, consistent playback.
Conclusion:
Converting the frame rate per second (FPS) is the optimal method to enhance the fluidity of motion shifts and is considered as one of the efficient techniques to enhance the quality of videos. By utilizing a video FPS converter such as Winxvideo AI, you have the ability to transform any video into 30fps, 60fps, 120fps, etc. with seamless and smooth transitions.
 Free Download
 Free Download
Winxvideo AI is for PC, while Macxvideo AI (from our MacXDVD brand) is for macOS.


