How Do You Add/Transfer Photo from PC to iPhone without iTunes?
This article is about how to add photos from a PC to your iPhone without file and data loss. See what is the easiest way to transfer photos to iPhone or move photos from iPhone to computer without using iTunes at all.
Saving more photos and videos has always been a great demand that impels people to run for 64GB, 128GB or even 256GB storage size. iPhone has more free space to store new files; theoretically, people should have added photos from PC to iPhone without a hitch, but the fact is they will end up with the difficulty in accessing a default app of iPhone and adding foreign things into it because of Apple's strict closeness and exclusiveness.
Nearly all iPhone managers do not support computer to iPhone transfer well enough when dealing with photos. For instance, occasional crashes happen on AnyTrans after spending ten minutes on adding just one photo to phone, and even the well-known MobileGo will prompt that "this operation may cause the photo lost". Without attention, errors are likely to happen: the photos that finally been deleted have the great chance to be the ones that you did not chose and did not intend to remove. Therefore, the opposite is the case and you will lose some important images.
All in all, unlike exporting iPhone photos, the photo importing operation will be somewhat unstable. No one but WinX MediaTrans can add photos from computer to iPhone 16 or earlier without iTunes, without errors and without data loss.
Top 3 Ways to Transfer Photos from Windows PC to iPhone without iTunes
Way 1. WinX MediaTrans - the Safest and Fastest Solution
- Transfer photos from Windows PC to iPhone or vice versa without data loss.
- Manage pictures in day/month/year; delete/organize iPhone photos.
- Transfer music, videos, e-Books, and other files between iDevice and PC.
- Export and convert HEIC to JPEG; create ringtone for iPhone, and more.
How to Add Photo from PC to iPhone Easily without iTunes?
If you need to add photo files or folders from your computer to the Apple iPhone without any worries on data loss independent of iTunes, WinX MediaTrans is a premium choice. It allows establishing self-defined photo albums in which you can add, export and delete the newly added photos at free will. The imported photos in the new albums will exist on your iPhone after syncing. Please follow the instruction below. The guide to transferring photos from iPhone to Windows PC is similar.
Step 1. Connect iPhone onto computer via USB cable
1. Download the safe iPhone photo manager, install it on your computer and launch on demand.
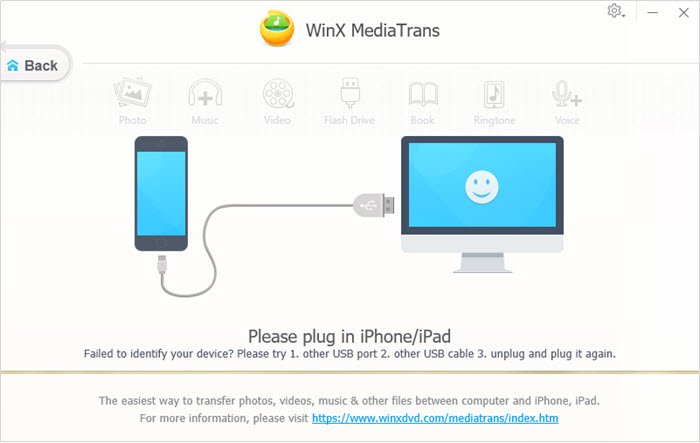
2. Connect your iPhone with computer via an original USB cable, and make sure to trust this computer on the screen of iPhone. Now you don't have to install iTunes on your computer.
Step 2. Create a new photo album
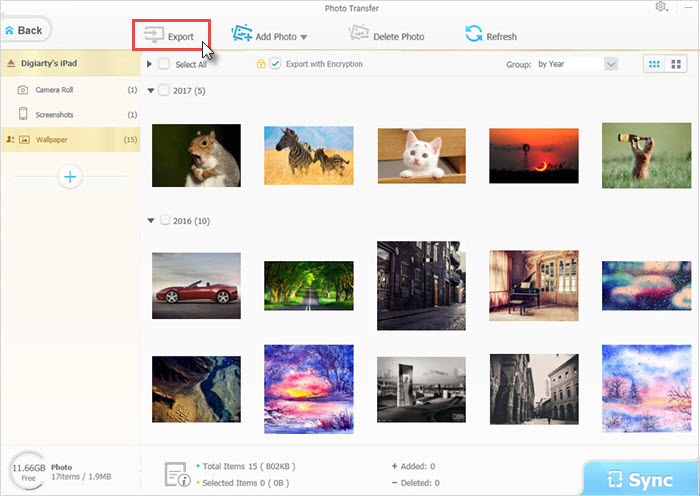
- Click on "Photo Transfer" button and wait all photos to be loaded in a flash.
- Tap the "+" icon on the left to establish a new photo album and input some words to edit the album name. You can create several albums at one time.

Step 3. Add photos from computer to iPhone without iTunes.
When checking the new album, click "Add Photo" on the top and choose between "add photo" and "add folder". Then browse in your hard drive and choose the proper image file(s) and/or folder(s) that have some pictures inside. WinX MediaTrans accepts .jpg, .jpeg, .png, .gif, .bmp and .tiff photo formats.
Note:
- You can add files and folders (even with subfolders) together. The software will recognize pictures only and display the pictures only.
- You are enabled to delete any photos after adding.
- The "Fresh" button allows to take in new photos that are just shot by iPhone or to return to the original state. But the operations of new album creating and new photo adding will be restored if you click "Fresh" before sync.

Step 4. Sync new photos from PC to iPhone.
After adding the photos, hit "Sync" button on the right bottom to sync the items. The newly added photos can be found on your mobile then. In this way, you won't lose any picture on your iPhone.
By adding photos from PC to iPhone like this, you can reload photos that have backed up onto computers from the old phone to the new iPhone, copy special pictures from hard drive to iPhone and share any images with friends by some third-party chat apps or uploading to SNS online such as Facebook, Twitter, Intagram and Flickr.
Way 2. Use iCloud to Transfer Photos from Windows Computer to iPhone
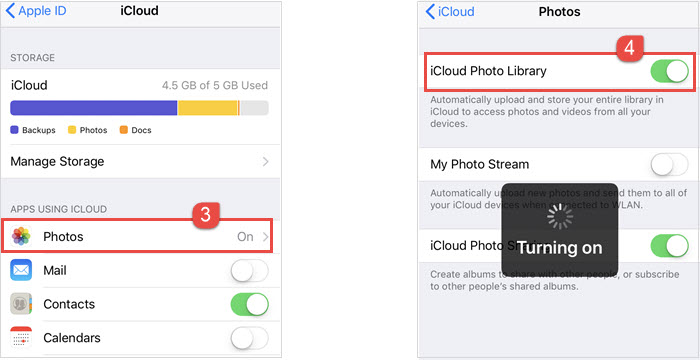
iCloud syncs and transfers Windows PC photos to iPhone easily. You can sync data freely between different platforms. It gives you 5GB storage space to start. 5GB is not enough if you have lots of HD pictures and 4K UHD video content. With iCloud backup, you won't lose your important photos, music, videos, and other files. The file sharing, however, is not that good when other people you are sharing are not on iCloud. Use steps below to use iCloud as a photos transfer app to move photos from Windows computer to iPhone via iCloud.com on Windows.
How to Transfer Photos from Windows PC to iPhone via iCloud.com
- Log into iCloud.com with your Apple ID on your PC.
- Click the Photos icon, click the Upload button and browse your photos on PC you'd like to transfer to iPhone. You can add one or multiple pictures at one time.
- Click Open/Choose and upload the images you choose to your iCloud Photo Library.
- When the photos are uploaded to your iCloud Photo Library successfully, you should see all the photos on your iPhone.

Way 3. Use Google Drive to Download Photos from Windows Computer to iPhone
Google Drive is a commonly used drive services, allowing you to access your Windows PC photos on iPhone easily as long as you upload the photos from PC to Google Drive. You can access all the files in Google Drive anywhere you have a internet connection. Google Drive supports image files in .JPEG, .PNG, .GIF, .BMP, .TIFF, .SVG. You can use Google Drive to transfer videos, music, documents, PDFs, and other types of files between Windows and iPhone. It's easy to get started.
How to Import Photos from Windows PC to iPhone with Google Drive
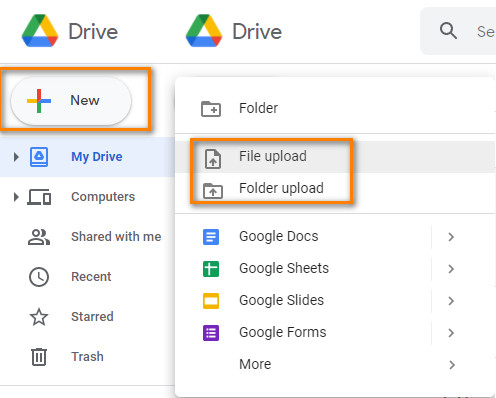
- On your Windows PC, open the Google Drive app or open the Google Drive via a web browser, log in with your Google Drive account.
- Click Add, choose Upload, choose the photos you want to upload to iPhone from Windows PC, tap Upload. The photos will start uploading to your account. You can also upload a image folder.
- Open the Google Drive app on your iPhone.
- Choose the photo you want to download, tap More icon, tap open, then Save image and Save the photo to your iPhone.

FYI. iTunes, a Danger to Cause File Loss while Syncing
Newer version of iTunes does support transferring photos between iPhone and Windows computer. However, when syncing photos from PC to iPhone, not only the photos you've stored in Photo Library, but also ALL the music, ringtones, iBooks and other media files you synced to your iPhone will be erased. Besides, many iOS and Windows users dislike using iTunes because of the non-user-friendly and complicated design, registration requirement and lousy pop-up notifications.


