How to Deinterlace Videos and Remove Jagged Artifacts
Nowadays, all broadcast television, cable, satellite, VHS, S-VHS, Beta, Laserdisc, 8mm, Hi8, Digital8 and most DV sources are interlaced. Most analogue cameras and even some modern digital cameras uses interlaced scanning too. But most cathode ray tube (CRT) computer monitors, all LCD computer monitors, and most HDTVs use progressive scan. Therefore, when you play an interlaced video on a computer monitor, you will see noticeable artifacts.
To watch interlaced video on modern non-interlaced displays without harsh interlacing lines, you need to deinterlace the video first. What's the best video deinterlacing software? Here we'll show you how to deinterlace a video using different Handbrake, VLC, Premiere, etc.

Best Video Deinterlacing Software to Remove Jagged Artifacts
Winxvideo AI - With the built-in "Linear Blending" video deinterlacing algorithm, it can easily convert interlaced videos to non-interlaced or progressive files. Easily and smoothly play any old interlaced videos on modern monitors, HDTVs, other non-interlaced displays without quality loss.
Other powerful functions: 1) Convert any videos among 370+ formats like HEVC, MKV, AVCHD, AVI, WMV, MP4, etc. at ultrafast speed; 2) Compress large HD, 4K, and 8K videos to smaller file size; 3) Edit, trim, crop, merge, add subtitles; 4) Free download videos from 1000+ sites.
What is Video Deinterlacing? Some Basics
Deinterlacing video is the process of converting interlaced video, such as common analog television signals or 1080i format HDTV signals, into a non-interlaced form (progressive video). Interlaced scan and progressive scan are the two kinds of ways to record video. What's the difference between interlaced scan and progressive scan?
Interlaced scan: This kind of video uses two sub-fields to generate a video frame in sequence. Field 1 scans odd lines of the image sensor, while Field 2 scans the even lines in the gap of Field 1. If you see a video listed with a letter "i" like 1080i, then it is an interlaced video.
Progressive scan: Also known as non-interlaced/sequential scanning, this kind of video draws the lines of each image in sequence from top to bottom. It is listed with a letter "p" like 720p or 1080p. If you play the interlaced videos on a display that use progressive scanning, you will see artifacts like jagged edges.
Best Ways to Deinterlace Videos
How to Deinterlace Videos with Best Video Deinterlacing Software?
Winxvideo AI is a professional video deinterlacing software. It's able to deinterlace videos to progressive format and remove jagged edge artifacts, regardless of video types that include HD MKV, H265/HEVC, AVCHD, M2TS, SD MP4, AVI, WMV, MOV, and more. It supports deinterlacing source videos in any resolution up to UHD 4K with fast speed. It takes advantages of the Linear Blending Deinterlacing algorithm to provide excellent output quality after deinterlacing.
Linear Blending takes a line and then average the pixel values in it with the line below, effectively blurring the frame. This almost completely eliminates the effects of interlacing. At times there may be slight ghosting (instant transition from one thing to another), but the image appears to persist for a fraction of a second and it's really hard to notice.
- It's simple and light on the CPU.
- It's faster with better quality than Yadif, which is known to give pretty nice results with a wide range of sources.
Step 1: Load interlaced video
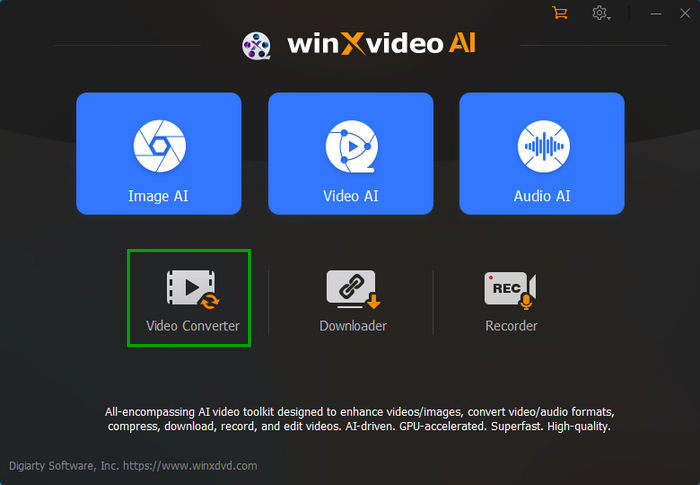
Launch the best video deinterlacing software and click "Video Converter" -> "+Video". Select the interlaced video from computer and load it into the program. Almost all popular videos are supported as input.
Step 2: Enable video deinterlacing
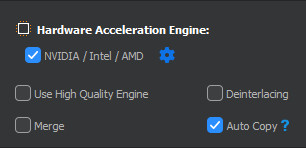
Specify an output video format like MP4, etc. in the Target Format column. Optionally do some edits to the video and click Codec Option button to adjust video/audio parameters like resolution, frame rate, etc. if you need. Then tick the "Deinterlacing" button on the main UI.
Step 3: Start deinterlacing video
Click "Browse" to set a destination folder to save the deinterlaced video. Hit "RUN" to start the video deinterlacing process to convert it into smooth motions without jagged lines or quality loss.
How to Deinterlace Videos with Handbrake?
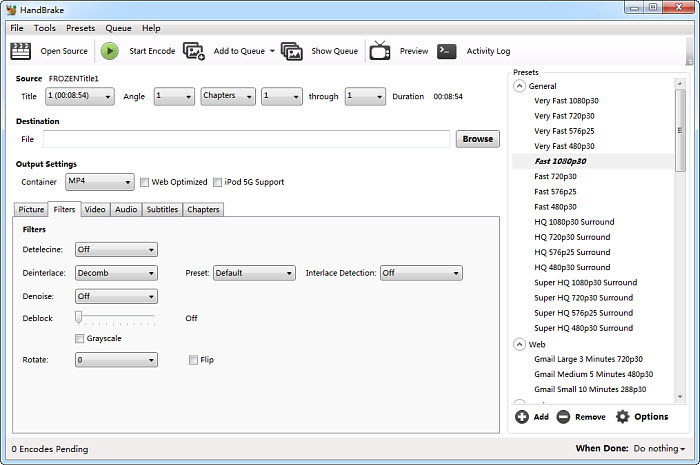
Handbrake also supports video deinterlacing. There are two options in Handbrake deinterlacing settings: Yadif and Decomb.YADIF (Yet Another DeInterlacing Filter) is the most popular deinterlacing filer. It checks pixels of previous, current and next frames to re-create the missed field by some local adaptive method and uses spatial check to prevent most artifacts. Decomb switches between multiple interpolation algorithms for speed and quality. Avoid decomb unless you are dealing with the rare case of mixed interlaced and progressive material.
Step 1: Import interlaced video
Download the free video deinterlace software and install it. Click the "Source" button to open a single video file or a folder with multiple interlaced videos.
Step 2: Choose deinterlacing filter
Select an output format for you video, like MP4. Then click Filters on the tab menu and find Deinterlace. Deinterlace video using a combination of Yadif or Decomb using a preset bob, eedi2, or eedi2 bob. If you dont' know how to interlace videos free with Handbrake best settings, here we recommend you two methods for the best quality or speed:
- DeComb EEDI2 (without Bob) is the best image quality. Less aliasing and best missing lines reconstruction. The one which looks more like progressive footage. The problem is: it is very very slow, takes lots of time.
- DeComb Bob (without EEDI2) is the best quality/speed balance. It has a little more aliasing but not disturbing and it is much faster. Best option if you cannot wait longer.
Step 3: Click Start Encode button to deinterlace video with HandBrake now. See detailed guide on how to interlace video using Handbrake.
How to Deinterlace Videos with VLC?
If you want to play an interlaced video on a progressive screen without jagged lines, you can use VLC. It has a video deinterlacing feature which is off by defualt. You can enable the VLC deinterlacing mode easily.
Automate Deinterlacing (On/Auto/Off) in VLC
- Open free video deinterlace software and select Tools on the top menu bar. Then select Preferences.
- Choose Video and open the Deinterlacing dropdown menu. Here are three options: Off, Automatic, and On. For non-tech users, we recommend the Automatic mode. Then VLC will deinterlace a video when it detect interlaced artifacts using a proper method.
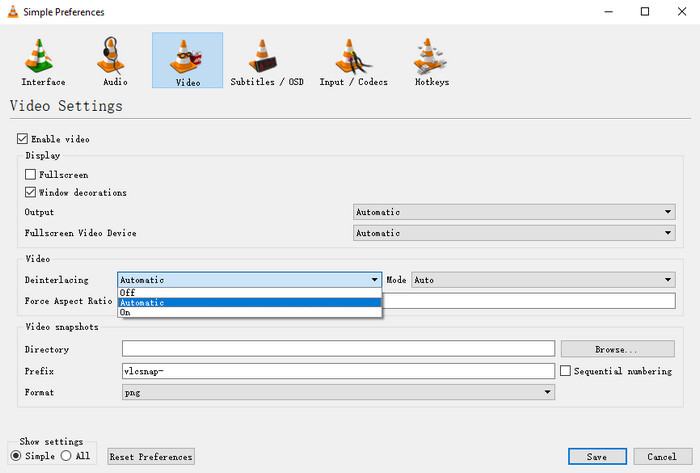
Enabling Streaming deinterlace mode
The VLC automatic detection is not always reliable. For advanced users, you'd better switch deinterlacing on/off manually when needed.
- Open the free video deinterlacing software and select Tools on the top menu bar. Then select Preferences.
- At the bottom of the Interface, choose All under Show setting.
- Scroll the list and go to Video > Filters > Deinterlace. Then select a streaming interlace mode from Blend, Mean, Bob, Linear, X, Yadif, Yadif (2x), Phosphor, Film NTSC (IVTC). (Don't know how to choose, here is a detailed explanation on VLC deinterlacing modes)
- Click Save and restart VLC.
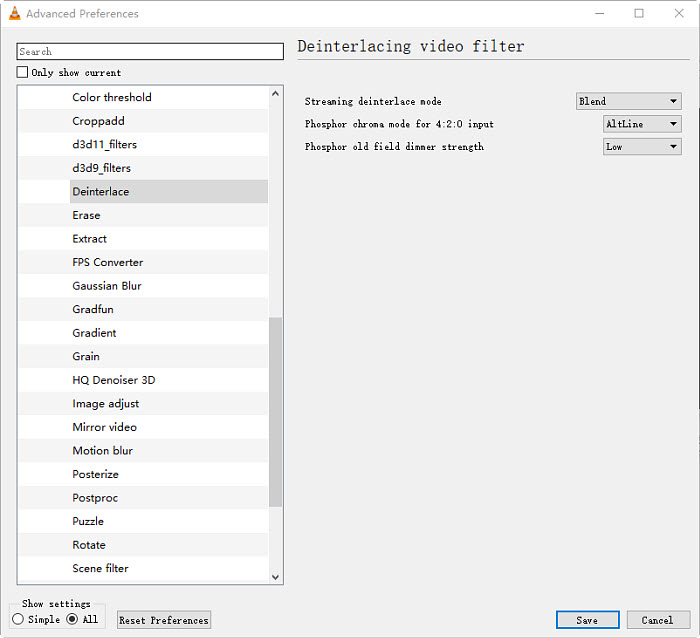
How to Deinterlace Videos with Premiere?
The Premiere Pro has a deinterlacing function which is designed to play clips in slow motion or in freeze frame. It's able to convert interlaced videos into smooth non-interlaced or progressive files by discarding one field and then interpolating the missing lines based on the lines of the dominant field.
Step 1: Open Premiere Pro and your video project. Drag the footage that you wish to deinterlace, and drop it into the timeline on Premiere Pro.
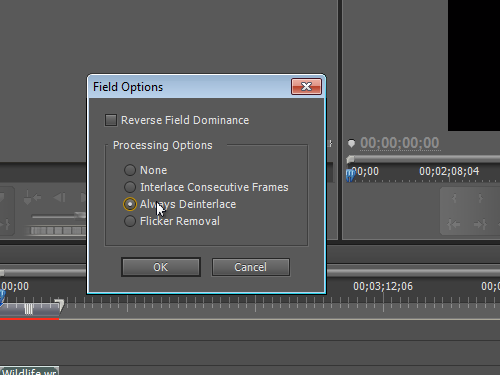
Step 2: Select the clip on the timeline and select "Clip" from the top menu, then "Video Options" then "Field Options." This will open the Field Options Window.
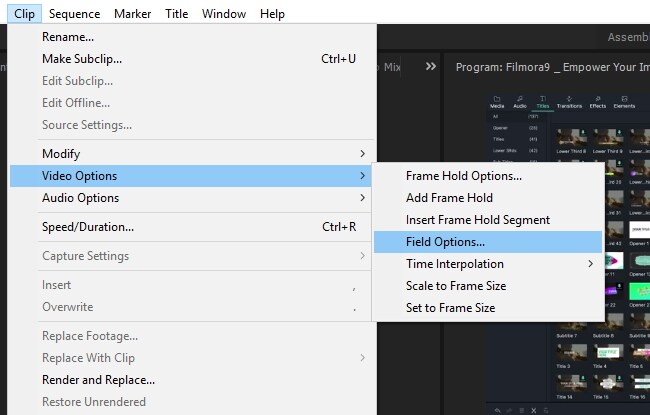
Step 3: Then you will see four options: None, Interlace Consecutive Frames, Always Deinterlace, and Flicker Removal. To remove jagged edge artifacts and deinterlace video with Premiere Pro, select Always Deinterlace. This will sort through the frames per second from your video and remove half of the frames that you don't need.
Step 4: Click OK. This process may take quite a longer time.
