


How to Record a Picture-in-Picture (PIP) Video with Sound
 Mike Rule
Updated on
Picture-in-picture (PIP) videos allow you to display one video stream within another, typically featuring a smaller window of a webcam feed overlaying a larger screen capture. This format is widely used in various types of content, such as gaming tutorials, reaction videos, and presentations. The primary benefit of PIP videos is the ability to provide real-time commentary or reactions, making the content more engaging and interactive.
Hot search: How to record Black Myth: Wukong Gameplay, How to Record a Lecture
Choosing a Screen Recorder
To capture a picture-in-picture video with audio, you need a solid screen recorder first. How to choose a decent screen recorder software from the varied options? There are a couple of factors to consider:
Recording Features:
- PIP Mode: Ensure the screen recorder supports PIP mode, allowing you to record both your screen and webcam simultaneously.
- Screen Area Selection: Choose a recorder that lets you select specific areas of the screen to record.
- Audio Options: Look for options to record system audio, microphone audio, or both.
Editing Features:
- Basic Trimming: Some recorders offer simple editing features like trimming.
- Advanced Editing Tools: Others provide more advanced tools, including transitions, annotations, and effects.
Free vs. Paid Options:
Top Free Ways to Record Screen and Face at the Same Time
1. Winxvideo AI
Winxvideo AI shines at letting you record a picture-in-picture video with system/microphone sound at high quality, from 720p to 1080p, 4K 2160p. Meanwhile, you can use its Draw feature to draw while screen recording and apply its Chroma key feature to remove background from webcam.
Its attractiveness never stops here. It also lets you free record screen and webcam video in a full screen or a specific screen area (full at your disposal). Meanwhile, just leverage it to capture screen videos, record a webcam video or record record system or microphone sound. Editing features are its another big draw, including trimming, splitting, cropping, converting format, removing noise from video, etc.
 Free Download
 Free Download
Note: AI tools for Mac are currently unavailable, but they're coming soon. Stay tuned.
- 4 recording modes: record screen, webcam, screen & webcam, audio recorder.
- Record screen video while drawing, in full screen or selective area at 1080p/4K 2160p high quality.
- A feature-rich screen recording with large batches of features, editing, converting, AI enhancement, video downloader.
- No advanced customization settings like audio mixer, scene transition, etc.
How to record PIP videos on Windows 10 using Winxvideo AI?
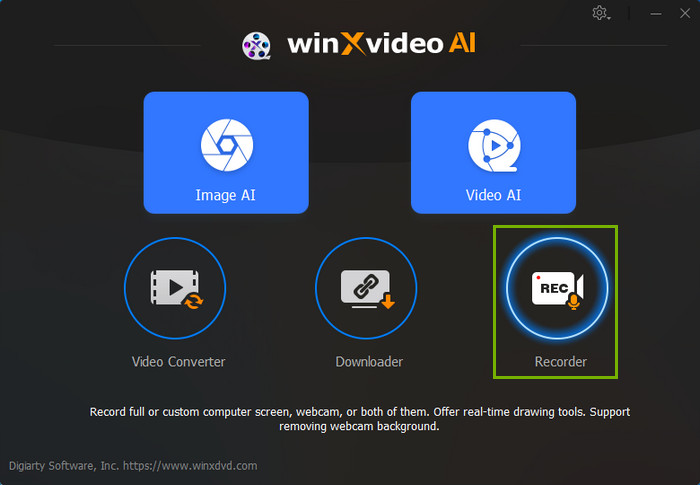
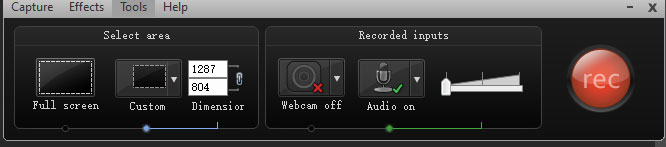
Step 1. Launch Winxvideo AI after installation and select Recorder on the main interface.
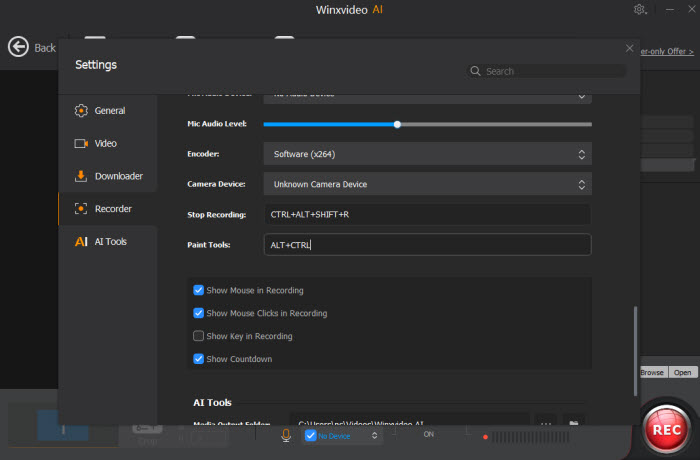
Note: tap the Setting icon on the top right corner of the UI and choose Recorder to adjust settings if needed. You're allowed to change recording quality, format, audio level/device, and know the shortcut for drawing (Ctrl+Alt).
Step 2. Select "Screen & Webcam" recording mode on the top. Certainly, you need to make sure you have an internal webcam recorder on your PC or external webcam recorder device.

Step 3. Choose to record the entire screen or part of the screen at the lower-left corner.
Step 4. Enable audio device(s), microphone or system sound. To ensure an excellent sound quality, please turn off the external music player and make sure a quiet recording environment.
Step 5. Click on the REC button to start recording a picture-in-picture video with 1080p or 4K 2160 high definition. When everything is OK, click on the Stop button to end. You can have a preview on your final recording and do some editing if needed.
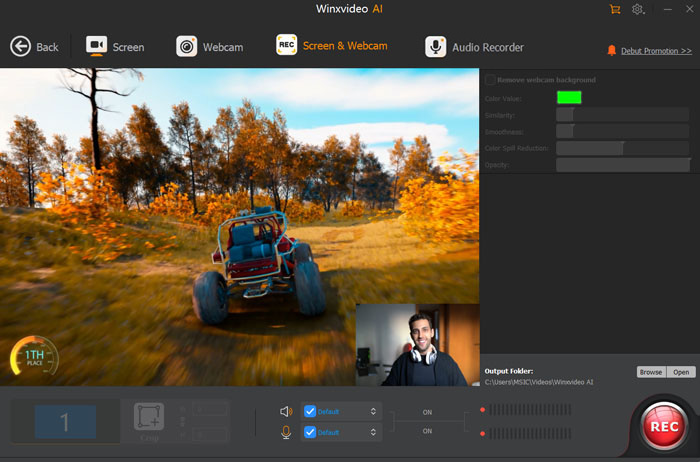
Note: manually tick the option "Remove webcam background" to turn background into virtual background to protect your privacy if your webcam background is green.

2. Camtasia
Camtasia is a comprehensive screen recording and video editing software. It supports PIP mode, allowing for simultaneous screen and webcam recording, easily getting game tutorial, reactions, video calls, product presentations captured with your face. At the same time, this screen and webcam recorder offers a wide range of editing tools, including transitions, annotations, callouts, and effects. It also includes pre-built video templates and assets to enhance your recordings.
- Despite its advanced features, the interface is intuitive and easy to learn.
- Extensive suite of editing features suitable for professional-quality videos.
- Produces high-resolution PIP videos with professional effects.
- One of the more costly options on the market.
- Resource-Intensive. It requires a powerful computer to run smoothly.
- May be too feature-rich for users who need basic picture-in-picture recording.
How to record a picture-in-picture video with audio using Camtasia?
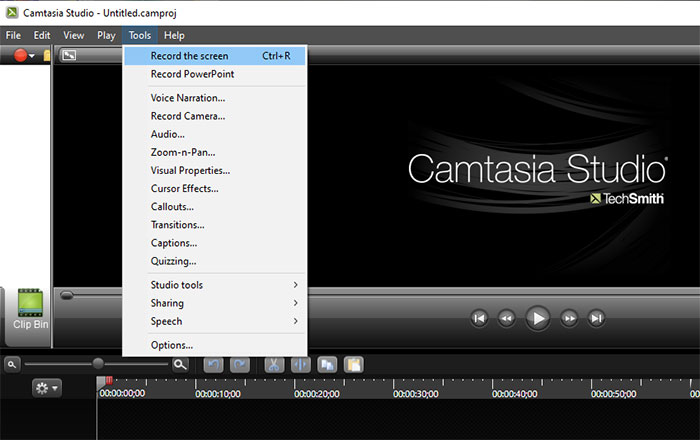
Step 1. Free download and install Camtasia from the official TechSmith website. Launch Camtasia on your computer then.
Step 2. Tap on the "New Project" button to start a new project. In the toolbar, click on the "Record" button to open the recording options. Choose the area of your screen you want to record by selecting the appropriate option under "Region." Enable the "Record Camera" option to invite your webcam in the recording.
Step 3. Adjust Webcam Settings. Click on the "Webcam" button to configure webcam settings. Choose your webcam from the list. Adjust the webcam position and size on the screen using the on-screen controls.
Step 4. Click the red "Record" button to start recording screen and your face at the same time. The audio is supposed to be capture, as well.
Step 5. After you've finished recording, click the "Stop" button in the recording toolbar. Camtasia will automatically import the recording into your project. You can preview your recording file before exporting or sharing.
Optionally, you can take advantage of its editing features to cut, trim your recording or add special effects to polish your recording. Once you're satisfied with your edits, click on the "Share" button to export your video in the desired format.
3. OBS Studio
How would we forget OBS Studio when it comes to capture a picture-in-picture video? OBS Studio is always a cut above. It not only provides you with several types of recording modes, like screen record, selected area recording, webcam recording, but also lets you record screen and add a webcam overlay. Consequently, you can record gameplay walkthrough video with your face showing up, record product demonstration video with your face to increase engagement, or create learning video with your face to make your educational video more appealing.
Additionally, OBS Studio offers powerful configuration options, including custom transitions, audio filters, and scene composition. It also supports high-performance real-time video/audio capturing and mixing.
- Free to use with a robust community for support.
- Offer great flexibility for complex recordings in high resolution and frame rates.
- Highly customizable settings for advanced users.
- The extensive features and customization options can be overwhelming for beginners.
- No internal editing features.
- It's demanding on system resources, requiring a powerful computer for optimal performance.
How to record screen and add a webcam overlay using OBS Studio?
Step 1. Download and install OBS Studio on your Windows 10 or Windows 11. Launch it after then.
Step 2. In the main window, locate the "Scenes" box. Right-click inside it and choose "Add." Within the newly added scene, find the "Sources" box. Right-click there and select "Add." Opt for "Display Capture" to record your screen, then follow the prompts to pick the display you wish to capture.
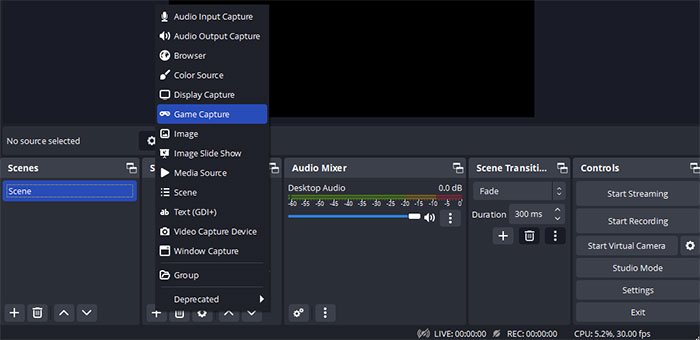
Step 3. Add Webcam Source. Right-click in the "Sources" box again and select "Add." Choose "Video Capture Device" to add your webcam. Select your webcam from the list and click "OK."
Step 4. In the main window, you can click and drag to rearrange or resize the sources to your preference.
If needed, you can adjust the settings. Click the "Settings" button in the bottom-right corner. In the settings menu, navigate to the "Output" tab to configure your recording settings, including the file format and quality. Then, go to the "Video" tab to set the base (canvas) resolution and the output (scaled) resolution.
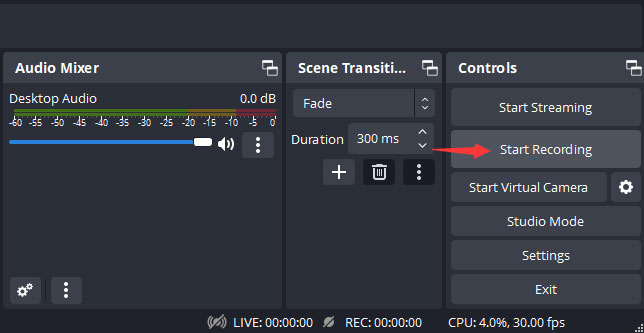
Step 5. Click the "Start Recording" button in the bottom-right corner to begin capturing picture-in-picture videos with audio sound. When you're finished, click the "Stop Recording" button. Your recording will be automatically saved in the destination folder you previously selected.
4. Screencastify
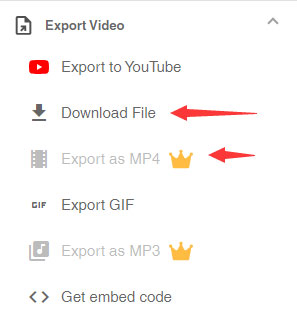
Screencastify is a browser-based screen recorder, primarily used as a Chrome extension. It supports recording your browser tab, entire desktop, or webcam. PIP mode allows embedding your webcam feed in the recording. Basic editing tools include trimming, cutting, and merging clips. Direct sharing options to Google Drive, YouTube, and exporting as MP4, GIF, or MP3 are also available.
- Simple to use, friendly to beginners.
- As a Chrome extension, it requires no additional software installation.
- Basic editing tools are included, suitable for simple modifications.
- The free version limits recordings to 5 minutes and adds a watermark.
- Lacks advanced editing features found in other software.
- Limited to Chrome, which might not be suitable for users who prefer desktop applications.
How to online free record screen and face at the same time using browser extension?
Step 1. Visit the Screencastify website and add the extension to your browser.
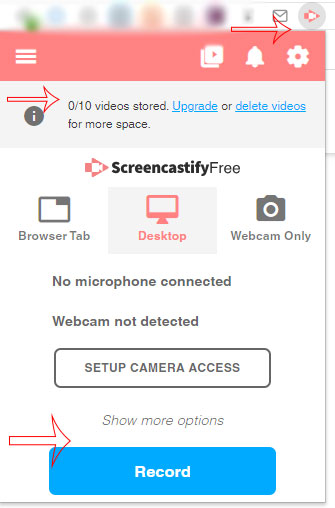
Step 2. Launch the Recorder and Choose Recording Mode. Open Screencastify and select the "Browser Tab" or "Desktop" option with "Embed Webcam" enabled.
Step 3. Select the Screen Area to Record. Choose whether to record the entire screen or a specific window.
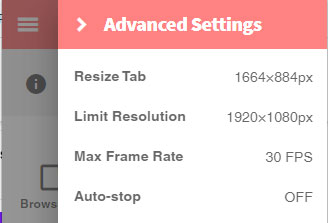
Step 4. Choose Webcam Settings. Adjust the webcam position, resolution, frame rate to your preference.
Step 5. Start Recording and Narrate Your Content. Click the "Record" button and begin narrating or demonstrating your content.
Step 6. Stop Recording and Edit the PIP Window Size/Position. After finishing the recording, use Screencastify's built-in editor to adjust the PIP window if necessary.
Export your video to your preferred format or directly upload it to platforms like YouTube.
5. ShareX
ShareX is an open-source screen recording and capture tool. It supports full screen, window, and region captures, as well as PIP mode for webcam recording. ShareX offers extensive customization options, including workflows for automated tasks and a wide range of output formats. It also includes built-in tools for basic editing, annotations, and effects.
- Completely free with no hidden costs.
- Offer a wide range of features and customization options.
- Supports a variety of output formats.
- The extensive features can make the interface overwhelming for beginners.
- Limited to basic editing, requiring additional software for advanced edits.
- Learning curve. Require time to learn and fully utilize all features.
How to record picture-in-picture videos using ShareX?
Step 1. Download and install ShareX. Visit the ShareX website and download the latest version of the software. Install it on your computer based on the instructions it shows.
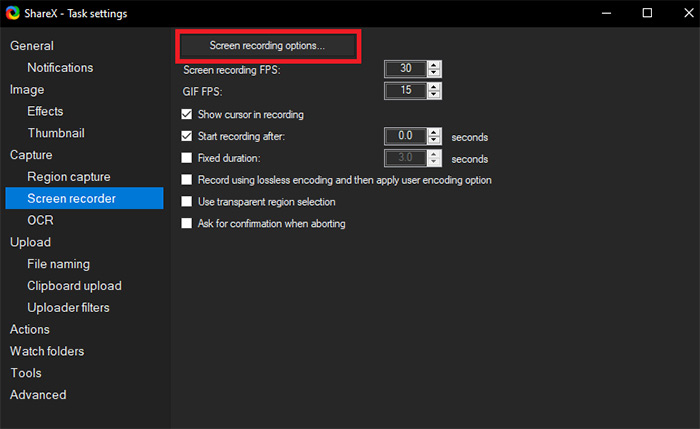
Step 2. Configure recording settings. Open ShareX from your Start menu or desktop shortcut > In the ShareX main window, click on "Task settings" on the left-hand side > "Screen Recorder" > Select your desired video codec under "Screen recording options." The default option is FFmpeg, which works well for most users > set your desired video format (e.g., MP4) and quality settings.
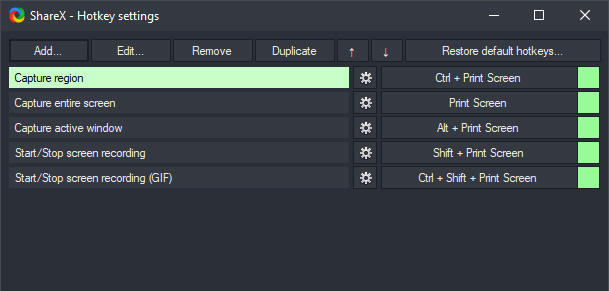
You can find the commonly used hotkeys for screen recording under hotkey settings, including capture region, capture full screen, start/stop screen recording, etc.
Step 3. Enable Webcam overlay. In the ShareX main window, click on "Tools" in the top menu bar and select "Screen recording (FFmpeg)" from the dropdown menu > click on the "Webcam" tab. Check the box next to "Enable webcam overlay." Select your webcam from the dropdown menu.
Step 4. Begin picture-in-picture video recording. After selecting the recording region, click the "Start recording" button. ShareX will start recording both your screen and webcam feed in PIP mode.
Step 5. Click on the ShareX icon in the system tray and select "Stop recording" or use the designated hotkey (default is Shift + Print Screen) to end this PIP video recording. After stopping the recording, ShareX will automatically save the video to the default location (usually the "Documents\ShareX\ScreenRecordings" folder). You can change the save location in the "Task settings" under the "Path" tab.
ShareX includes basic editing tools for trimming and cutting your video. In the ShareX main window, click on "Tools" and select "Video converter" to access these editing options. For more advanced editing, you may need to use additional software like OBS Studio, DaVinci Resolve, or Adobe Premiere Pro.
In conclusion, the fusion of screen and webcam recording not only streamlines the content creation process but also revolutionizes the way we connect and communicate in the digital landscape. As we navigate an increasingly virtual world, the ability to capture both screen activities and personal expressions simultaneously proves to be a powerful asset. Whether you're striving to deliver impactful presentations, create engaging tutorials, or foster collaborative environments, the harmonious integration of screen and webcam recording stands as a testament to the evolving nature of technology.
Embrace this transformative capability, and let it empower you to engage, educate, and captivate your audience in ways that were once unimaginable. The future of dynamic content creation lies at the intersection of your screen and webcam – a convergence that opens doors to innovation and compelling storytelling.


