How to Convert Video in High Quality and Even without Quality Loss
Users always require high quality video output when converting videos, so that they won't lose the bright colors, sharp contrast and clear picture quality. But few video converters in the martket can convert videos with high quality reserved even if they claimed that they're able to convert videos without losing quality. In the reality, they may not able to handle 4K UHD video files completely, drop frames when converting high frame rate videos, or get blurry or pixelated videos. Given that, is there a video converter to transcode videos in high quality and even without quality loss? Scroll down...
Grab the High Quality Video Converter to Transcode Video without Losing Quality
Winxvideo AI - A free video converter that allows you to convert videos to any formats, be it MP4, MOV, MKV, FLV, WMV, WebM, HEVC, H.264 etc. without losing quality. It also delivers fast converting speed with the support of GPU acceleration.
Table of Contents
Part 1. What Factors Affect Video Quality
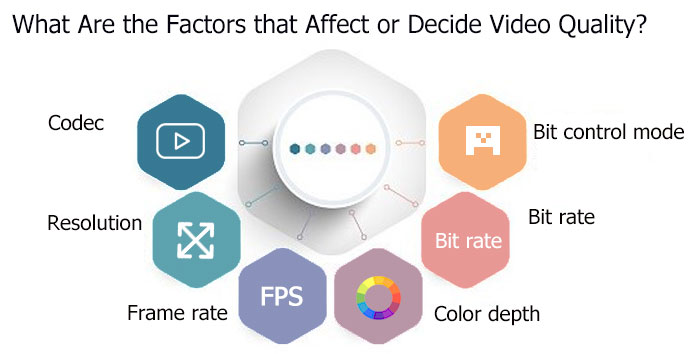
Before you probe into how to convert video without losing quality, you need first know the main factors that affect video quality. Here we'd like to dive deep for what decide video quality. Generally, the below factors could affect the video quality: Video resolution, frame rate, bit rate, codec, bit control mode (macroblock), Bit depth (color depth).
- Resolution: Video resolution is definitely the most mentioned one when converting videos as it has the most intuitive impact on quality. It refers to the number of pixels organized or arranged by width and height in each frame.
- Video codec: Video codec is the way of video encoding. Different video codec comes with different compression algorithm and ratio. For example, MP4 H.264 vs MP4 HEVC, video encoded in HEVC will be more vivid than H.264 when compressed to the same file size.
- Frame rate: Frame rate doesn't affect video quality directly. But it decides the video fluidity, which in turn affects visual effects. After all, no one likes a video in stuttering, and a stuttering video is far from high quality.
- Bit rate: Bit rate is the main factor that decides video file size (video size = bit rate x duration). Also, it affects video quality as well, after all, the video quality is closely related to video size. Higher bit rate usually brings better video quality.
- Bit control mode: Rate control mode is the way of bits allocating for a given frame. Usually, there are kinds of rate control modes in the most popular x264/x265 encoder, including CQP, Bitrate and CRF. CQP is a mode targeted on the compression for every Macroblock in a frame and Bitrate focuses on file size, CRF allocates bits intelligently to control the output video quality.
- Bit depth: Bit depth (color depth) refers to the number of bits used for each color component of a single pixel. The higher the bit depth of a frame is, the finer and smoother the image will be, and accordingly, the better the video quality. Most digital videos use 8-bit depth, and 4K HDR usually adopts 10-bit or 12-bit depth.

Part 2. How to Convert Videos without Losing Quality
To convert videos without losing quality, you need to ensure none of the factors mentioned above has changed. For that, remuxing is a necessity for this task. It refers to a lossless process that simply takes the video and audio streams from one container and puts them into a new container. During this process, nothing changes in the underlying structure or data.
A remux can be in any container like .m2ts, .mp4 etc but most prefer an MKV container. If you want to downsize the video but not lose the video quality during the remux process, you can also choose to remove the other unwanted audios/subtitles. This won't damage the quality.
Winxvideo AI can be used to remux video from one format to any other, such as MKV to MP4, M2TS to MP4 etc. That's all thanks to the unique Auto Copy feature, which enables you to convert videos from one container to another without changing the underlying structure, codec or any other data.
Here are the easy steps to remux video with Winxvideo AI without losing quality.
Step 1: Load the source video.
Click "Video Converter""+ Video" on the top of the main interface to load your video. You're able to import several video files at once.

Step 2: Choose your desired output format.
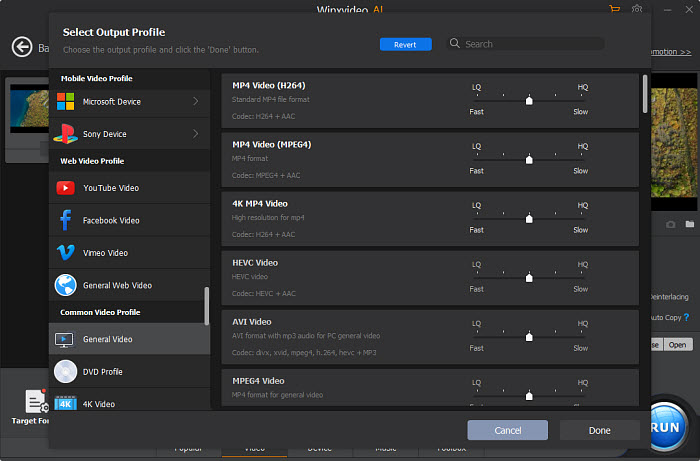
As the video loaded, an output profile window pops up automatically. There are 420+ preset profiles available for your choice. For example, go to "General Profiles" to choose "MP4 Video" as the output format.
Step 3: Tick on the box of "Auto Copy".
Back to the main interface, tick on the box of Auto Copy. This option will help you convert video without losing quality as it only moves the data from one container to another one. Also, as it changed nothing, the converting speed will be optimized than re-encoding.
Step 4: Start conversion.
After you're done, tap the blue "RUN" button at the right corner to start conversion immediately.
Part 3. How to Decode/Encode Video in High Quality
Besides quality, many users requires to reduce the video file size when converting videos. This means you need to transcode videos as well as tweak the video parameters properly so as to compress video without compromising the video quality. If you adjust video resolution, codec, frame rate, bit rate, color depth and bit control mode reasonably, you can encode video in high quality.
Likewise, with Winxvideo AI, you can decode and encode video to any video formats, and also tweak video resolution, codec, bit rate, frame rate freely to compress video with high quality reserved.
Let's check how to encode videos in high quality.
Step 1: Load the source video.
Click "Video Converter""+ Video" button or simply drag and drop to load your video.

Step 2: Choose your desired output format.
Select your desired output format from the automatically popped up window. For example, go to "General Profiles" to choose "MP4 Video" as the output format. And the move the slider to the High Quality and Slow Speed to enhance the video quality. Or you can also choose "HEVC Video" as the output format, which will keep the same high quality but reduce the file size by the half.

Step 3: Tweak video parameters to optimize the quality further.
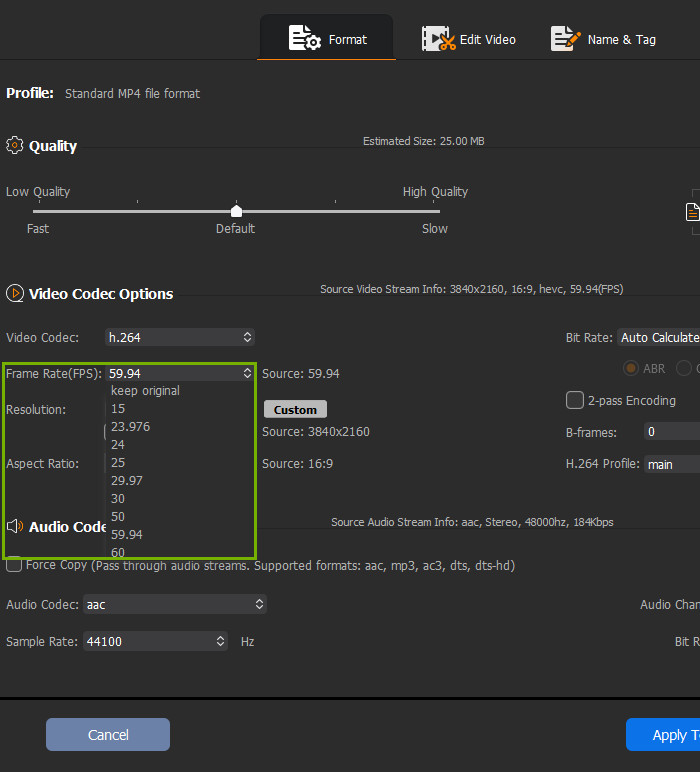
Click the gear-shaped Settings button, here you have several options to enhance the video quality:
- Upscale your video resolution to 1080p or 4K UHD. This will enlarge the video frame size through nearest neighbor interpolation, bilinear interpolation and bicubic interpolation. See more about 4K upscaling >>
- Keep the original frame rate to ensure that you won't lose the fluidity of the video.
- Depending on your video resolution and frame rate, you can adjust your video bit rate in a range of it requires, such as 35–45 Mbps for 4K @30fps or 53–68 Mbps for 4K @60fps.
This video converter doesn't allow you to adjust bit control mode and bit color depth manually, but the embedded Use High Quality Engine will output the best quality it can according to your Settings. So don't forget to tick on the box of Use High Quality Engine to improve the output quality.
Step 4: Start conversion.
After you're done, click the "Browse" button to select an output folder and then tap the blue "RUN" button at the right corner to activate the video conversion.
Part 4. FAQs about High Quality Video Conversion
1. What is the best quality video converter?
There are many excellent video converters that could help you convert video with high quality video output. Here we've collected top 7 picks:
- Winxvideo AI
- Duo Video Converter
- Divx converter
- Freemake Video Converter
- VSDC Free Video Converter
- CloudConvert
- HDConvert
2. How do I convert low resolution video to high resolution?
This requires a video upscaler. Open up Winxvideo AI, load your low resolution video and choose an output format. Click Settings button and upscale low resolution to high resolution, such as 720p to 1080p, 1080p to 4K as you need. Then tap RUN button to start conversion.
3. How can I convert 4K video to 1080P without losing quality?
Load your video to Winxvideo AI, and select an output format for it, then click Settings button to enter a new window where you can convert 4K to 1080p resolution and tweak frame rate, bit rate, aspect ratio, audio if you need. After you've done, back to the main interface to tick on the box of Use High Quality Engine and click RUN button to fulfill the video conversion.


