


How to Record Computer Audio Step by Step in 5 Ways
 Mike Rule
Updated on
"How do I make the voice recorder pick up computer audio? Wondering how I can make the voice recorded app on Windows pick up the sounds coming from my laptop?"
Are you looking for an easy way to record audio from computer? Whether you want to capture your favorite music, save an online meeting, or create a podcast, recording audio from your computer is a valuable skill. Capturing high-quality sound directly from your computer can seem daunting at first, but with the right tools and techniques, it's easier than you might think. In this guide, we’ll explore step-by-step methods to record computer audio on Windows 10/11and macOS, including built-in tools, free software, and professional solutions.
Winxvideo AI records desktop audio from music, microphone sound, calls, meeting, audio from a live stream, etc. It provides crisp audio quality. Record screen, webcam, system sound, microphone.
It's easy to use, no installation required, and works well for recording audio from computer system and microphone. Ideal for quickly recording a few audio files for casual use. Limited control options.
Audacity is the go-to tool for high-quality recordings and more control over the audio process. Record system audio, apply effects, and edit their recordings for professional-quality output.
Method 1. Record High-quality Computer Audio with Winxvideo AI
Winxvideo AI contains a computer audio recorder that’s able to record the audio sound from system, microphone, or both. It’s extremely easy to use and there is no complicated settings. You can save the recorded system audio in MP3, WAV, AAC, M4A, FLAC, OGG, AC3, WMA, iPhone ringtone, and more. And you're available to adjust audio settings like audio sample rate, audio bit rate, audio channel, audio codec, etc. for high quality like 192kbps, 320kbps.
Meanwhile, it employs advanced AI algorithms to eliminate unwanted background noise, including keyboard clicks, electronic hums, static, humming, etc., ensuring professional-sounding recordings. In addition to desktop audio recording, it’s also an AI video/image enhancer, video converter, compressor, downloader, and editor.
How to record audio from computer using Winxvideo AI?
Step 1. Begin by downloading and installing Winxvideo AI on your PC.
 Free Download
 Free Download
Note: AI tools for Mac are currently unavailable, but they're coming soon. Stay tuned.
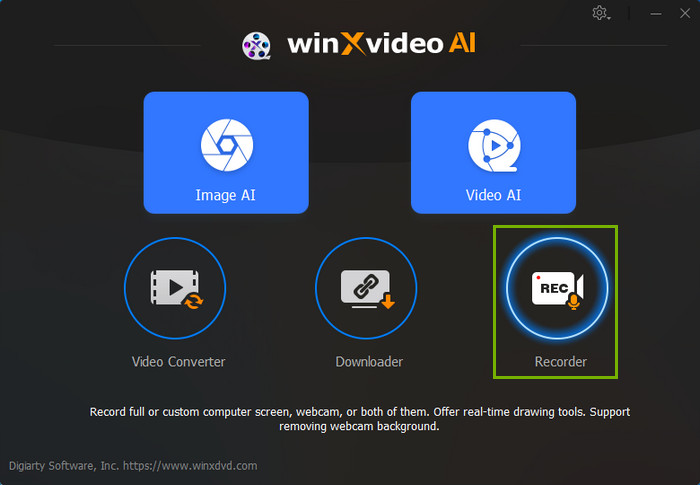
Step 2. Launch Winxvideo AI after installation and select Recorder on the main interface.
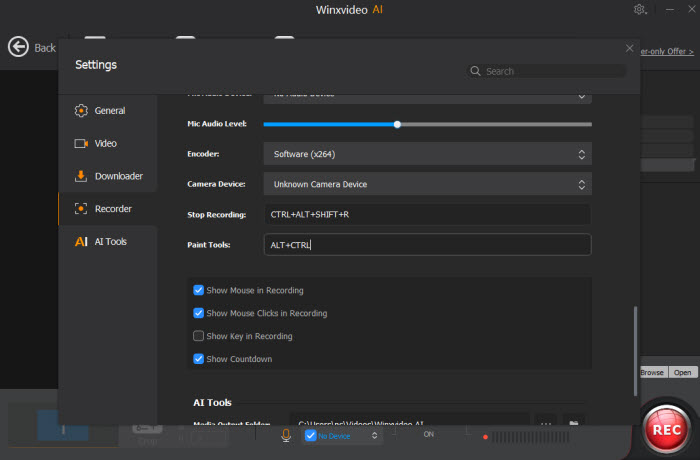
Note: click the Setting icon on the top right corner of the UI and choose Recorder to adjust settings if needed. You're allowed to change recording quality, format, audio level/device, and know the shortcut for drawing (Ctrl+Alt+Shift+T).
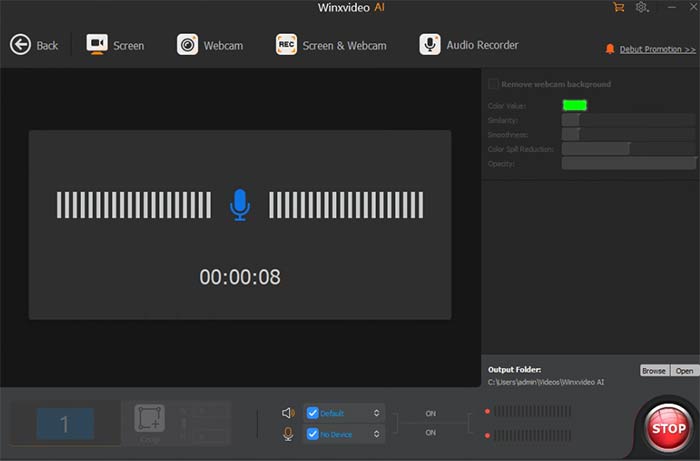
Step 3. Select Audio Recorder mode at the top menu.

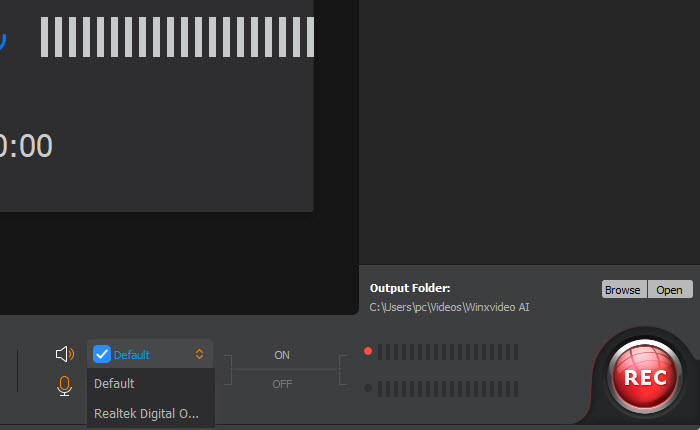
Step 4. To record computer audio, enable speaker icon and choose your device. If you want to record both system audio and microphone sound, enable both the speaker and microphone icons and choose your devices.
Step 5. Click on the REC button to start recording audio sound from your computer. When everything is OK, click on the Stop button to end.
Method 2. Record Computer Audio Using Audacity
Audacity is a free, open-source audio recording and editing software that supports recording computer audio on Windows and macOS. It allows for recording and editing multiple audio tracks simultaneously, enabling features like overdubbing, mixing, and layering. Users can customize bit depth, sample rate, etc. to record music, podcasts, or meetings with high-fidelity audio. In addition, there are a wide range of editing tools, including cutting, copying, trimming, and splicing audio as well as effects like noise reduction, equalization (EQ), reverb, etc. to enhance audio quality.
Related reading: best audio recording software 2025
How to Record audio from computer using Audacity?
Step 1. Download and Install Audacity
Go to the Audacity website and download the program. Then install Audacity on your computer.
Step 2. Configure Audio Input (Crucial Step)
On Windows:
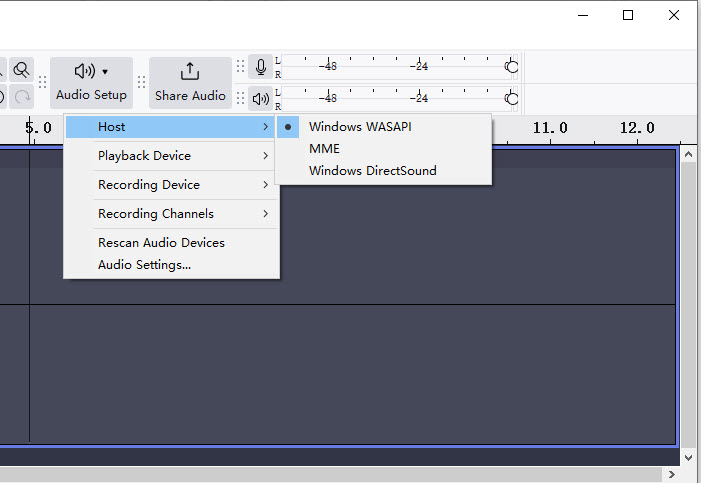
On the interface of Audacity, find the Audio Setup button on the top menu bar and click on it. From the Host, choose Windows WASAPI to record desktop audio.
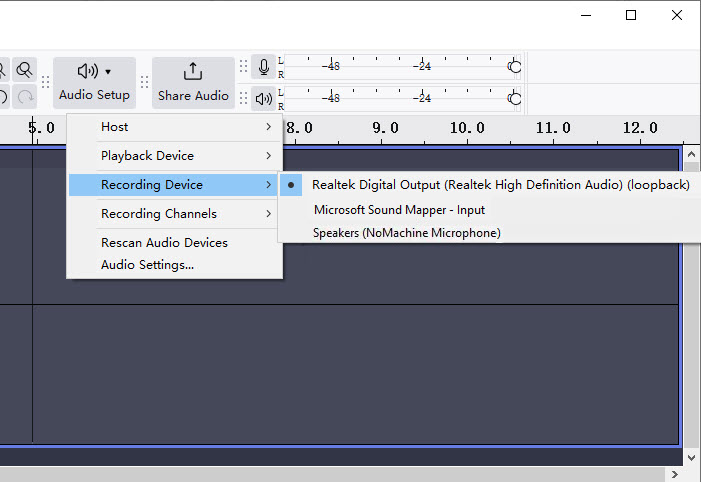
Under "Recording Device," choose "Speakers" or "Headphones" (the output device you're using).
On macOS:
MacOS does not have built-in capabilities to record desktop audio. You'll need to download Soundflower to record desktop audio.
- Download and install Soundflower, a virtual audio driver for macOS.
- Open Audio MIDI Setup (Applications > Utilities) on Mac.
- Click the +button in the bottom left color and create a "Multi-Output Device". Then select both your "Built-in Output" and "Soundflower (2ch)" as output devices.
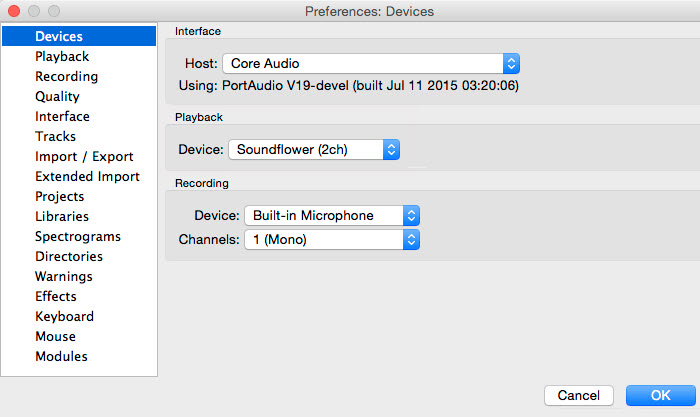
- In Audacity, go to "Edit" > "Preferences" > "Devices".
- Select "Soundflower (2ch)" as the Recording Device. Then you can record computer audio on Mac.
Step 3. Record System Audio
Click the Record button in Audacity to begin capturing computer audio. Play the audio you want to record (such as from a video or online source).
Step 4. Stop and Save
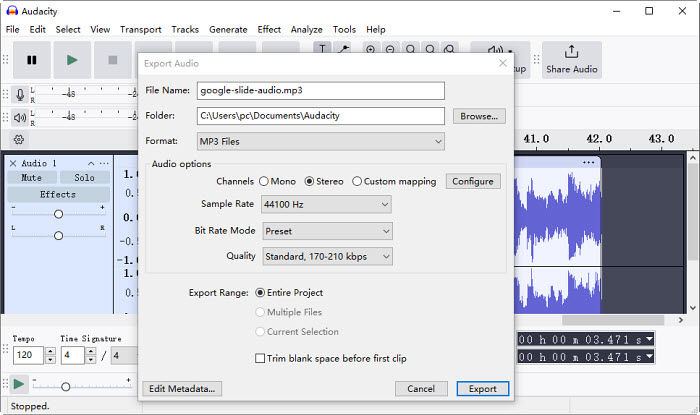
When you're done, click the Stop button in Audacity. Go to File > Export Audio, then choose Export to computer to save the recorded computer audio in your desired format like MP3, WAV, M4A, OGG, and more.
Method 3. Record PC Audio using Windows' Built-in Sound Recorder
Windows 11/10 and earlier versions include a built-in computer audio recorder. Known as "Sound Recorder" in Windows 11 and "Voice Recorder" in previous versions, this simple yet effective tool allows you to effortlessly capture audio directly from your system or microphone.
Easily record and save audio files directly to your computer for use in presentations, lectures, or any other project. This convenient tool provides a straightforward way to capture audio with minimal effort.
How to record system audio with Windows Sound Recorder?
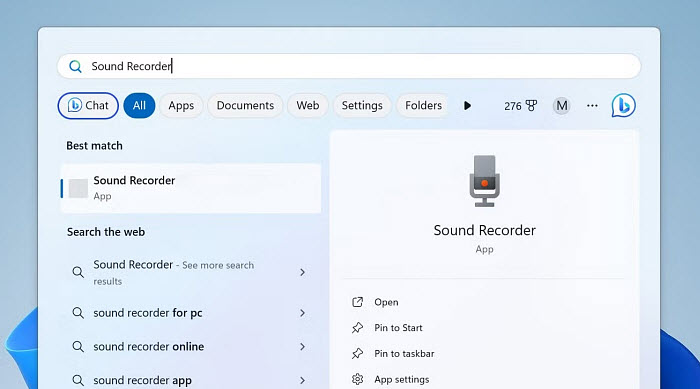
Step 1. Click on the Start menu (Windows icon) in the bottom-left corner of your screen. Type "Sound recorder" or “Voice recorder” into the search bar based on Windows 11 or Windows 10. Then select and open it.
Step 2. Once the app is open, click the microphone icon in the bottom-left corner and choose the desired input device from different audio sources or microphones.
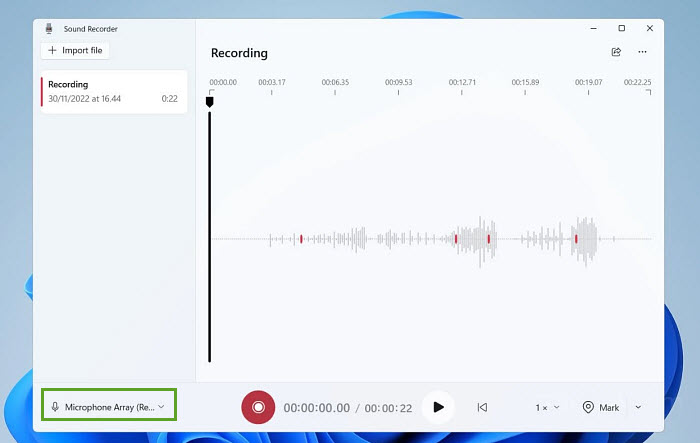
Step 3. Next, play the audio you want to record and click the red record button to start computer audio recording (or press Ctrl+R).
Step 4. To stop the recording, click the same red record button again. The recorded computer audio file will be listed in the left sidebar. You can select a recording and click "Play" or press Spacebar. You can also right-click on it to share, delete, or rename.

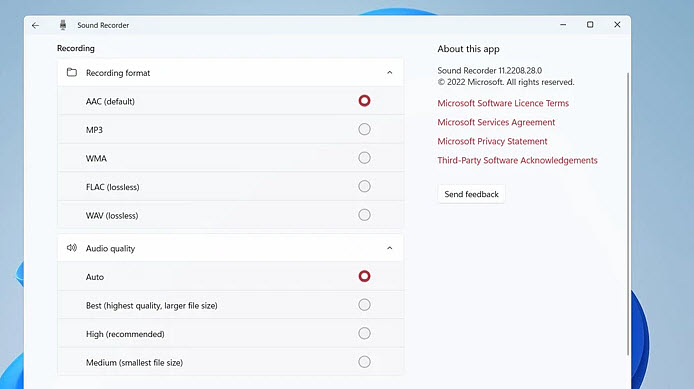
Step 5. Click the three dots in the top-right corner, select "Settings," and choose the desired "Recording Format". Sound Recorder saves recordings in the M4A format. But you can change the recorded desktop audio file in MP3, AAC, WMA, etc. You can also adjust the audio quality here.
Method 4. Record Computer Audio using OBS
OBS Studio (Open Broadcaster Software) is a free, open-source software primarily designed for video recording and live streaming. However, it is also a powerful tool for recording computer audio on Windows and Mac, offering flexibility and customization for both beginners and advanced users. It can record system sounds, including music, games, and other applications and support a wide range of audio codecs and sample rates, allowing for high-quality recordings with minimal distortion. There are highly customizable settings that allow you to fine-tune audio input and output for optimal results.
How to record desktop audio with OBS?
Step 1. Download and install OBS Studio from the official website (obs.project). Launch the OBS Studio application.
Step 2. In the main OBS window, under Sources (at the bottom), click the "+" (plus sign) to add a new source. From the menu, select "Audio Output Capture". This option captures the desktop audio.
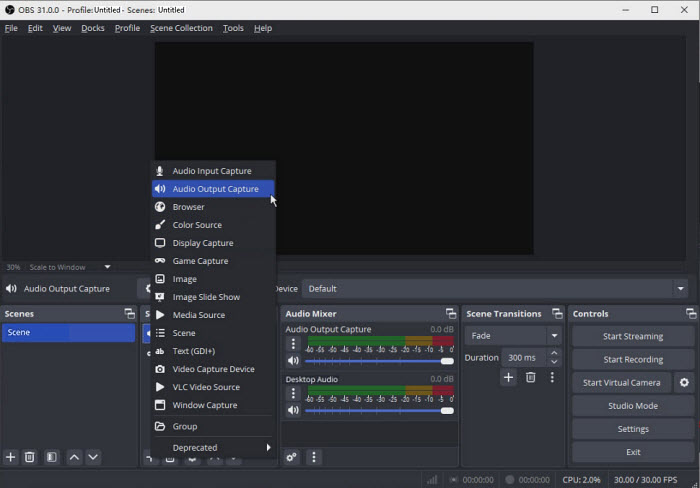
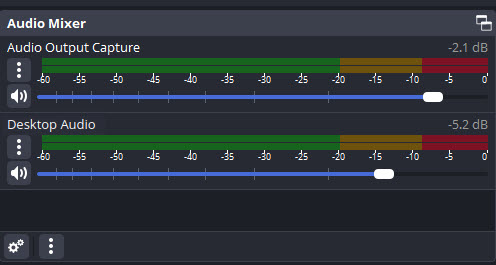
Step 3. After adding the audio source, you should see an "Audio Output Capture" entry in the Audio Mixer section at the bottom of OBS. You can adjust the desktop audio level directly in the Audio Mixer by moving the slider for Audio Output Capture.
Step 4. Right-click on the "Desktop Audio" source in the "Sources" list and select "Properties." Select the correct audio output device. This is usually your default audio output (e.g., "Speakers," "Headphones").
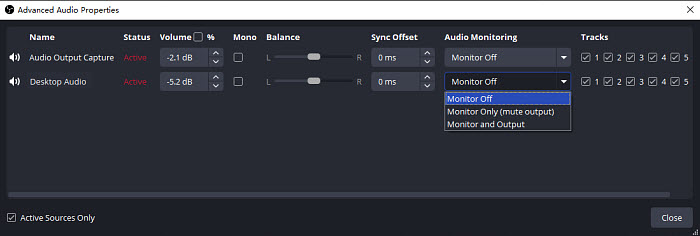
Next, right-click on the "Desktop Audio" source and choose the "Advanced Audio Properties" window. Then in the Audio Monitoring section, choose "Monitor and Output". This setting is crucial for recording desktop audio and will ensure OBS captures the audio that is being played back by your computer.
Step 5. Once you have your audio and video sources set up, click the "Start Recording" button in the lower-right corner of OBS and play the audio you'd like to record. To stop the computer audio recording, click "Stop Recording". Your audio file will be saved in the location you set in Settings > Output > Recording Path.
Method 5. Record Computer Audio with QuickTime Player
QuickTime Player on macOS allows you to record audio from a microphone, but it doesn’t support system audio by default. To record computer audio (internal sound) using QuickTime Player on macOS, you'll need to use a third-party virtual audio device (like BlackHole) to route system audio into QuickTime.
How to record system audio with QuickTime Player?
Step 1. Go to BlackHole’s GitHub page and download the latest version. Open the .dmg file and install it by dragging BlackHole dmg file into your Applications folder.
Step 2. Next, open Applications > Utilities > Audio MIDI Setup. Click the + icon at the bottom-left and select Create Multi-Output Device. Check both BlackHole 2ch and your built-in speakers/headphones to route audio to both.
In System Preferences > Sound > Output, select the Multi-Output Device you created. (This ensures system audio plays through your speakers and is routed to BlackHole.)
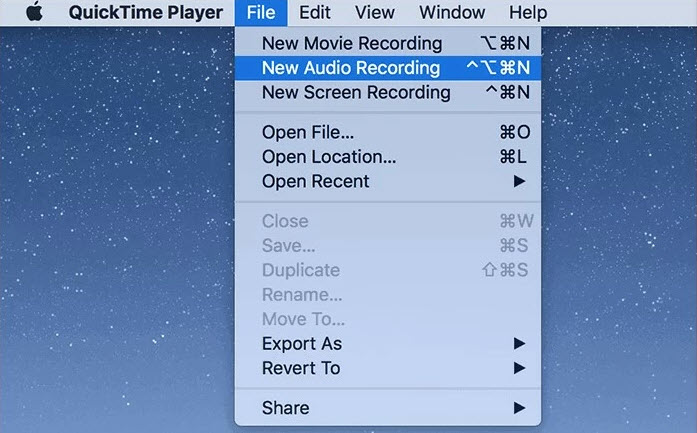
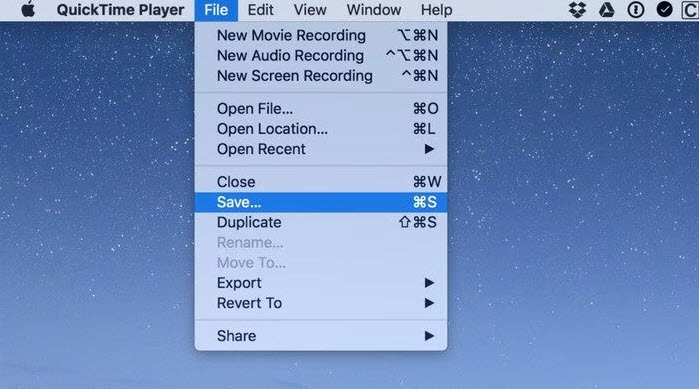
Step 3. Launch it from Applications or via Spotlight (⌘ + Space, type "QuickTime"). Go to File on the top menu bar and choose New Audio Recording.
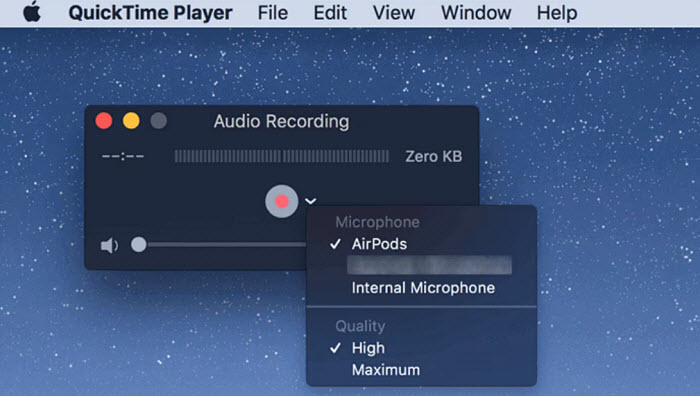
Step 4. Click the down arrow next to the record button (●) and select BlackHole 2ch as the microphone input. Then you can click the Record button (●) to start capturing system audio on Mac.
Step 5. When you finish record computer audio on Mac, click the Stop button (■) when done. Click on File > Save or (⌘ + S) to save the recorded desktop audio on your Mac.
Tips for Recording Computer Audio in High Quality
1. Use reliable desktop audio recording software for high-quality audio capture. Options like Audacity, OBS Studio, or Adobe Audition are great for both system audio and microphone recording. Programs like Make sure your software is set to record at high bitrates (e.g., 320 kbps for MP3) and sample rates (44.1kHz or 48kHz).
2. Use High-Quality Audio Drivers and Virtual Devices. Virtual Audio Devices like Soundflower, BlackHole, or Voicemeeter can route audio directly from your system into your recording software. These drivers help bypass system limitations and prevent audio degradation.
3. Optimize Audio Settings in Your Software. Ensure the audio levels aren't too high or too low. Aim for -6dB to -3dB on the input levels to avoid distortion or clipping. Choose a high sample rate (44.1kHz or 48kHz) and bit depth (16-bit or 24-bit) for the best quality.
4. Adjust Your Computer’s Sound Settings. To recording system audio from comoputer, enable Stereo Mix in your audio settings to allow your computer to capture the sound coming from your speakers. Some sound card enhancements can interfere with audio quality. Go to Control Panel > Sound > Properties > Enhancements and disable all effects (e.g., noise cancellation, equalizers).
5. Reduce Background Noise. In both your audio software and recording device settings, enable noise suppression or noise reduction to clean up any unwanted sounds from your environment. Close other programs or background applications that might use your CPU and introduce noise or lag during recording.
6. Record in Lossless or High-Quality Formats. WAV or FLAC formats are the best options for lossless, high-fidelity recordings. These formats don’t compress the audio, preserving every detail.
Conclusion
Recording computer audio can be a straightforward process, but the best method depends on your specific needs and the quality you're aiming for. Whether you need a simple solution for casual recordings or a powerful tool for professional-grade audio, this guide has provided you with a variety of options to consider. By leveraging tools like Winxvideo AI, Windows Sound Recorder, Audacity, OBS, QuickTime, etc., you can capture high-quality desktop audio for various purposes.
FAQ
1. How do I record my computer screen with audio?
Beyond desktop audio recording, some tools like Winxvideo AI excel at screen recording with high-quality audio. You can capture the entire screen or select specific areas, while simultaneously recording system audio, microphone input, or both. This versatility makes them invaluable for creating tutorials, presentations, gameplay recordings, and more.
2. Does Windows 10 have an audio recorder?
Yes, Windows 10 comes with a built-in audio recording tool called Voice Recorder. It's a simple app that allows you to record audio using your computer's microphone or external microphone. However, it's not designed for recording system audio (e.g., music or sound from videos).
3. How do I record computer audio on a Mac?
On Mac, you can rely on Audacity with BlackHole, OBS, VLC, QuickTime, etc. to record desktop audio.
4. How to record audio from a website on PC?
You can record audio from online sites or streaming services just like you would record any other audio source on your computer. Simply open your recording software, configure the settings, play the audio on the website, and begin recording.


