[Fixed] Music Won't Go into Media Pool/Timeline in DaVinci Resolve
From DaVinci Resolve's official manual, DaVinci Resolve is compatible with audio formats like WAVE, Broadcast WAVE, MP3, AAC (M4A), AC3 (from QuickTime and MTS file container). And it accepts your audio file with sample rates ranging from 32 kHz to 192 kHz and mixed bit depths from 16bit to 32bit.
Theoritically speaking, it's never gonna be a science rocket to import music to DaVinci Resolve. However, life is not always a bed of roses. Most users, if not all, complained that they can't import MP3, even WAV music file to media pool or timeline in DaVinci Resolve. Why would this happen? How to make this problem right? Calm down! Spare 3 or 4 minutes to read the below solutions (with reasons explained) and you will get your MP3 import issue in DaVinci Resolve fixed without much sweat.
The Audio Track in the MKV Can't Add to DaVinci Resolve? Convert MKV to MP4!
DaVinci Resolve got some issue with MKV format. If the audio track in MKV video can't import to DaVinci Resolve timeline, converting MKV to MP4 is your smart approach!
Free download Winxvideo AI to 1:1 copy video & audio tracks from MKV to MP4 without transcoding if both of these two container formats keep the same video/audio codec. Your output MP4 video is 100% original quality after you utilize its "Auto Copy" mode. And the remuxing process goes 10X faster than the normal video transcoding. Work as a video downloader, compressor, editer, as well!
Top Solutions to Fix "Music Won't Go into Media Pool/Timeline in DaVinci Resolve" Issue
Part 1. Top Solutions to "DaVinci Resolve Can't Add MP3 or WAV to Media Pool"
Why can't I drag MP3 into DaVinci Resolve? DaVinci Resolve can't import MP3 or WAV to media pool? This kind of question has been posted on varied types of forums and Q&A websites. This indicates that this error happens at high frequency and that most DaVinci Resolve users might be bothered by this headachy problem.
To help you out of this off-putting error, here gathers all the effective solutions to tackle this "DaVinci Resolve can't add audio track to media pool" issue. Check the below methods or jump to the method you need if your time is limited:
- Solution 1. Clear Your Cache or Delete Render Files
- Solution 2. Drag the Audio Clip under the Video Track
- Solution 3. Go to Edit Page
- Solution 4. Go to Cut Page
- Solution 5. Re-record MP3 as WAV Format
- Solution 6. Re-name Your MP3 File
- Solution 7. Change MP3 VBR to CBR
- Solution 8. Free Convert MP3 to MP4 Video Format
Solution 1. Clear Your Cache or Delete Render Files
Primarily, clear your cache or delete render files in DaVinci Resolve to have a test. This is the most basic solution yet the one that you might ignore. Continue reading the following solutions if this still doesn't work for you.
Solution 2. Drag the Audio Clip under the Video Track
Try to drag the audio clip under the video track. This will create a new audio track with the clip edited into it.
Solution 3. Go to Edit Page
Go to edit page in DaVinci Resolve and try there. If it still shows you the same result, right click the audio file and tell it to make a new timeline with selected clip. Copy the audio in the new timeline and paste it into your other timeline.
Solution 4. Go to Cut Page
Beyond edit page, other users also share with us the method to fix DaVinci Resolve not importing MP3 issue - go to Cut Page.
Drag an audio file under V1 on the Cut page in 17.2.2 Studio and it creates an audio track with the file. OP then is trying to drag an audio file onto a Video track, which won't work on the Edit page either.
Solution 5. Re-record MP3 as WAV Format
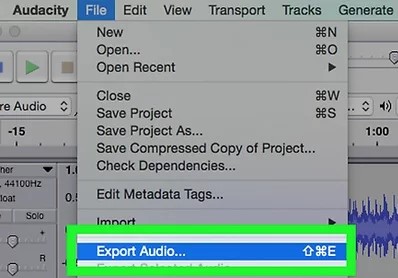
If, unluckily, the above solutions don't work for you, please re-record your MP3 sound as .wav audio format. DaVinci Resolve shows more friendliness to WAV audio format.
Generally, Audacity is highly recommended to help you change MP3 to WAV format with virtually nary quality damage.
Solution 6. Re-name MP3 File
Some users point out that MP3 import issue in DaVinci Resolve is still there even after they convert MP3 to WAV. In such case, you need to check your MP3 file name to see if it contains any emojis in the name.
Davinci doesn't recognize your MP3 or WAV audio files with emojis in the names. As such, Davinci would be straight up rejecting the files in their entirety. A quick rename later and Davinci happily accepts your music files.
Solution 7. Change MP3 VBR to CBR
Another commonly seen case is your MP3 variable bit rate. DaVinci Resolve supports MP3 files with a constant bit rate. If you feed Resolve a variable bitrate MP3, it's likely to handle it poorly or even reject your MP3 importing.
And generally, your DaVinci Resolve never has the plan to tell you that. Consequently, the most direct solution is to change MP3 variable bit rate to constant bit rate using Audacity. Click here to watch the detailed YouTube video guide if needed.
Solution 8. Free Convert MP3 to MP4 Video Format
Providing the above 7 solutions still don't come as your preference, converting MP3 to MP4 video is supposed to be your ultimate solution to fix "DaVinci Resolve can't import MP3 to media pool" issue.
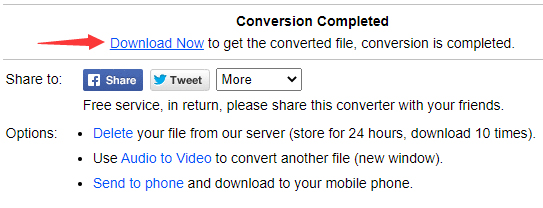
Use onlineconverter.com to convert MP3 to MP4 or MOV, AVI, ProRes, etc. DaVinci Resolve file format without quality damage. Afterwards, separate video and audio tracks in DaVinci Resolve, then you can successfully use your audio.
Part 2. Top Solutions to "Audio Won't Go into Timeline in DaVinci Resolve"
The solutions mentioned in Part 1 mainly concerns about loading single audio file into DaVinci media pool while this part covers single audio file loading to timeline failure, as well as the audio track in the video adding to timeline error. Give a shot on the corresponding troubleshooting tips based on your specific situation:
Solution 1. Make sure you are adding the MP3 file to an audio track.
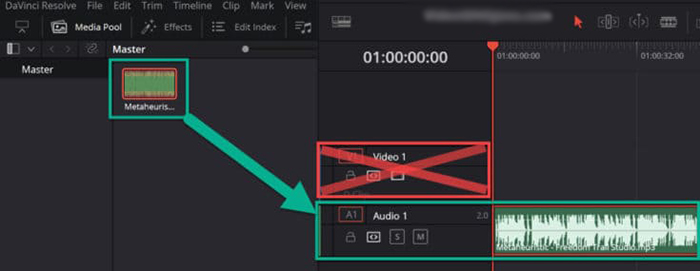
When you drag your desired MP3 music file from the "Media Pool" inside Resolve to the timeline, there stands a high likelihood to actually drop it in the wrong area. Make sure, to drop it in the lower part of the timeline. Before you drop it, you shall be able to see "Audio 1" pops up and your MP3 clip in the timeline. Meanwhile, extend the video track to be at least the length of your audio track.
Solution 2. Don't Change Any Audio Parameters Settings via Audacity
This experience comes from a user on forum. The effective way he shared is to create a new, empty project. He added the song to the media pool with no changes via Audacity. Then he added it to the timeline successfully.
From his actual test, he concluded that there must be something in the project settings in his project due to settings changes, which don't match up with the default settings. You can take his experience for reference if necessary.
Solution 3. Turn Gray to Normal
"I have 4 audio tracks on my video. I had A1 doubleclicked to be gray for whatever reason, I didn't do this knowingly. So I would understand that track is passive, as it's gray..? Ok thus far, but why can't I then add audio files to any other track A2..A4 either? Why is that?"
If you click some Audio track label, say "A1", twice (either slowly or double-click), it turns gray. After this, you're unable to add audio tracks to your timeline in Resolve. Click it again to return it from "gray" to "normal" - whatever that normal is - and you're good to go again.
Solution 4. Create a Stereo Audio Track on the Fairlight Page
When you load some music files with copyright proction, you ought to change your tactic.
- Create a stereo audio track on the Fairlight page after you load your music files into media pool in Resolve.
- Drag the audio file from the Media Pool onto this newly created audio track.
- Import the source media in to DaVinci Resolve on the Media page first, before attempting to drag the audio file on to the Timeline in either the Edit or Fairlight pages.
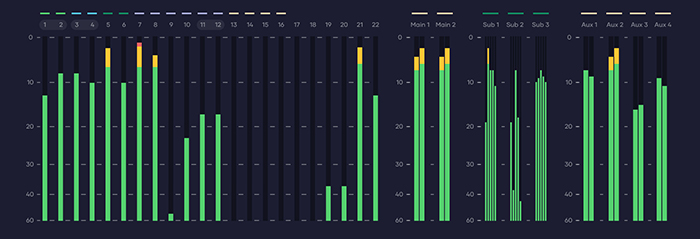
Note: notwithstanding your music file is copyright unprotected or downloaded from Soundcloud, YouTube, etc. sources, you're still suggested to name your audio file as "Copyright Free [original filename].mov" to avoid unnecessary loading error.
Solution 5. Convert MKV to MP4 for DaVinci Resolve
DaVinci Resolve is fragile now and then, especially when it comes to handle MKV video files. Therefore, if you come across the audio track in the MKV video not adding to timeline in Resolve, MKV container format might be the chief culprit.
The most direct way is to convert MKV to MP4 video format. Give a shot on Winxvideo AI which remux MKV to MP4 container format at 1:1 lossless ratio thanks to its "Auto Copy" mode. You can just change its container format from MKV to MP4 without changing the inner video/audio codecs if the input and output codecs keep the same.
Meanwhile, it allows you to easily change MKV video 12-bit color depth to 10bit or 8bit color depth since the Free version of Resolve only gets 10bit support limitation. After that, you can smoothly load your MKV audio track to timeline in Resolve.
How to Remux MKV to MP4 for DaVinci Resolve with High Quality?
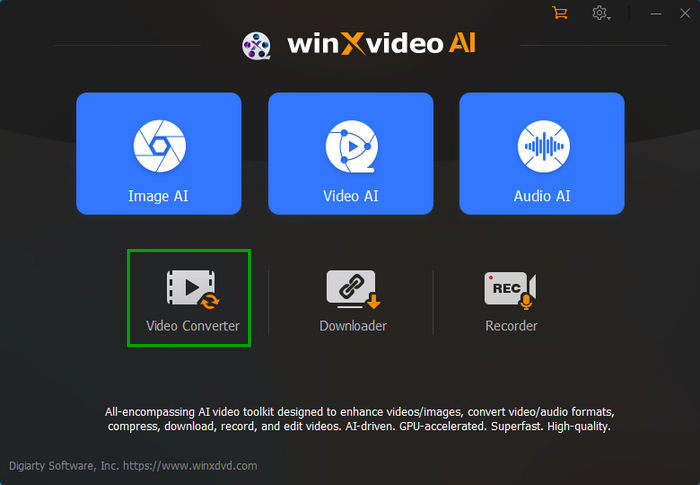
Step 1. Download Winxvideo AI, install and launch it on your computer. Then, select Video Converter.
Step 2. Click the + Video button on the top bar to add your MKV video footage.
Step 3. Move to Target Format and choose MP4 Video (h264+aac) as the output format as it has been proved to be the best video format for DaVinci Resolve to process.
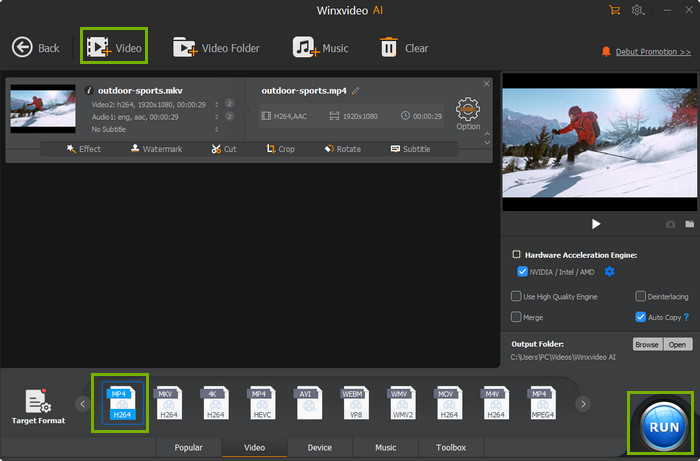
Step 4. Optionally, you can click the Codec Option button to adjust video bitrate, frame rate, aspect ratio, resolution, etc.
Step 5. When everything is done, click the Browse button to select a destination folder and then hit the RUN button to start converting MKV to MP4 DaVinci Resolve best video format.


