


How to Colorize a Black and White Photo: 5 Methods
 Mike Rule
Updated on
Black and white photos capture precious moments with a timeless elegance. While they hold a certain charm, adding a touch of color can breathe new life into these old photos. In this article, we'll introduce 5 ways to colorize black and white photos. No matter you want to colorize old photos on computer, mobile, or using an online tool, we've got you covered. Here you can find the photo colorizer to perform manual colorization, selective colorization, and AI-powered automatic colorization.
Method 1. Colorize a Black and White Photo in Winxvideo AI
Winxvideo AI is a powerful tool that simplifies the process of turning black and white photos into colorful images. Its AI-driven technology makes it a beginner-friendly option that delivers impressive results with just a click.
Pricing and availability
Supported OS: Windows
Pricing:
- Free trial: process up to 5 images.
- 1-year plan / 3 PCs: $25.95
- Lifetime / 1 PC: $45.95
- Family / 3-5 PCs: $57.95
Steps to colorize a photo:
Step 1. Get Winxvideo AI.
Download and install Winxvideo AI on your computer.
 Free Download
  Free Download
Winxvideo AI is for PC, while Macxvideo AI (from our MacXDVD brand) is for macOS.
Step 2. Open Image AI tool.
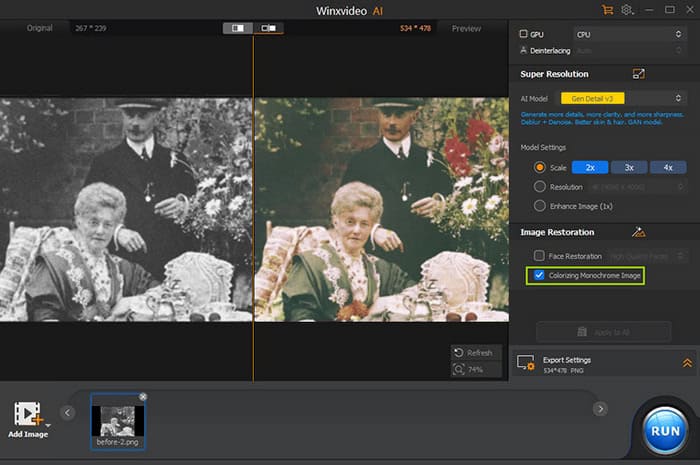
Launch Winxvideo AI and select the "Image AI" module.

Step 3. Open target black and white photo.
Click the "Add Image" button at the bottom left corner to import the black and White photos you want to colorize.
Step 4. Apply colorization.
Check the "Colorizing Monochrome Image" option on the right.
Tips: As you can see from the interface, Winxvideo AI also allows you to upscale and enhance images. You can apply them based on your own needs.
Step 5. Export the colorized photo.
Click the "RUN" button to export the new photo that has already been colorized.
Beyond colorization, Winxvideo AI is a versatile tool for image and video processing. It can upscale, deblur, denoise, and sharpen images, as well as convert, compress, edit, record, and download videos.
Method 2. Colorize a Black and White Photo in Photoshop
Photoshop offers powerful tools for transforming black and white images into vibrant color photographs. While there are various techniques, we'll focus on the efficient and effective method using the Neural Filters.
Pricing and availability
Supported OS: Windows, Mac
Pricing:
- For individuals: $22.99/mo
- For teams: $37.99/mo per license
Steps to colorize a photo:
Step 1. Open your photo.
Launch Adobe Photoshop and then open the black and white photo you want to colorize.
Step 2. Duplicate your layer.
Right-click on the background layer in the Layers panel and select "Duplicate Layer". This preserves the original photo.
Step 3 (optional). Remove dust and scratches from your photo.
If your photo is showing its age with dust and scratches, the Spot Healing Brush can be a quick fix. Simply adjust the brush size to match the imperfection and gently click on it to remove the blemish.
Step 4. Access Neural Filters and apply Colorize.
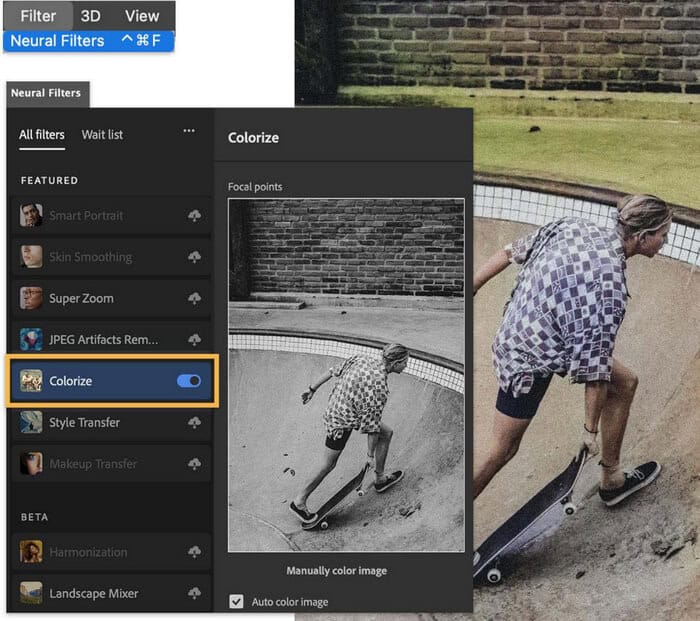
In the menu bar, go to Filter > Neural Filters and then toggle the Colorize filter on. After that, Photoshop will automatically colorize your black and white photo.
Note: If this is your first time to use Colorize, you need to download it first. If you have already downloaded it, simply toggle it on.
Step 5. Refine colors.
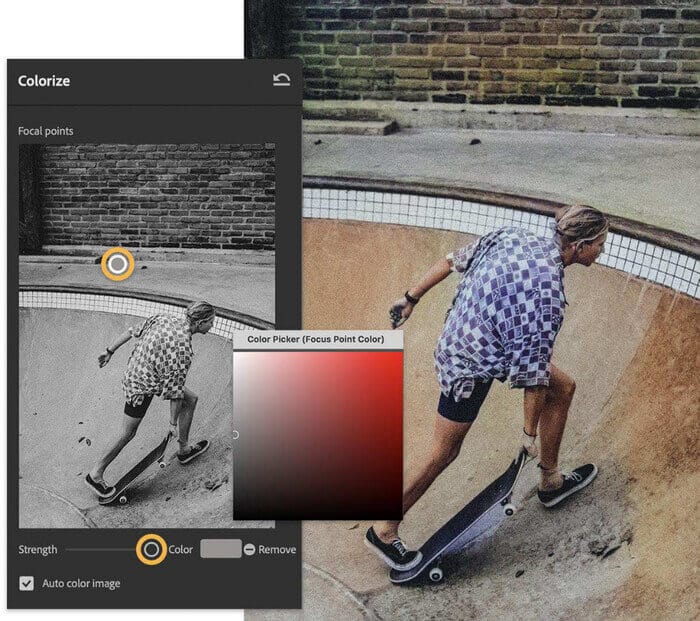
If you're not satisfied with the automatic colorization, you can go to the Focal points preview and click to target an area you want to change and use the Color Picker to assign new color to the area. You can adjust the Strength slider to control the range of the area affected.
Step 6. Fine-tune overall color settings.
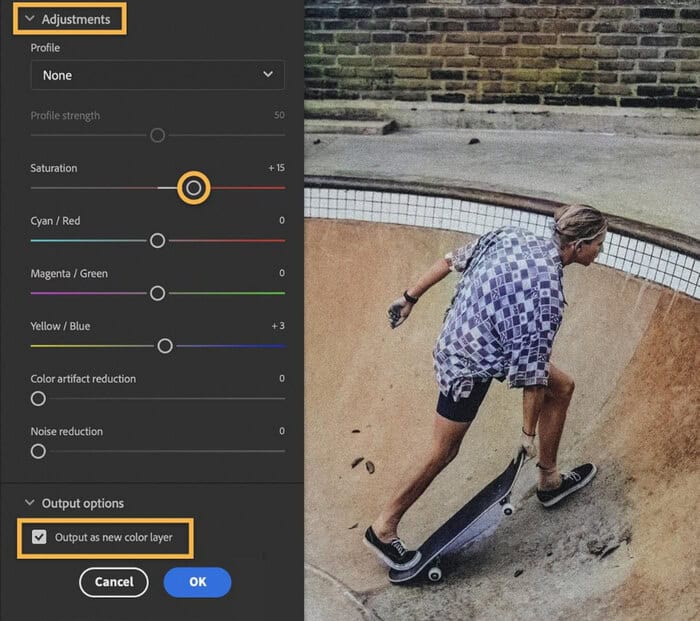
Open the Adjustments panel to modify saturation, Cyan/Red, Magenta/Green, Yello/Blue, and other color settings.
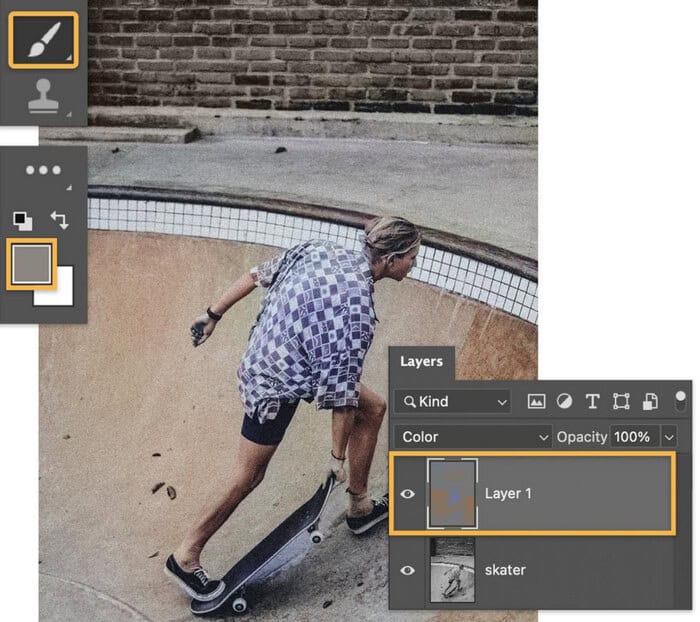
Step 7. Customize your colors.
If you want to add your personal touch, use the Brush tool on the layer generated by the Colorize Neural Filter. It's already set to Color blending mode.
Step 8. Save your colorized photo.
Choose File > Export > Export As to save the colorized version with a new name.
By following these steps, you can effectively turn your black and white photos into color images.
Method 3. Colorize a Black and White Photo in GIMP
If you're looking for a free alternative to Photoshop for colorizing old black and white photos, GIMP is a good choice. GIMP doesn't have an automated colorization tool like Winxvideo AI, but it offers granular control for precise colorization. This method requires patience and a good understanding of color theory.
Pricing and availability
Supported OS: Windows, Mac, Linux
Pricing: Free
Steps to colorize a photo:
Step 1. Open your black and white photo.
Launch GIMP, go to File > Open to open the black and white photo you want to colorize.
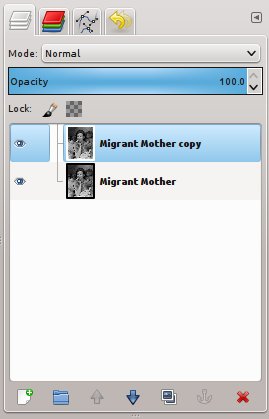
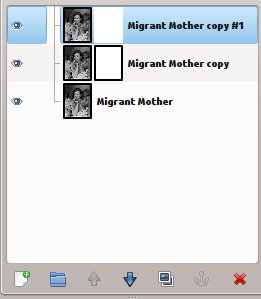
Step 2. Duplicate the layer.
Right-click on the background layer and select "Duplicate Layer" to make a copy of your photo. This helps in case you need to start over.
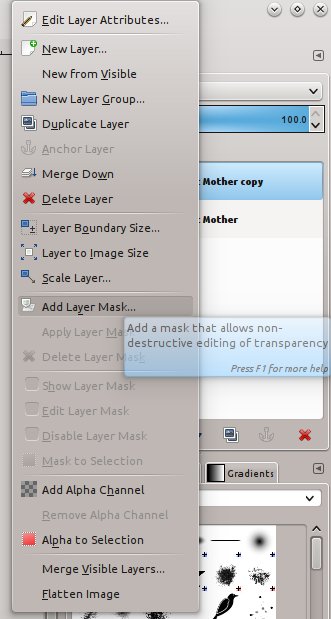
Step 3. Set up Layer Mask.
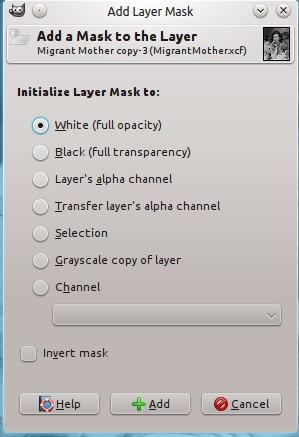
Right-click on the image layer and choose "Add Layer Mask".
In the dialog box, select "White (full opacity)" and click "Add".
Next, duplicate this layer to have a backup of your masking layer.
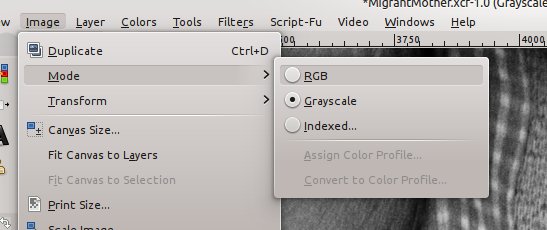
Step 4. Adjust image mode.
Go to "Image" -> "Mode" and choose "RGB." This will create three color channels: Red, Green, and Blue.
Step 5. Choose coloring method.
Navigate to Colors in the top menu and choose one of these color adjustment tools: Color Balance, Hue-Saturation, or Colorize. For this tutorial, we'll use Colorize.

To use these coloring methods, ensure that our image, located on the left, is selected rather than the layer mask, which is positioned on the right.

Step 6. Apply color.
Adjust the Hue, Saturation, and Lightness sliders until you achieve the color you want for the entire image or a specific area.

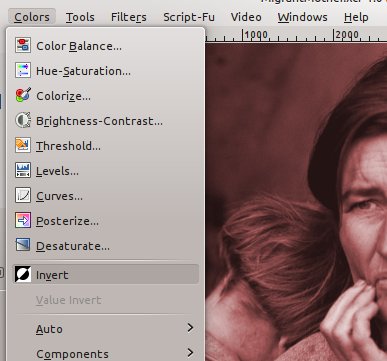
Step 6. Invert the layer mask.
Invert the layer mask by going to Colors > Invert to hide the color effect temporarily.
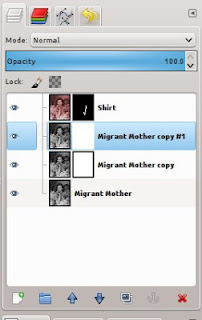
Step 7. Selective coloring.
Use selection tools (Select > By Color, Select > Fuzzy Select, etc.) or the paintbrush tool (Tools > Paintbrush) to paint on the layer mask with black to reveal the colored areas selectively.

For precise selections, use the Select tools to isolate different parts of the image before applying color.
Step 8. Review and finalize.
Create duplicates of your colored layer and repeat the process for different objects or areas in the photo. Use the paintbrush tool to touch up any areas where color has bled outside the lines.
Step 9. Final adjustments.
Adjust layer opacities (Layer > Transparency > Opacity) to blend the colors naturally with the original grayscale tones.
Fine-tune color balance and saturation using adjustment layers or by revisiting the Colorize tool.
Step 10. Export your colorized photo.
Once satisfied with the colorization, merge or export your layers (Image > Flatten Image or File > Export As) to save your colorized photo in your desired format.
Method 4. Colorize a Black and White Photo Online in Canva
For a quick and convenient colorization solution, look no further than Canva. This is an online tool so that you can add color to your black and white photos from the comfort of your web browser.
Pricing and availability
Availability: Web-based, accessible from any device with a web browser
Pricing:
- Free
- Canva pro: $120
- Canva teams: $100
Steps to colorize a photo:
Step 1. Access Canva.
Head over to https://www.canva.com/your-apps/AAFyZikp2tA/colorize in your browser.
Step 2. Upload your photo.
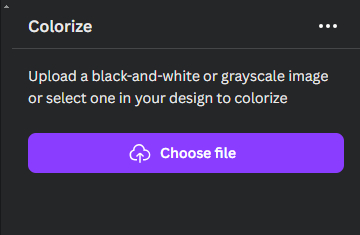
Hit "Use in a new design" and choose a template size or select "Custom size" for your photo's original dimensions. Then, you‘ll be brought to the editing panel. Now you should click the "Choose file" button to open the black and white photo you want to colorize.
Step 3. Apply the colorize magic.
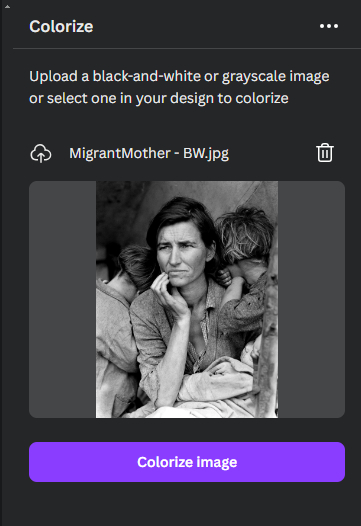
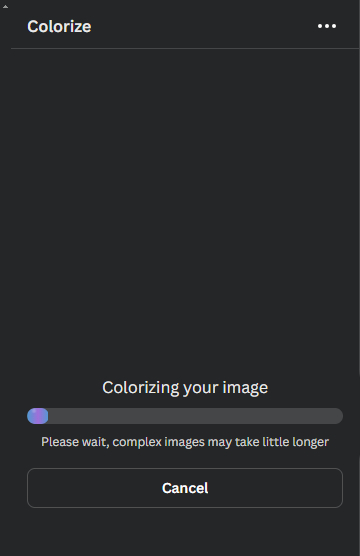
With your photo uploaded, click on the "Colorize image" button to start colorizing the image.
It will show you a progress bar.
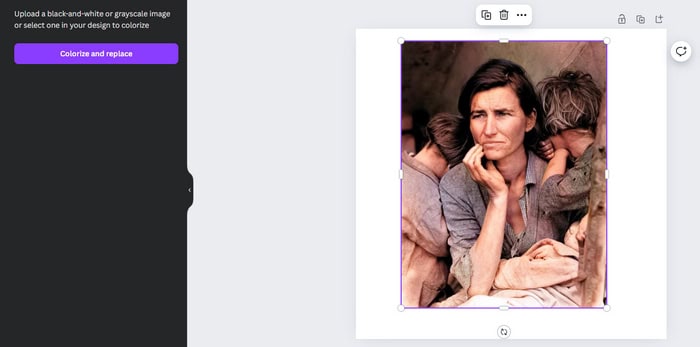
Step 4. Download and share your colorized photo.
Once you're happy with the colorized version, click "Share" button at the top right corner, and then choose to download or share your colorized photo. You can use your colorized photo in a new Canva design for social media posts, cards, and more, or simply save it to your device and share it directly.
Method 5. Colorize a Black and White Photo in Picsart
Picsart is a popular mobile photo editing app known for its user-friendly interface and wide range of creative tools. Beyond basic editing features, it offers advanced options like colorization, allowing you to change black and white photos into color. If you want to color a black and white photo on iPhone or Android, you can try this method.
Pricing and availability
Supported OS: iOS, Android
Pricing:
- Free trial: 7 days.
- Monthly plans: Picsart Plus: $13/mo; Picsart Pro $15/mo
- Yearly plans: Picsart Plus: $5/mo; Picsart Pro $17/mo
Steps to Colorize a Photo:
Step 1. Prepare your photo.
Open the Picsart mobile app and tap the plus (+) sign to start a new project. Then, choose the black and white photo you want to colorize from your photo library or search for the photo among Picsart's Free to Edit images.

Step 2. Select the area to color.
Tap the "Tools" icon at the bottom of the editor screen, then choose "Selection".
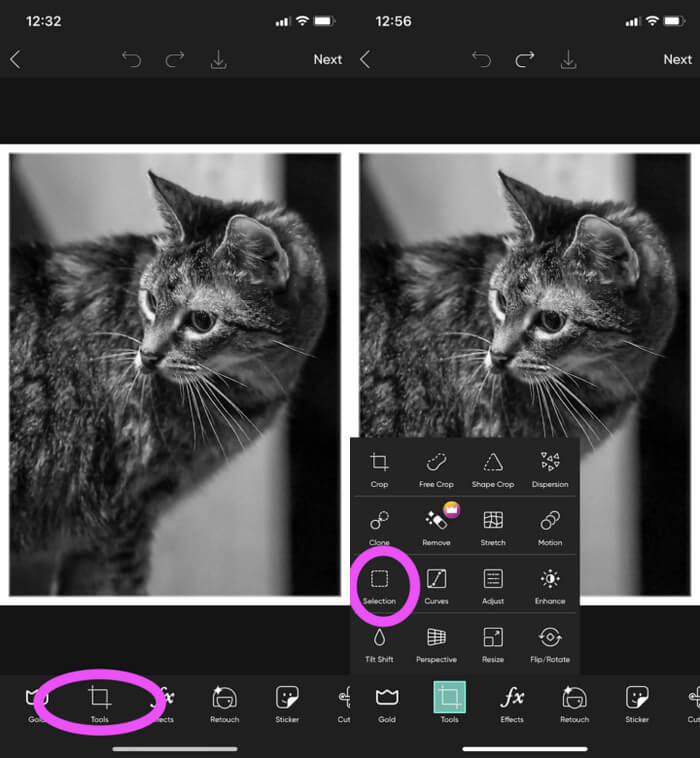
Next, use the "Brush" tool to carefully outline the area you want to color.
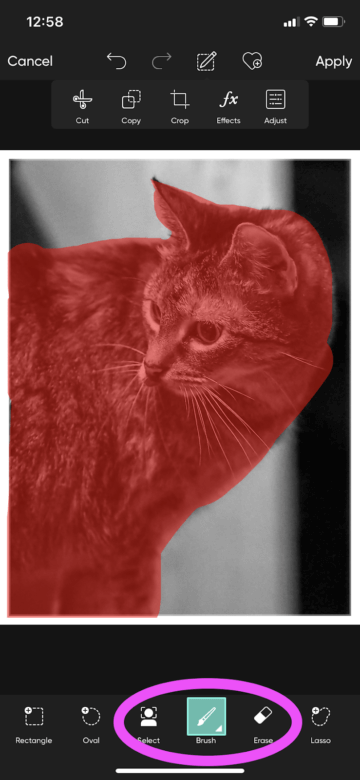
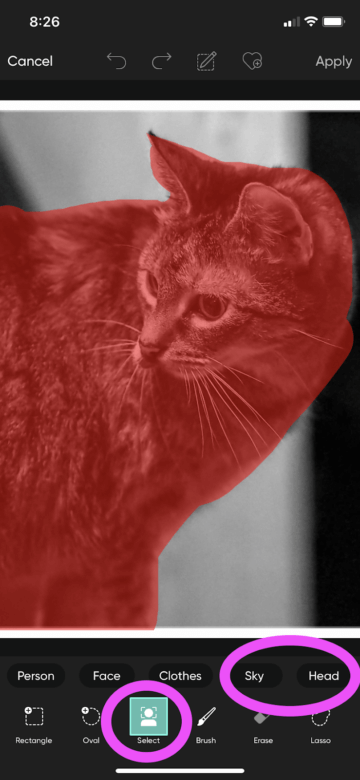
Tips: Before using the selection brush on your photo, adjust the brush size for better maneuverability around curves and intricate details. Simply tap the small white arrow in the corner of the Brush icon and adjust the Size slider accordingly. For images with distinct features you wish to uniformly color (like faces or the sky), utilize our AI Select tool for quicker results.
Step 3. Apply your chosen color.
After filling in the desired areas with the initial color, select "FX" from the toolbar above your canvas.

Navigate along the bottom toolbar until you locate the Color effects. Select the Colorize option and adjust the Hue and Fade sliders until you achieve the desired shade. The slider offers vibrant greens, bold purples, and rich blues. If the tone isn't perfect, don't worry—you can fine-tune the intensity and brightness of the colors in the photo later using additional filters.
Step 4. Repeat for other areas.
Repeat steps 2 and 3 for each section of the photo you want to color.
Step 5. Apply and download the colorized photo.
After coloring all desired areas, tap "Apply" to finalize your changes. Then, click the download button to save the colorized photo to your image library.
Conclusion
With a variety of methods available, colorizing your black and white photos has never been easier. Whether you prefer a quick online solution like Canva, an AI-powered tool like Winxvideo AI, a user-friendly mobile app like Picsart, or a powerful desktop tool like Photoshop, you can breathe new life into these old photos.
When choosing a method, you should consider your skill level, desired outcome and product cost. Some methods like Winxvideo AI require minimal user interaction, while GIMP offers more control but demands more technical skills. If you want a quick solution, online tools or mobile apps might suffice. For precise control and professional-looking edits, dedicated desktop software is the way to go. Free options like GIMP and Canva exist, while premium software and apps offer advanced features and functionality. So you can experiment with different methods to find the perfect fit for your needs.
 FAQs About Colorizing Black and White Photos
There are various options, including professional-grade software like Photoshop, free alternatives like GIMP, and online tools like Canva. The best choice depends on your skill level and desired outcome.
Yes, Google Photos has a built-in feature called "Colorize" that can automatically add color to black and white photos. It uses AI to analyze the image and suggest colors. While still in beta, the feature has shown promising results.
While it's challenging, some image restoration techniques can help improve the quality of old and damaged photos before colorization.
Yes, there are several smartphone apps that offer basic colorization features. However, for more advanced results, using desktop software is often recommended.
Yes. Photoshop, GIMP, and Picsart allow you to select specific areas for colorization, giving you precise control over the process.
Research historical color references and use color theory to guide your choices. Pay attention to shadows, highlights, and the overall atmosphere of the photo.


