


How to Clip on PC – Clip GamePlay / Screen on Windows 11/10/8/7
 Mike Rule
Updated on
Many gamers wonder how to clip on a PC to capture their best moments, funny fails, or impressive plays for sharing on social media or with friends. Beyond gameplay, many users also seek ways to clip other screen activities, such as movies, online meetings, or courses.
In this guide, we'll explore some of the best tools for clipping gameplay and other screen activities on a PC, including Winxvideo AI, Xbox Game Bar, GeForce Experience, and Medal.tv. We'll provide step-by-step instructions for each application, helping you find the right tool for your specific needs. Whether you want to clip something that already happened—like the last 15, 30, 60, or 120 seconds, or the last 5, 10, 15, or 30 minutes—or record upcoming events, this guide has you covered. Let's get started.
Method 1: How to Clip on PC with Winxvideo AI
The first tool I recommend for clipping on PC is Winxvideo AI. It is built with a screen recorder can capture anything happening on your screen, from gameplay and movies to online meetings and courses. It excels at recording high-quality footage, making it ideal for gamers and content creators who want smooth, high-definition recordings.
Why Choose Winxvideo AI for Clipping on PC?
- Easy to Use: Start and stop recording effo2rtlessly with a single button or a simple key combination, similar to the Xbox Game Bar.
- Low Performance Impact: The software is optimized to minimize system performance impact, ensuring smooth gameplay without interruptions.
- High-Quality Recording: Winxvideo AI records at high frame rates in high definition, capturing game clips with no lag or FPS drops.
- Versatile Output Formats: It supports a wide range of video formats (MP4, MOV, MKV, TS, FLV), making it easy to share your recordings across different platforms.
- Built-in Paint Tools: Enhance your recordings in real-time with built-in paint tools, allowing you to draw, annotate, or highlight key moments directly on the screen during recording.
- Flexible Editing: Quickly trim and edit your recorded videos to remove unwanted parts and refine your content with ease.
How to Use Winxvideo AI to Clip on PC
Step 1: Begin by downloading and installing Winxvideo AI on your PC.
 Free Download
 Free Download
Note: AI tools for Mac are currently unavailable, but they're coming soon. Stay tuned.
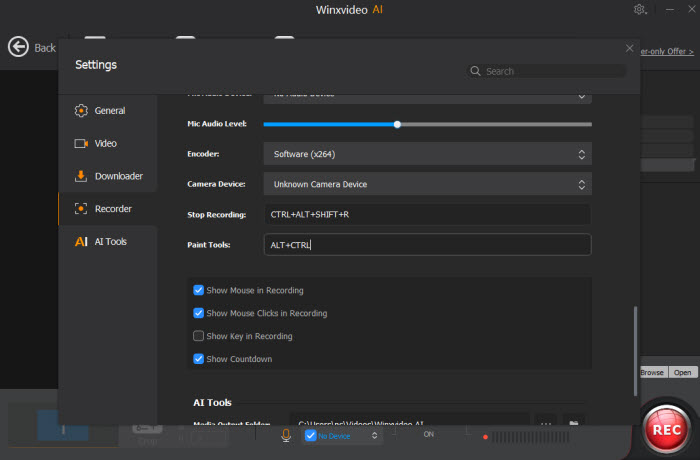
Step 2: Open the application and click the gear icon in the top right corner to access the Settings menu. Navigate to the Recorder section, where you can customize various options, such as setting up shortcuts, choosing the recording quality and format, and deciding whether to display the mouse, mouse clicks, keystrokes, and a countdown timer on the screen.
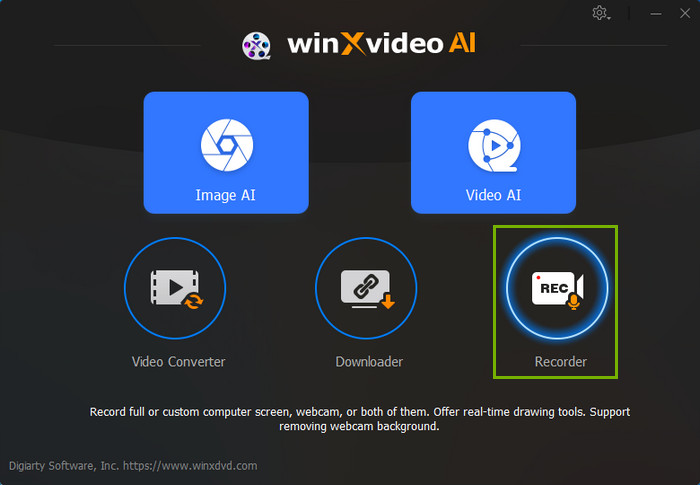
Step 3: Once your settings are configured, close the Settings window and select the "Recorder" from the main menu to enter the recording interface.
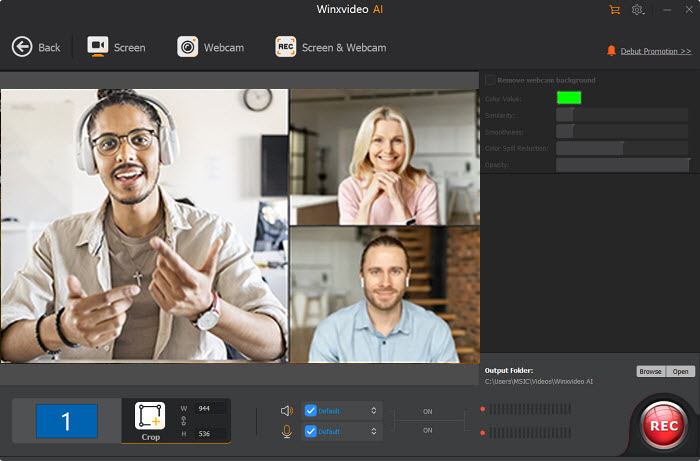
Step 4: To start setting up your recording, click the "Screen" button to display your desktop, and if needed, use the "Crop" button in the lower left to define the specific area you want to capture. For full-screen recording, you can skip this step. Adjust the audio settings by toggling the system sound and microphone on or off according to your requirements.
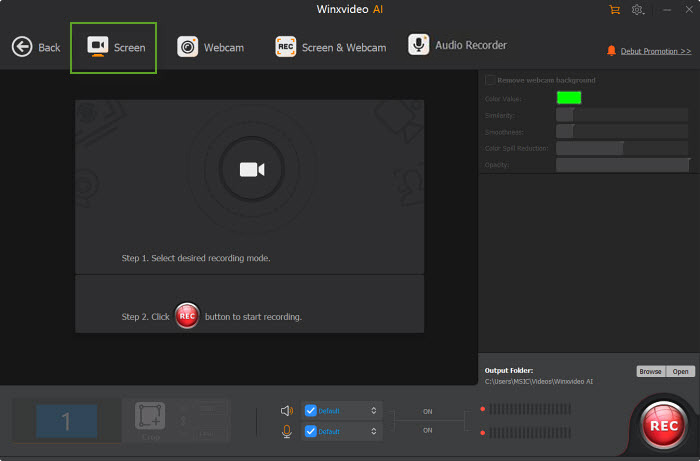
Step 5: Click the "REC" button in the bottom right corner to initiate the recording, which will start after a brief 5-second countdown.
Tip: During recording, you can press Shift + Ctrl + ALT + P to bring up the Paint Tools, allowing you to draw, annotate, highlight, and add notes directly onto your screen.
Step 6: Once you've clipped desired segment, press Shift + Ctrl + ALT + S or click the "STOP" button to end the recording.
Tip: To upscale or enhance the video frame rate, import your clips into Winxvideo AI’s Video AI tool. For tasks like converting, compressing, trimming, merging, and adding subtitles, use the Video Converter feature within Winxvideo AI.
Method 2: How to Clip on PC with Xbox Game Bar
Xbox Game Bar is a convenient tool built into Windows 10 and 11 that allows you to easily capture videos and screenshots while gaming. Beyond recording, it also offers features like sound modulation and teammate discovery.
Now, let's explore how to clip the last 30 seconds, last 5 minutes, or any custom duration on your PC using Xbox Game Bar.
Step 1: Adjust Xbox Game Bar settings.
To record game clips on your PC using the Xbox Game Bar, start by adjusting your Game Bar settings. Open the Settings menu by pressing Windows + I, then navigate to Gaming. Ensure that the option to "Record game clips, screenshots, and broadcast using Game Bar" is enabled.
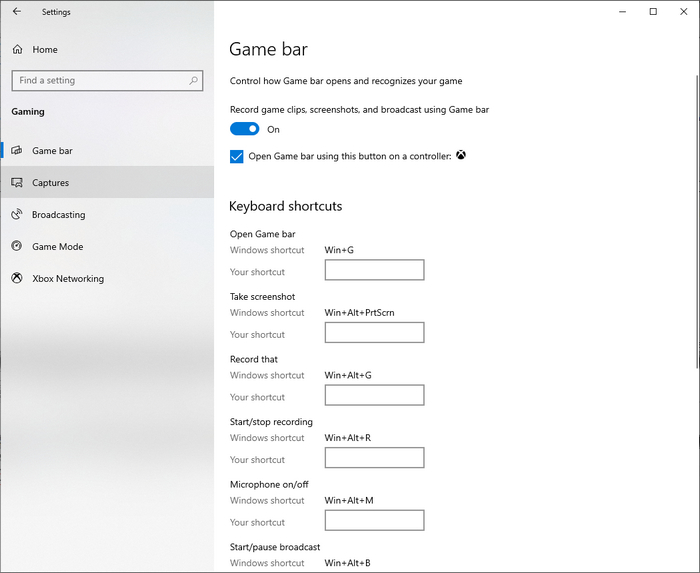
You can also customize recording settings, such as quality and duration, in the Captures tab under Gaming.
Step 2: Start recording game clip.
Once your settings are configured, you're ready to start recording. Launch the game you want to capture and press Windows + G to open the Game Bar overlay. To begin recording, click the circular camera icon or press Windows + Alt + R.
Step 3: Stop recording.
After 30 seconds, 5 minutes, or your desired length, press Windows + Alt + R again or click the recording button to stop.
Step 4: Access your clip.
After recording, a notification will appear, showing where your clip is saved. You can click the notification to view the clip directly or find it in the Videos > Captures folder on your PC.
How to Record the Last 30 Seconds or 5 Minutes of Gameplay with Xbox Game Bar
To capture the last 30 seconds or 5 minutes of gameplay on your PC using Xbox Game Bar, you need to enable Background Recording and set your preferred recording duration. Here's a step-by-step guide:
Step 1: Enable Background Recording
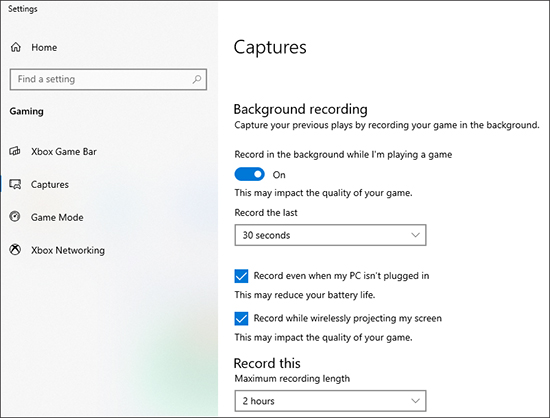
On Windows 10:
- Go to Start > Settings > Gaming > Captures.
- Under Background recording, toggle on Record in the background while I'm playing a game.
- Choose your preferred duration from the dropdown menu under Record the last, selecting 30 seconds, 5 minutes, or any other available option.
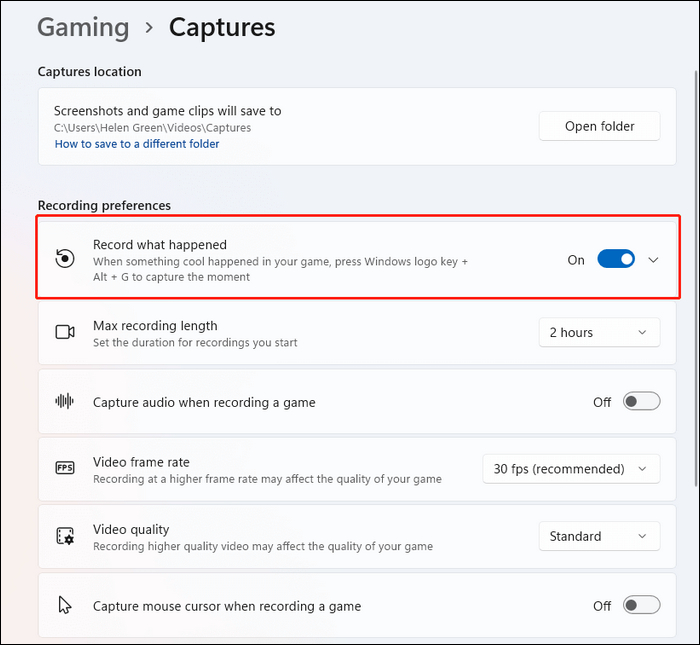
On Windows 11:
- Open Start and go to Settings.
- Under Gaming, select Captures.
- Ensure Record what happened is set to On.
- Use the Record the last dropdown menu to select your desired recording duration, such as 30 seconds or 5 minutes.
Step 2: Start Clipping
When you want to save a clip, press Windows Key + Alt + G. This will automatically save the last 30 seconds or 5 minutes of your gameplay, depending on your settings.
Note: Enabling Background Recording may impact game performance. If you experience any lag or slowdowns, consider reducing the recording duration.
Method 3: How to Clip on PC with GeForce Experience
If you have an NVIDIA-supported graphics card, you can make use of GeForce Experience to clip on PC.
GeForce Experience's ShadowPlay (now Share Overlay) feature is perfect for capturing those incredible in-game moments with ease. With its DVR-style Instant Replay mode, ShadowPlay continuously records your gameplay in the background, allowing you to instantly save the last 30 seconds with a simple hotkey. Whether you just pulled off an amazing stunt or scored a critical win, you can quickly save or share your clip directly to platforms like YouTube or Facebook.
Beyond instant replays, ShadowPlay also functions as a full-fledged recording tool, letting you manually capture gameplay for as long as you need—up to stunning 8K HDR at 30 frames per second or 4K HDR at 60 frames per second. Since ShadowPlay is hardware accelerated, it runs seamlessly in the background, ensuring high-quality recordings without impacting your game’s performance.
Note that NVIDIA ShadowPlay supports specific games only. To see which games are compatible, open the GeForce Experience app and check the Home tab.
Below, we'll guide you through the steps to efficiently clip your gameplay using GeForce Experience.
Step 1: Download and install GeForce Experience app from NVIDIA's official website.
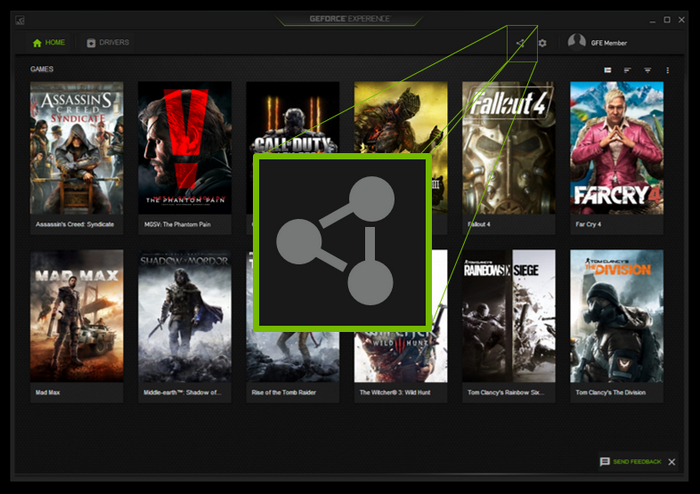
Step 2: Open GeForce Experience, click the share icon to access SShadowPlay which has been upgraded to the even-better Share Overlay UI.
Step 3: Start recording.
To record the last x seconds/minutes of gameplay, click the "Instant Replay" button (circular arrow) in the overlay or use the shortcut Alt + Shift + F10. With Instant Replay, you can save up to 20 minutes of gameplay without having to manually start or stop recording. For longer recordings, click the "Record" button (circle with a dot in the center) or use the shortcut Alt+F9.
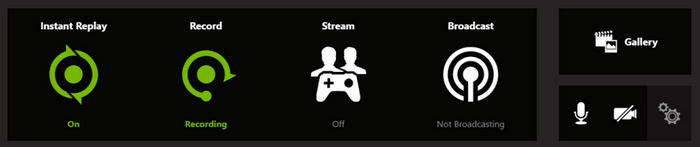
Step 4: To stop recording, click the "Stop Recording" button (square) in the overlay.
Step 5: Find your recordings by clicking the "Gallery" button in the GeForce Experience overlay and selecting "Videos".
Method 4: How to Clip on PC with Medal.tv
Medal.tv is an easy-to-use tool for recording and clipping your gameplay on PC. With features like Clip Mode and Full Session Recording, Medal.tv automatically captures your game sessions, allowing you to save and share your favorite moments effortlessly.
Medal.tv supports thousands of games right out of the box. Simply launch your game, and Medal will start recording as soon as it detects the game running. If you're unsure whether your game is supported, you can check the full list on Medal.tv or use the search bar to find your game. For unsupported games, you can manually add them to start clipping immediately.
Here's a step-by-step guide on how to clip on PC using Medal.tv:
Step 1: Download Medal.tv from the official website, install it on your PC, and launch the application.
Step 2: Launch your game. Once your game is launched, Medal will automatically detect it and display the game in your Online Activity section at the top left corner of the Title bar.
Step 3: Start clipping. When your game is detected, press F8 (the default hotkey for clipping) to capture a clip. With just a tap, you can save the last 15, 30, 60, or 120 seconds, or even 5 or 10 minutes of gameplay, depending on your settings.

Tips:
- The default key for clipping is F8, but you can change this in Settings > Hotkeys.
- In Clip Mode, only the length of the selected clip is saved. For example, if you set your clip length to 30 seconds, only the past 30 seconds of gameplay will be stored.
- To record a regular video, press and hold the hotkey (default F8) for more than 1 second. Press and hold it again to stop the recording and switch back to Clip Mode.
How to Screen Record with Medal.tv
Medal.tv also allows you to record your entire screen, making it ideal for capturing not only gameplay but also other PC activities. Follow these steps to screen record.
Step 1: Turn on the "Record" feature, and if prompted, grant permission to Medal.tv.
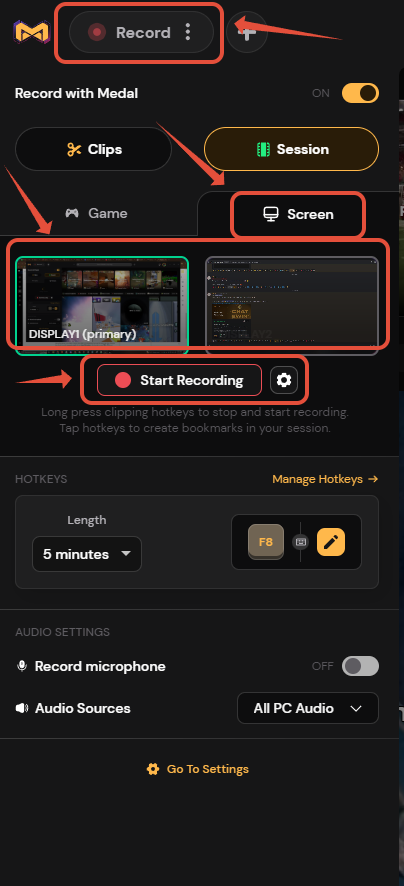
Step 2: If you have multiple displays, choose which screen you want to record.
Step 3: Assign your preferred hotkey for starting and stopping the screen recording.
Step 4: Press the hotkey to begin recording, and press it again to stop. Your recordings will automatically be saved to your Medal library.
Tips:
- Clips and sessions created through screen recording cannot be published.
- Even when Medal’s recording feature is disabled, it will still recognize your game and show that you’re playing, but no gameplay will be captured. To completely stop Medal from recording, head to the settings menu and switch off the “Record with Medal” option. This will pause all recording functions until you choose to reactivate it.
Default Hotkeys for Clipping on PC
Each clipping tool comes with its own set of default shortcuts, allowing you to start, stop, or adjust recordings on the fly. Below is a quick reference table outlining the key combinations for Winxvideo AI, Xbox Game Bar, GeForce Experience, and Medal.tv, so you can easily find the hotkeys that best suit your needs.
| Winxvideo AI | Xbox Game Bar | GeForce Experience | Medal.TV |
|---|---|---|---|
| Stop recording: Shift + Ctrl + ALT + S Paint tools: CTRL+ALT+SHIFT+T |
Open Game Bar: Windows + G
Start/stop recording: Windows + Alt + R Open Windows settings: Windows + I Record that: Windows+ Alt+G |
Open/close the in-game overlay: Alt + Z
Start/stop manual recording: Alt + F9 Toggle instant replay: Alt + F10 |
Clip (last 15/30/60/120 seconds or last 5/10 minutes): F8 Long Press Recording (Starts/Stops): Hold F8 for over 1 second (Records everything until you hold it again) Bookmark (While Recording): Tap F8 while recording to create a bookmark within the clip for later reference. |
Compare the 4 Methods: Pros and Cons
Choosing the right clipping tool depends on your specific needs and setup. Below, we compare the four methods—Winxvideo AI, Xbox Game Bar, GeForce Experience, and Medal.tv—highlighting their key advantages and limitations to help you decide which one best suits your requirements.
| Method | Pros | Cons |
|---|---|---|
| Winxvideo AI | - High-quality recording - Versatile editing features - Built-in paint tools for annotations - Won't impact game performance - Support recording any screen activity - Also support recording webcam, PIP, and audio - Also convert, compress, edit, and download |
- can't record previously happened if you didn’t enable it. |
| Xbox Game Bar | - Pre-installed on Windows 10/11 PC - Easy to use with hotkeys - Can record last 30 seconds or 5 minutes |
- Limited recording length (no manual control) - Basic features, no editing tools - Background recording might impact game performance |
| GeForce Experience (ShadowPlay) | - Ideal for NVIDIA users - Captures high-quality gameplay (up to 8K HDR) - Instant replay mode for clipping the last moments (up to 20 minutes) |
- Requires NVIDIA graphics card - Only supports specific games - Limited editing features |
| Medal.tv | - Automatic game detection and recording - Customizable clip length (15/30/60/120 seconds, 5/10 minutes) |
- Default clip length might not be ideal for all situations - Limited editing features - Screen recordings cannot be published |
Conclusion
Clipping gameplay or screen activities on a PC has never been easier, thanks to versatile tools like Winxvideo AI, Xbox Game Bar, GeForce Experience, and Medal.tv. Each tool offers unique strengths—whether it's high-quality recording, ease of use, or customizable features—allowing you to capture your most exciting moments with ease. Winxvideo AI stands out for its advanced editing capabilities and minimal performance impact, making it a solid choice for both gamers and content creators. Meanwhile, Xbox Game Bar, GeForce Experience, and Medal.tv provide excellent options for quick, in-game recordings tailored to specific hardware setups.
Selecting the right tool depends on your needs, whether you’re looking for advanced editing, instant replay features, or simple, no-fuss recording. By understanding the pros and cons of each method, you can confidently choose the clipping tool that best fits your recording style, ensuring that every epic play, funny moment, or important screen activity is captured perfectly.
Remember, the quality of your clips often depends on your initial setup and recording method. Taking a moment to adjust settings and explore the unique features of each tool will help you achieve the best results. Whether you're sharing your gameplay with friends or creating content for a wider audience, the right tool will make all the difference in showcasing your skills and experiences.


