


How to Record Nintendo Switch Gameplay: A Comprehensive Guide
 Mike Rule
Updated on
Capturing your Nintendo Switch gameplay is a great way to share your gaming experiences, create content, or simply save memorable moments. There are several methods available, each with its own advantages and considerations. Nintendo Switch has a built-in feature that allows you to record short clips of your gameplay. This is a convenient option for quick captures, but it has limitations in terms of recording length and customization. A capture card lets you to record your gameplay directly to your PC or laptop. This method offers the most flexibility and control, but it can be more expensive and requires additional hardware. In this guide, we'll explore each of these methods in detail, providing step-by-step instructions and tips to help you achieve the best results.
Also see: How to screen record on Switch
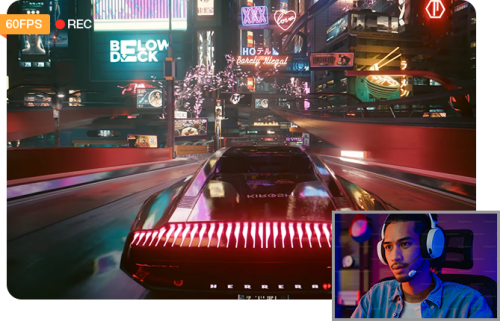
How to Record Switch Gameplay with No Limits
Tired of the limitations of OBS and Switch built-in tool for recording Nintendo Switch gameplay? Winxvideo AI offers a more comprehensive and flexible solution. Unlike OBS, which can be resource-intensive and sometimes struggle with capturing Switch gameplay smoothly, Winxvideo AI provides a dedicated, optimized experience.
Capture stunning Switch gameplay footage in high-definition 1080p or 4K resolution at 30 or 60 frames per second. Need more control over your Switch recordings? The free recording software's Chroma Key feature lets you easily remove backgrounds with just a click, ensuring your focus stays on the action. Export your recordings in popular formats like MP4, MKV, MOV, FLV, TS, and more, making it easy to share or edit your content.
 Free Download
 Free Download
Note: AI tools for Mac are currently unavailable, but they're coming soon. Stay tuned.
Step 1. Preparation Work
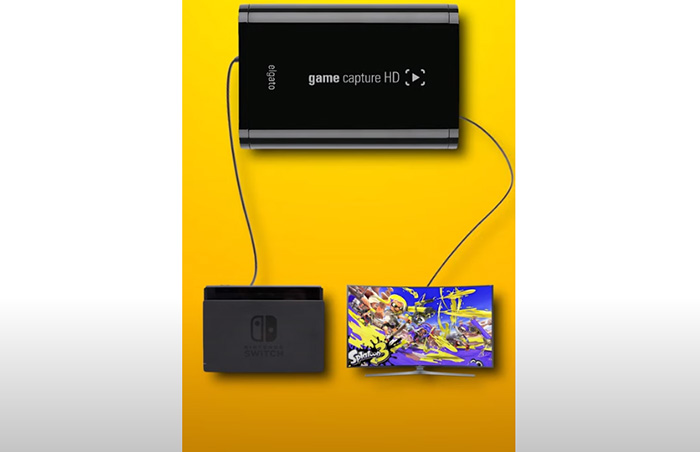
Ensure you have a capture card compatible with Nintendo Switch (e.g., Elgato Game Capture HD60 S). Prepare HDMI cables to connect the Switch, capture card, and your PC. Connect the HDMI output from the Nintendo Switch Dock to the HDMI input on your capture card. Use a USB cable to connect the capture card to your PC.
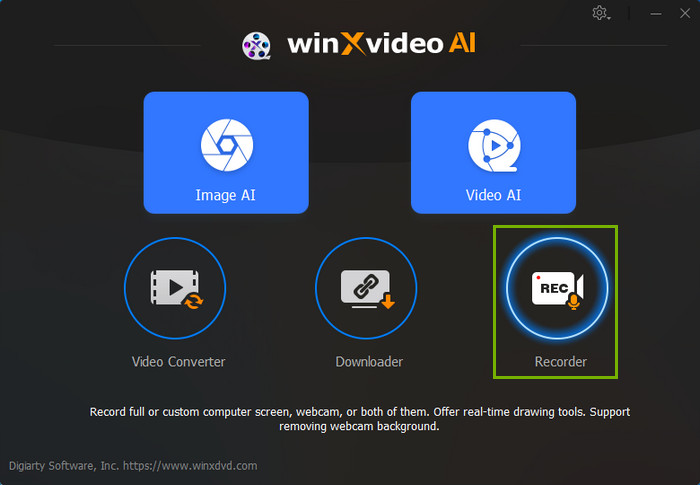
Step 2. Launch Winxvideo AI and Set Up Recorder
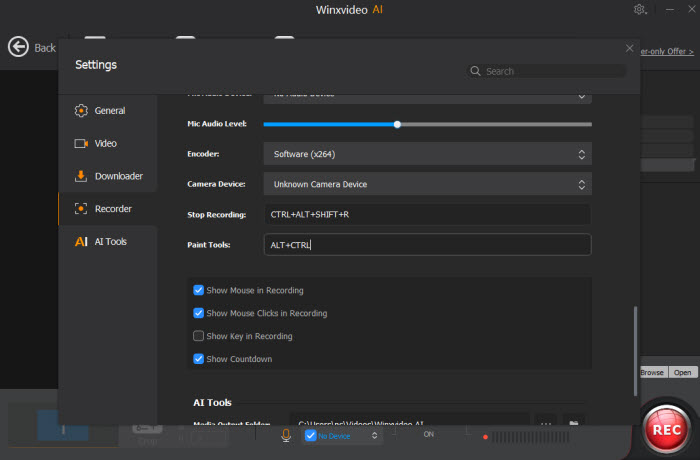
Begin by opening the Winxvideo AI application on your computer. Navigate to the "Recorder" section, where you can customize various settings to tailor the recording experience to your preferences. Adjust recording quality, format, audio levels, and even the shortcut for drawing. These options provide flexibility in creating high-quality gameplay footage that meets your specific needs.
Step 3. Choose Recording Mode and Area
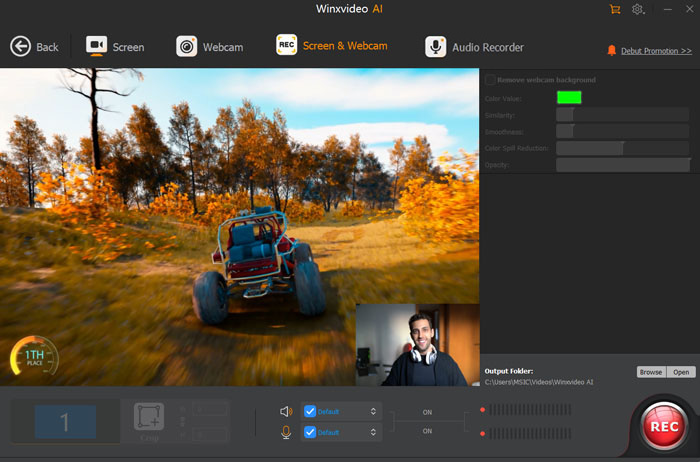
Once you've configured the settings, select the appropriate recording mode. If you want to capture only the game screen, choose "Screen." For a more immersive experience that includes your webcam footage, opt for "Screen & Webcam." Next, determine the desired recording area. You can choose to record the entire screen or focus on a specific region to highlight key gameplay moments.
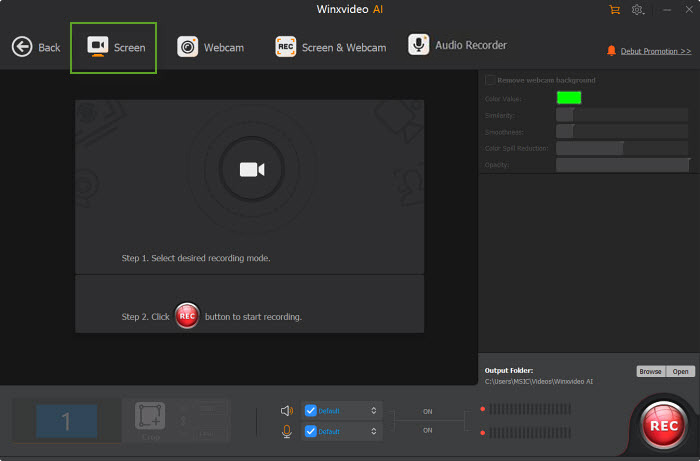
Step 4. Enable Audio
To ensure a complete and immersive recording, enable your preferred audio device(s). This allows you to capture game sounds, background music, or even your own commentary. By enabling audio, you create a more engaging and comprehensive gameplay experience for viewers.
Step 5. Start and Stop Recording
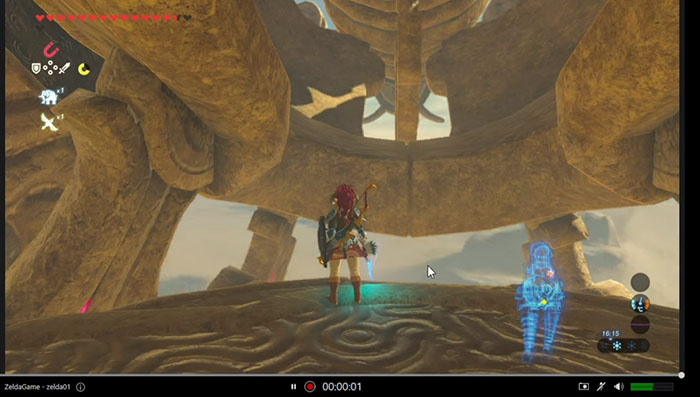
With your settings configured and audio enabled, you're ready to start recording. Click the "REC" button to begin capturing your Switch gameplay. The recording will continue until you click the "Stop" button. This allows you to precisely control the duration of your recordings and ensure you capture only the most exciting and relevant moments.
How to Record Switch Gameplay with Capture Card
Video capture is now supported on consoles running system menu version 4.0.0 or later. You can record gameplay video footage from the following titles:
- The Legend of Zelda: Breath of the Wild
- Mario Kart 8 Deluxe
- ARMS
- Splatoon 2
Step 1. Choose Your Capture Card
The capture card should have an HDMI input to connect to the Switch's output and an output to connect to your PC or recording device. Ensure your capture card is compatible with Nintendo Switch. Popular options include Elgato Game Capture HD60 S, AverMedia Live Gamer GC573, and Razer Ripsaw HD.
Step 2. Set up the Hardware
Connect the HDMI output from the Nintendo Switch Dock to the HDMI input on your capture card. Use a USB cable to connect the capture card to your PC.Connect the HDMI output from the capture card to your TV or monitor if you want to view the gameplay while recording.
Step 3. Install and Configure Capture Software
Download and install the capture software provided with your capture card or use a third-party option like OBS Studio. Configure the software to capture the input from your capture card. Adjust settings like resolution, bitrate, and audio input/output as needed.
Step 4. Start Recording
Start the game you want to record on your Nintendo Switch. Press the recording button in your capture software to start recording. Keep an eye on your recording software to ensure the gameplay is being captured correctly.
Step 5. End Recording and Save
Press the stop button in your capture software when you're finished recording. Save the recorded video file to your desired location.
How to Record Switch Gameplay with Nintendo Switch
By following the steps and tips for how to record Switch gameplay without capture card via Nintendo Switch’s built-in tool, you can easily capture and share your favorite Nintendo Switch gameplay moments.
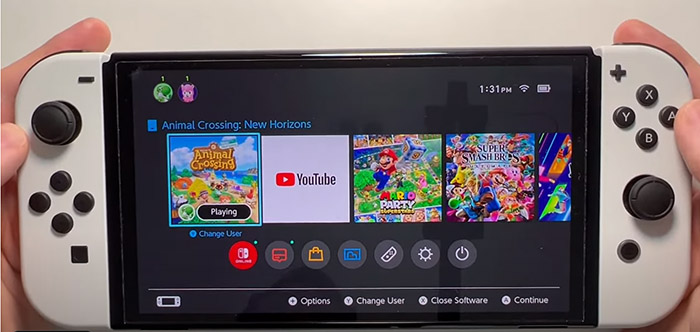
Step 1. Locate the Capture Button
The Capture Button is typically located on the left Joy-Con. It's the button with a circle and a square inside.
Tips: While the default recording length is 30 seconds, you can adjust this setting in the Switch's System Settings.
Step 2. Start Recording
To start recording, press and hold the Capture Button. Once you've captured the desired footage, release the button to stop recording. To capture a still image, press the Capture Button once.
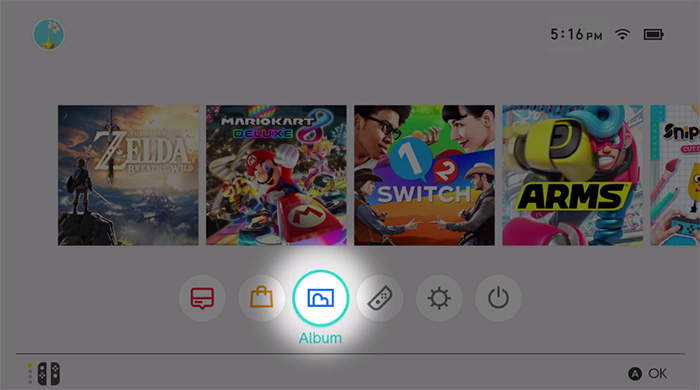
Step 3. View and Share Your Recordings
Press the Home Button to return to the home screen, then select the "Album" icon. Your recorded videos will be stored here. You can share your recordings directly to social media platforms like Facebook or Twitter, or edit them using a video editing app. Share your recordings on platforms like YouTube or Twitch to reach a wider audience.
How to Record Switch Gameplay with OBS
OBS (Open Broadcaster Software) is a popular tool for recording and streaming gameplay. By following these steps, you can easily set up OBS to capture your Nintendo Switch gameplay, including both video and audio.
Step 1. Set Up OBS
Launch Open Broadcaster Software (OBS) on your computer. In the "Scenes" window, click the "+" button to create a new scene for your gameplay.
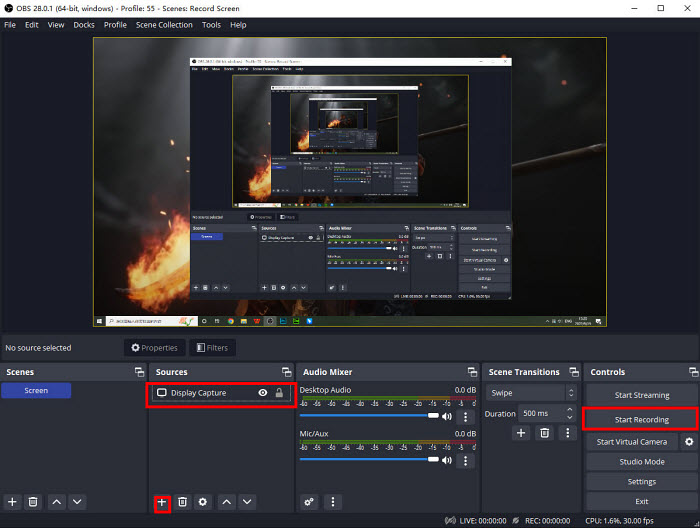
Step 2. Add Game Capture Source
Click the "+" button in the "Sources" window. Choose "Game Capture" from the list of available sources. Give the source a name and select "Capture specific window." From the dropdown list, choose the Nintendo Switch game you want to capture.
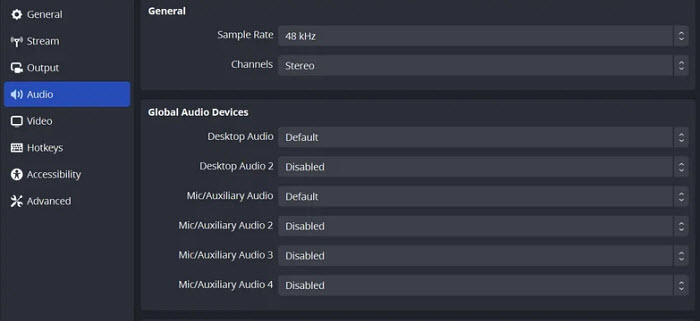
Step 3. Configure Audio Sources
- Desktop Audio: Go to "Settings" > "Audio" and enable "Desktop Audio" to capture the game's sound.
- Microphone: If you want to add commentary, select your microphone under "Mic/Auxiliary Audio."
Step 4. Adjust Audio and Video Settings
In the OBS mixer, ensure your audio levels are balanced. Go to "Settings" > "Video" to check the video resolution and frame rate. Adjust as needed. Choose a suitable output format (e.g., MP4, FLV) based on your needs.
Step 5. Start and Stop Recording
Before starting your gameplay, click "Start Recording" in the main OBS window. When your gaming session is over, click "Stop Recording" to save your video. If you want to stream your gameplay live, configure OBS to stream to platforms like Twitch or YouTube.
 Part 4. FAQs about How to Record Switch Gameplay
The built-in capture feature typically has a maximum recording length of 30 seconds. This limitation can be somewhat restrictive for capturing longer gameplay sequences or entire game sessions. To record longer clips, you may need to consider using a capture card or other external recording methods.
Yes, you can edit and trim the recorded videos using the Nintendo Switch's built-in editing tools. However, the editing options are limited compared to dedicated video editing software. For more advanced editing tasks, such as adding music, transitions, or text overlays, you may want to transfer your videos to a PC and use a professional editing tool.
Yes, you'll need a capture card to capture the video output from your Nintendo Switch and feed it into OBS. A capture card acts as a bridge between your console and your PC, allowing OBS to receive the video and audio signals.
Popular capture cards for Switch gameplay include Elgato Game Capture HD60 S, AverMedia Live Gamer GC573, and Razer Ripsaw HD. These cards offer good performance, compatibility, and a range of features for capturing and streaming gameplay.
Using a capture card offers several advantages over the built-in capture feature. You can record longer videos, adjust settings like resolution and frame rate, and capture additional audio sources such as microphone commentary or background music. Capture cards also provide more flexibility for editing and sharing your recordings.


