How to Record Webcam Video Windows 10 with Audio | Top 5 Ways
 Mike Rule
Updated on
Webcam recording has become an indispensable tool for communication, content creation, and personal expression. Whether you're looking to capture precious moments, create engaging content, or connect with colleagues across the globe, harnessing the power of webcam recording on Windows 10 opens a world of possibilities. With its user-friendly interface and versatile features, mastering the art of webcam recording has never been more accessible.
In this comprehensive guide, we'll share with you the top free ways to record a video with webcam on Windows 10 so as to unleash your creativity and share your story with the world effortlessly.
1. Windows Camera
Windows 10 has a built-in webcam recording software called Windows Camera. It has features like HDR mode and digital video stabilization to help you shoot smooth videos. You can also pause and resume recording while recording.
This utility offers a hassle-free way to capture videos directly from your webcam, allowing you to create content, capture memories or record educational videos without needing any additional software. Here's a step-by-step guide to help you navigate through the process
How to record yourself with webcam Windows Camera on Windows 10?
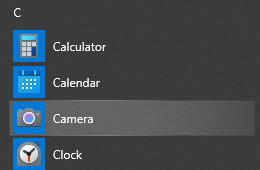
Step 1. Access the built-in Windows Camera App. Start by opening the Camera app on your Windows 10 system. You can do this by clicking on the Start menu, typing "Camera" into the search bar, and selecting the Camera app from the search results. The app is a native feature of Windows 10, pre-installed for your convenience.
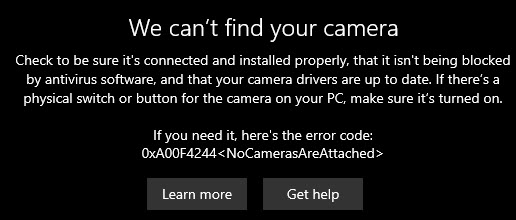
Note: Make sure that your internal camera is turned on or your external camera is correctly connected to your Windows 10 computer. Beside, check if your camera drivers are up to date. Or you will encounter the error code like below.
Step 2. Prepare for Recording: Once the Camera app is open, you'll see a live feed from your webcam. Before you start recording, take a moment to adjust your webcam angle and lighting to ensure the video quality is as good as possible. Remember, good lighting can significantly enhance the clarity and overall look of your video.
Step 3. Switch to Video Mode. By default, the Camera app may open in photo mode. To switch to video mode, look for a video camera icon or a switch on the screen, usually located on the right or bottom of the app window. Clicking on this will change the mode from photo to video.
Step 4. Start Recording. To begin recording your video, click on the red record button. This button is typically found in the center of the screen when in video mode. Once you press it, you'll notice a timer starting, indicating that the recording is in progress. Make sure you're ready to go as soon as you hit this button.
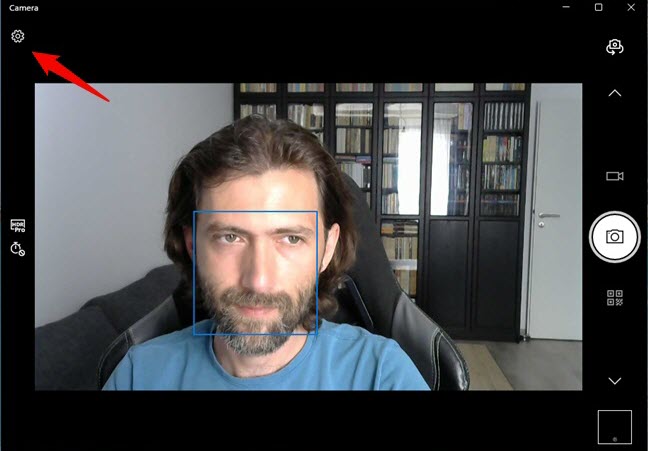
Step 5. End Recording. When you've finished recording, click the stop button (usually located in the same place as the record button). Your video will automatically be saved to your device.
Step 6. Locate Your Video. To find your recorded video, navigate to the "Camera Roll" folder on your Windows 10 machine. This is typically located in your "Pictures" folder, but you can also access it directly through the Camera app by clicking on the thumbnail of the last image or video captured. From here, you can view, edit, or share your newly created video.
2. Winxvideo AI
This full-fledged webcam video recorder for Windows 10 enables you to record beauty teaching videos, product demo videos, instructional videos, etc. up to 4K 2160p resolution with system or microphone audio. Meanwhile, it provides you with Draw feature to mark the highlights while recording and Chroma key to remove green background from webcam recording at 1 click.
Additionally, this top screen recorder software for Windows 10 is exceptional at recording a full screen, a part screen or capturing screen and your face at the same time to satisfy every recording need, including video calls, online conference, educational video, gameplay walkthrough, streaming video, etc.
 Free Download
 Free Download
Note: AI tools for Mac are currently unavailable, but they're coming soon. Stay tuned.
How to Record a Webcam Video on Windows 10 with Webcam Recording Software?
Step 1. Launch Winxvideo AI after downloading and installation and select Recorder on the home screen. On top of Recording feature, you can find AI video enhance, AI image enhance, video converter and downloader features available. Choose them to have a try (no time limit) if needed.
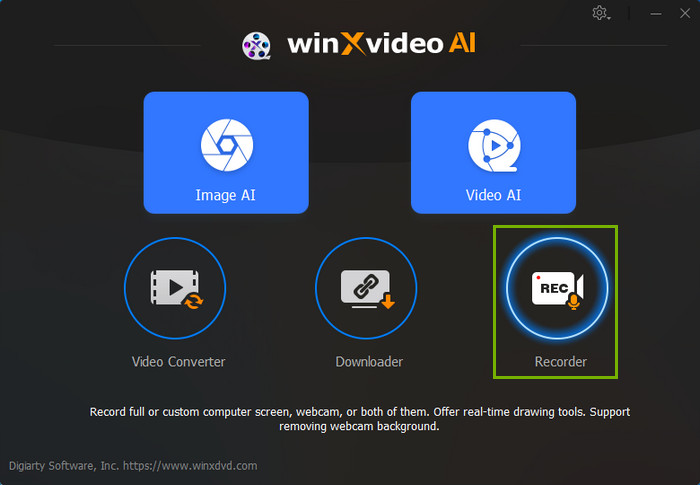
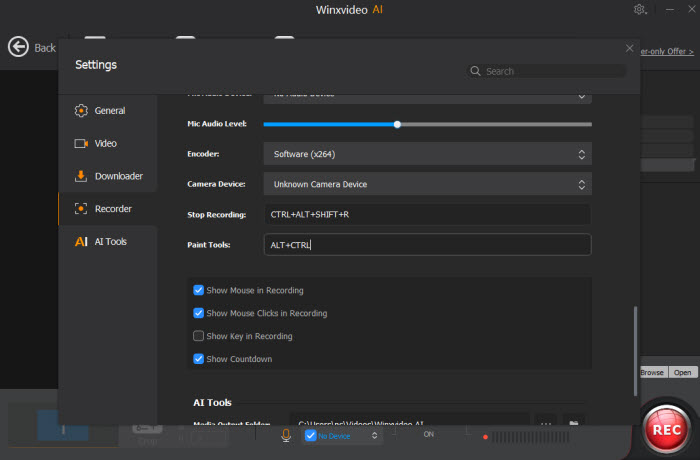
Note: tap the Setting icon on the top right corner of the UI and choose Recorder to adjust settings if needed. You're allowed to change recording quality, format, audio level/device, and know the shortcut for drawing (Ctrl+Alt+Shift+T).
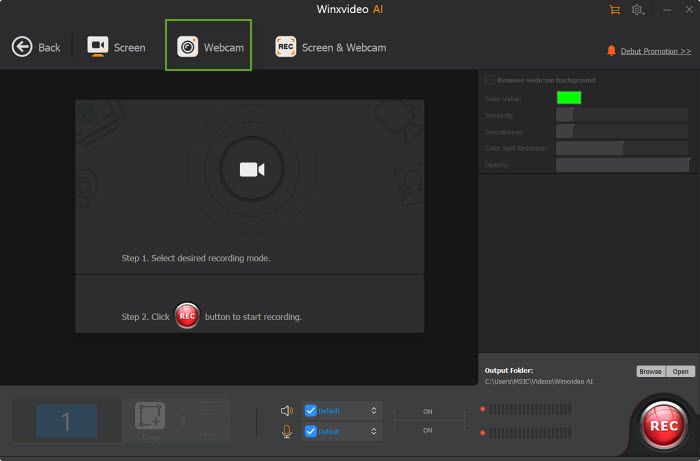
Step 2. Select Webcam recording at the top banner. Microphone is enabled by default, thus you can record facecam video with your voice.
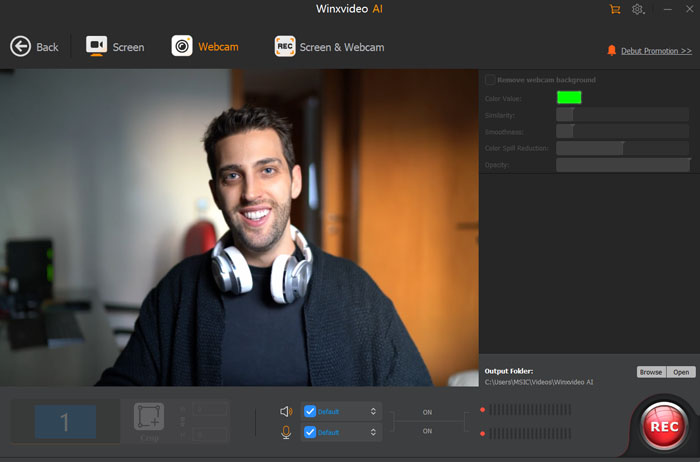
Step 3. Choose to record the entire screen or part of the screen at the lower-left corner.
Step 4. Click on the REC button to start a webcam video recording on Windows 10 PC. When everything is OK, click on the Stop button to end.
3. Clipchamp
Clipchamp is not just a webcam recorder; it's a feature-rich video editing suite. It includes a variety of features that cater to the needs of both casual users and content creators.
It gives you access to its webcam recording feature to record a quick video, a vlog video, a Skype video call or a tutorial video to attract more views or share on SNS. After webcam recording on Windows 10, this free online video recorder also addresses your necessities in video editing, including trimming, cutting, splitting, and merging video clips. Adding text overlays, titles, and credits is straightforward, with various customization options available, as well.
Notwithstanding Clipchamp offers a free tier, it's worth noting that access to some of its more advanced features and assets requires a subscription. Meanwhile, as a free web-based video recorder, Clipchamp's performance is highly dependent on your internet connection and computer's capabilities. Exit unnecessary programs while recording a webcam video online.
How to Free Online Record a Video with Webcam on Windows 10
Step 1. Head over to Clipchamp website and create an account. Or you can log into via your Microsoft account or Google account. It's free for basic stuff.
Once you're logged in, move your mouse to "Features" at the top menu to expand its hidden list > click "Camera Recorder" under Features to enter its online webcam recorder webpage. Hit "Capture a webcam video".
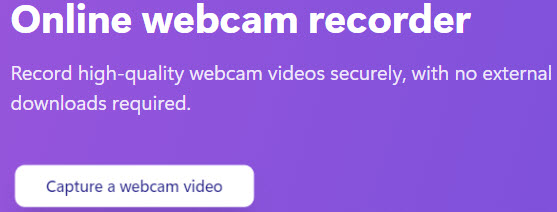
Step 2. New Project or Open Existing. Click the big purple "Create a Video" button in the center to start a fresh new project or find your existing project in your projects list on the left and click on it to open it up. Afterwards, tap "Record & Create" > opt for "Camera" on the newly pop-up Clipchamp recording & editing window.
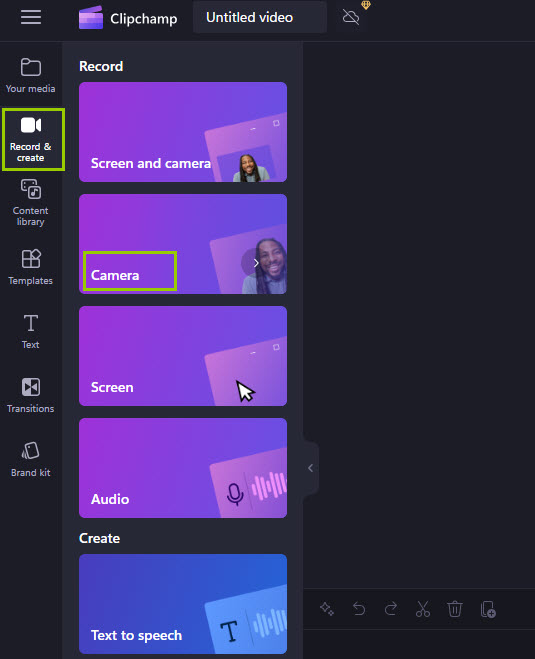
Step 3. Enable your camera and microphone grounded on the prompts it shows up. Click Allow to continue.
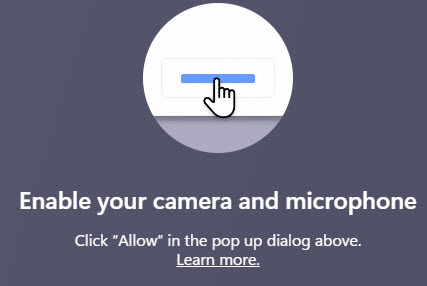
Step 4. Permission to record. The first time you use the webcam recorder, Clipchamp might ask you to allow access to your camera and microphone. Just click "Allow" to authorize it to access to your camera and microphone so Clipchamp can capture your video with a facecam.
Step 5. Preview. Now you're supposed to see yourself on the screen through your webcam. This is your chance to check if everything looks good – lighting, environment, even personal appearance.
Step 6. Start recording. Click the big red record button in the center. Clipchamp will give you a short 3-second countdown before it starts recording. So take a deep breath and deliver that message to the world (or at least your viewers)!

Step 7. Click the square red button in the center to stop recording your webcam recording when you want to end.
Note: after recording, Clipchamp will auto add your webcam recording project to the editing timeline, where you can trim, add text, background music, split video, etc. Meanwhile, the free version of Clipchamp webcam recordings have a 30-minute limit. If you need to record something longer, you can just create multiple recordings and merge them into one later.
4. Webcam.io
Webcam.io emerges as a streamlined and user-friendly online tool dedicated to webcam recording without the frills of advanced editing features. This focus on core functionality makes it an attractive option for users with specific needs, such as creating quick video messages, recording a webinar, conducting video interviews, or generating content for social media platforms that don't require heavy post-production work.
Another major perk of Webcam.io is its free service. This removes any financial barrier, making it perfect for anyone who needs a simple webcam recording tool. Whether you're a student or a professional, Webcam.io helps you capture videos without additional investment. Plus, the convenient direct download feature lets you save your recordings right after, ensuring they're readily available for editing, sharing, or whatever you need them for.
How to Free Online Capture a Webcam Video with Webcam.io
Step 1. Fire up your favorite browser on your Windows 10 PC. The widely used browsers like Chrome, Firefox or Edge are all accepted. Just head over to webcam.io in the address bar and hit enter. You need to register to this online webcam recorder and log in first.

Step 2. Webcam.io will ask you to allow access to your webcam and microphone. Give it your permission. It's not some creepy stalker site (although, maybe double-check your webcam isn't already spying on you – just sayin'). Click "Allow" so webcam.io can capture your facecam video on Windows 10 PC.
Step 3. Preview. Now you can see your face and it's chance to adjust your lighting, background, your hair, makeup, etc.
Step 4. Hit that big red record button to start recording a webcam video. Webcam.io will show you a timer counting up your recording time. When the countdown is over, the recording started.
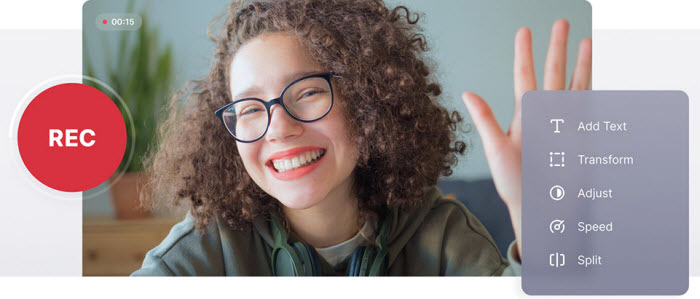
Step 5. Once you've stopped recording, webcam.io gives you a couple of options. You can download your video to your computer or share it with the world using a handy link.
Note: Similar to the above-mentioned online free webcam video recorder Clipchamp, this free online wecam recording service also puts a limit on recording time, and it's even shorter - only 14 minutes. If you care about this, switch to other webcam recording software we mentioned before.
5. Bandicam
Bandicam stands out in the realm of facecam video recording software, offering a robust suite of features that both professional content creators and casual users adore. It provides you with the ability to record high-quality webcam videos, and capture video footages of their screen, gameplay, business conference, video calls, streaming videos. One of its big draws is the high compression ratio, which ensures that the recorded videos are of a manageable size without compromising on quality. This is particularly beneficial for users who need to share or upload their videos online.
Additionally, Bandicam supports recording at high frame rates and resolutions, up to 4K UHD, making it a favorite among gamers and professionals creating high-resolution tutorials or presentations. Its real-time Draw feature is a valuable tool for you to highlight key points or annotate your videos dynamically while webcam recording.
While Bandicam isn't free, it offers a one-time purchase option, which can be more cost-effective than subscriptions for those who plan to use it long-term. To help you decide, Bandicam provides a free version with some limitations, like watermarks on recordings and a 10-minute cap per video. This lets you try before you buy and see if it meets your needs.
How to Record Your Webcam with Audio using Bandicam
Step 1. Head over to Bandicam's website, download and install Bandicam on your Windows 10 PC. Be wary of any unwanted extras they might try to bundle in.
Step 2. Choose Bandicam free version or paid version for webcam recording on Windows 10. As we mentioned before, the free version only gives you 10 minutes for recording and watermark attached. In most cases, you're suggested to upgrade to its lifetime version without those annoying limits.
Step 3. Opt for "Device Recording" (a webcam icon) on the main screen after launch. Select your webcam from the dropdown menu. You can also choose to record audio from your microphone here if you want your voice included. Meanwhile, select the recording area you want, full screen or partial screen.
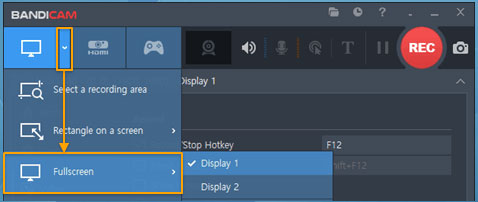
Step 4. Back in the main Bandicam window, hit the big red "REC" button. You'll get a short countdown before Bandicam starts recording your webcam video. Now's your time to shine (or at least deliver that killer presentation).
Step 5. Hit the red "REC" button again to stop webcam video recording. Bandicam will save your recording video as an AVI file by default. You can change the output format in the settings if needed.
To sum up, there are multiple ways to record yourself on webcam on Windows 10, from free and simple options to feature-rich software. For a quick capture, the built-in Camera app gets the job done. Clipchamp offers a user-friendly browser-based webcam recorder within its video editing platform. For more control, consider top feature-rich screen recording software like Winxvideo AI. If you prefer a web-based solution without downloads, webcam.io lets you record directly in your browser. Finally, Bandicam provides a powerful option with a free trial, but comes with limitations in the free version. Ultimately, the best choice depends on your needs and preferences, whether it's a simple webcam recording or a feature-packed production.


