How to Use Windows 11 Video Editor Photos App to Edit Video?
Windows Movie Maker might appear first on your radar once you begin searching for free video editor for Windows 11 or Windows 10. Yet, different strokes for different folks. Windows Movie Maker is not so user-friendly as you imagine. Windows Movie Maker not working, WMM won't import MP4 MOV files, WMM not showing video, and more problems are peaking over the horizon now and then.
If you're unbearable to those troubles caused by WMM during editing video or vlog, keep in mind that you're always have more than one option. Windows 11 built-in video editor Photos app also features a wide selection of bare bone video editing features, which is enough to most users for customizing MOV MKV MP4 video footages on Windows 11/10/8/7.
Spend 2-3 minutes here to read the detailed guide if you're interested in using Photos app to trim, rotate, split, merge videos, change video speed, add text/motion effects/video filters to video clip, etc.
Table of Contents
Part 1. How to Use Windows 11's Hidden Video Editor Photos App to Edit Videos
- #1. Trim Video
- #2. Rotate Video
- #3. Split Video
- #4. Merge Videos
- #5. Change Video Speed
- #6. Add Text to Video
- #7. Add Motion Effects/Video Filters
Part 2. Windows 11 Photos App Crashing/Not Working? Try Best Alternative
Part 1. How to Use Windows 11's Hidden Video Editor Photos App to Edit Videos
First things first. Before you go, create a new video project in Photos app. To do so, launch Photos app on your Windows 11 or Win 10 from the Start Menu, taskbar, or the app library of your Windows PC. Then continue:
- Choose your desired pictures by clicking on the seperate checkboxes displayed on each picture thumbnail.
- Hit "New video" button > click "New video project" option from the drop-down list. Alternatively, hit "Video Editor" tab if you just need to open an existing video file or image.
- Tap the grey button "New video project" showing up on the screen > name your video > give "OK" a hit.
- Click "Add" button under the 'Project Library' panel > select "From this PC" from the menu > import videos to Photos from local storage.
- Still under Project Library panel, opt for "Place in storyboard" option, then the storyboard screen will display your imported video clips or images. Now, let's start to free edit video in Windows 11 video editor Photos app:
#1. Trim Video
Trimming or cutting a video refers to remove part of a video to create a clip out of a video. To trim a video with Windows 11 Video Editor (hidden in Photos app), drag your video from the project library to the bottom edit section and then click Trim option.

Step 1. Drag the slider to where you want to cut the video on the trim section. You're at the full control over your video length. The blue portion of the video is your resulting video duration after trimming. Hit Done to trim your video footage.
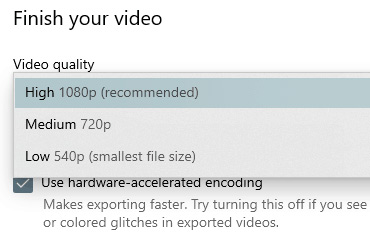
Step 2. Click Finish video button after trimming is done > select the video quality, 1080p, 720p, or lower > hit Export to begin exporting video from Photos to your Windows 11. The process may take awhile depending on the size of the video clip.
#2. Rotate Video
Sometimes your video resource just gets upside down and needs to be flipped or rotated 90 degrees or 180 degrees. Thus, rotating video is a must step.
Step 1. Tap "Rotate" button on the video editing bar (next to trash icon).

Step 2. Hit this button one, two or three times based on your need. Each hit will rotate your video 90 degrees. Your upside down video will become normal with clicking twice.
Note: Windows Photos app won't always rotate MP4 or other video flawlessly and the video editing features are limited compared to othre professional tools, you can resort to other MP4 rotators for help.
#3. Split Video
Instead of cutting off clips from video, another way to shorten video length is to split video. And Windows 11's Video Editor in Photos app also lets you divide video into segments with nary a part discarded.
Step 1. Tap "Split" button on storyboard panel (next to Trim icon).
Step 2. Move the blue slider to the key point that you wanna divide video. Only two segments are achieved for each splitting process. The right pane will display the duration of clip one and two when they are split.
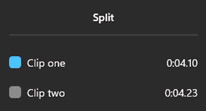
Note: repeat the split process if you wanna more than 2 segments. For instance, you can split a 10-min video into 1 min and 9 min, then split the 9min video into 3min and 6min, and repeat the process until your desired segments are splitted out from the whole video.
#4. Merge Videos
You have the demand to split video to clips and also increase the likelihood of merging videos into one, esp. the segment is not what you need after video splitting. The process of combining videos into one is damn simple in Photos app. Check below:
Step 1. Load all the videos you want to merge to the project library. Drag-and-drop them to the editing section one by one and in the order you want the clips to play.

Step 2. Choose Finish video button at the uppper right corner of the home screen to export the combined video. Choose a video quality you favor and click on Export. The merge process would cost you several seconds or minutes based on the clips length and quantity.
#5. Change Video Speed
Video normal speed can't present the visual effects of time lapse or slow motion. That's the reason why video speed feature comes.
Step 1. Click "Speed" button on the user interface after you load video into Photos app.
Step 2. Freely move the slider bar from left to right (Slow - Normal -Fast). You can slow down video speed to 0.02x (slowest) or speed up video up to 64x (max speed) using this Windows 11's hidden video editor.

Note: Windows 11 Photos app also features video cropping, you can follow the guide and learn how to crop a video in Windows 11 here >>
#6. Add Text to Video
Video overlay text can polish your video footage to a higher level. For instance, it can help you explain the video picture to your audience or make video more interesting and delightful with some amusing & novel text thereon. To add overlay text to video, check instructions:
Step 1. Tap "Text" button on the storyboard panel (next to Split icon).
Step 2. Type the content in the provided text box.
Step 3. Choose the text style and layout from the displayed list on the right-hand sidebar.
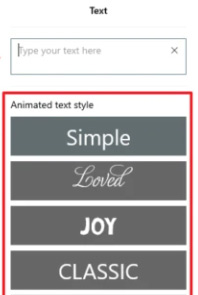
Step 4. Drag the pointers (on the bottom of the UI) to decide the show time for your overlay text. Hit "Done" button after every single setting is adjusted well.
#7. Add Motion Effects/Video Filters
Premiere users have After Effects to optimize their video footages while Windows 11 video editor Photos users also have special effects (though just limited basic effects). If you don't ask too much about special effects, give Photos app a try concerning its effects and filters.
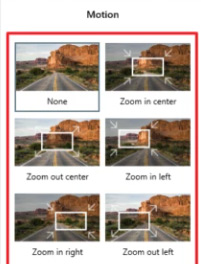
Tap "Motion" button and make your choice from the display options: Zoom in center, zoom out center, zoom in left/right, zoom out left/right, pan left/right, tilt up, tilt down. Move the select box to the specific frame of your whole video picture. Tap "Done" to apply the selected motion effect to your video. The same also applies to 3D Effects.
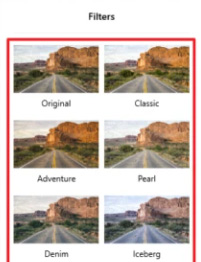
To add filters, tap "Filters" on the bar and then the built-in filters show up on the sidebar, including classic, adventure, pearl, iceberg, energy, joy, inky, pixel, etc. Opt for you prefer and tap "Done" button to confirm and apply filter to video.
Part 2. Windows 11 Photos App Crashing/Not Working? Try Best Alternative
Generally speaking, Windows 11 video editor Photos app is great to most users with basic editing needs. Yet, it still drives you stir-crazy when Photos app is crashing, black screen, not importing video or not working during editing. You don't have to stick with it if the solutions you find still don't get those Photos app problems fixed. Instead, edit videos using Windows 11 Photos app alternative.
Winxvideo AI (100% free and safe) is worth your trial. It's a strong performer in video trimming, cropping, expanding, rotating, audio volume, adding subtitles/watermark, etc. You can also use it to free download 4K stock video from Instagram, Facebook, YouTube, Vimeo, Dailymotion, etc. 1000+ sites to enrich your video resource.
What's better, WinX features with advanced GPU hardware acceleration to help you edit the compute-intensive 4K HEVC video shot by iPhone 13/12/Pro Max, GoPro, Drone, etc. without app crashing, black screen, not working problem, CPU 90% usage or CPU overheat troubles.
How to Use Photos App Alternative to Free Edit Video on Windows 11?
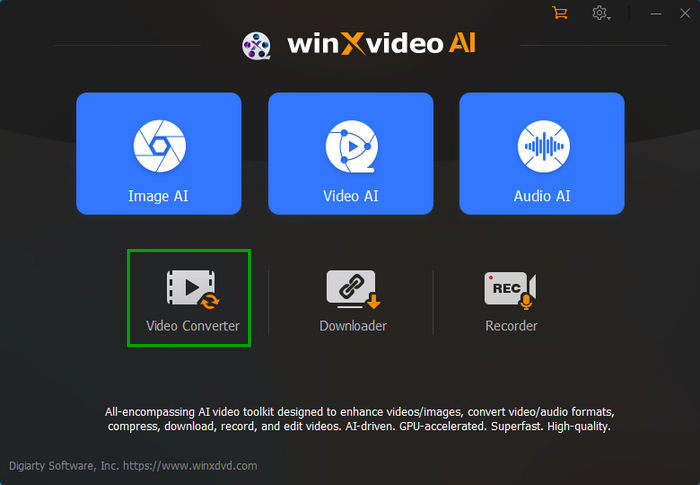
Step 1. Install the free video editor.
After downloading, find the .exe file on the specified folder and disk, double click and install WinX free editor and converter following the wizard. Then launch it for free use.
Step 2. Load your video.
Click "+Video", browse to the location of the video and import your video resource from local storage drive. Bulk editing is available, too.
Step 3. Choose an output profile.
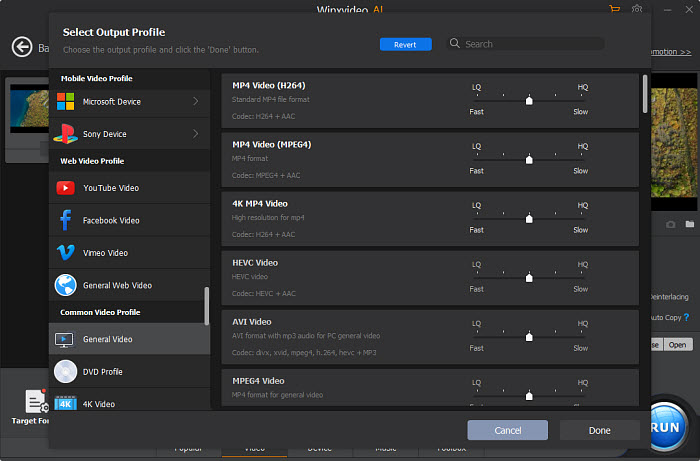
On the "Output Profile" window, choose an output video format according to your need, from PC (Mac) general profiles MP4, AVI, AVC, WMV, to Apple/Android/Microsoft/Sony devices or YouTube/Facebook/Vimeo web videos. After settling down, just click "OK".
Step 4. Edit Video MP4 MKV AVI.
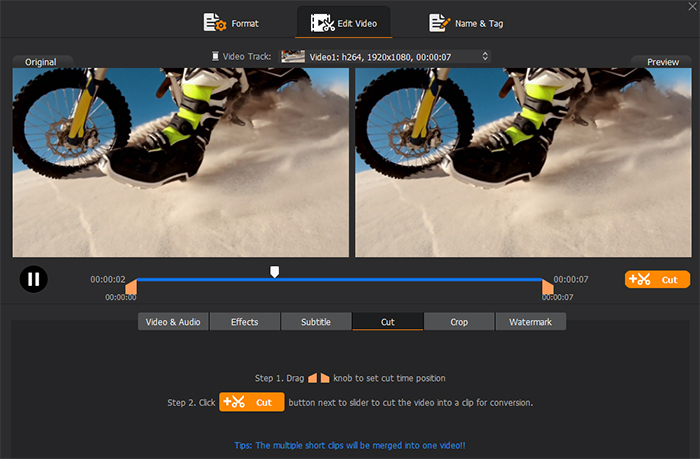
You're allow to trim, crop, merge, add subtitle and adjust video parameters to specialize your video file after you tap "Edit" (scissor-shaped icon) on the main interface. Then select the specific feature to customize your video footage of any resolution (4K/8K incl.).
![]() Merge videos
Merge videos
To join multiple video clips into a single one, tap Merge under the preview window of the best video joiner software.
 Cut/Trim videos
Activate Trim tab, and manually tick Enable Trim. Then, you can trim off the beginning and/or ending segments.
![]() Crop unwanted borders or other areas of a video
Crop unwanted borders or other areas of a video
Move to Crop & Expand tab, check Enable Crop, and then choose an option from the dropdown menu of Crop Original. Choosing Crop LetterBox will crop off the black bars around the image directly. Or directly drag the frame in the Preview window to applying MOV cropping feature.
![]() Add subtitle to video footage
Add subtitle to video footage
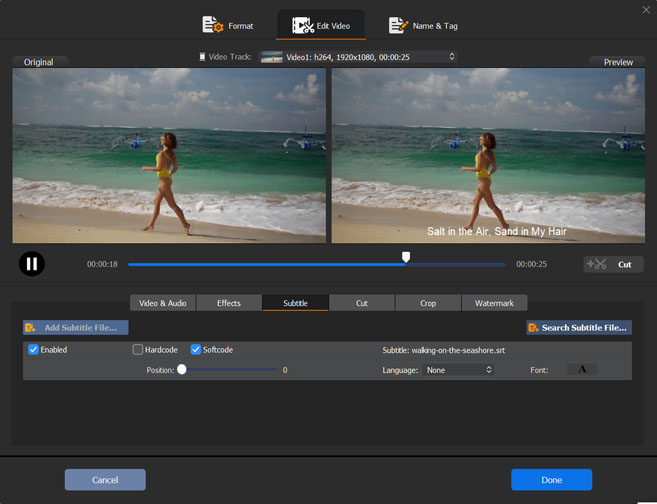
Move mouse to Subtitle > check Enable Subtitle > Extra > choose Add to open the .ass, .ssa or .srt external subtitle file you made by yourself or downloaded from online subtitle sites.
 Tweak video audio parameters
Click Settings icon and then you will be directed to a new panel where you can modify video/audio codec, frame rate, bit rate, sample rate, aspect ratio, resolution, etc. But if you're not a tech savvy guy, you'd better leave those parameters as default.
Step 4. Export your video.
If you have finished editing and settings, simply hit RUN button to export new files.
As its name implies, its bread and butter is video converting. Thus, you can use it to transcode your video at whatever codec or format since it supports up to 370+ input video codecs/formats. And you can convert video to MP4, MOV, MKV, H264, H265, AVI, WMV, WebM, MP3, AAC, FLAC, iPhone ringtone, etc. with 420+ profiles at GPU hardware accelerated speed (5X faster), no stucking, crashing, freezing, not working issues.


