


How to Fix Out-of-Focus Videos in Premiere Pro
 Mike Rule
Updated on
Have you ever spent hours filming a perfect shot, only to find it's blurry when you play it back? Out-of-focus videos can be a major disappointment, especially when you've invested time and effort into capturing the perfect shot. If you've found yourself searching for a solution, you're not alone. Reddit forums are filled with users asking how to fix blurry footage, and one of the most common answers is Adobe Premiere Pro. However, the answers from the community aren’t as detailed and organized as you expect.
In this article, we'll delve into the steps involved in using Premiere Pro to restore clarity to your out-of-focus videos, and we'll also explore the potential of AI-powered tools like Winxvideo AI as an alternative solution for those seeking quicker results.
Understanding the Problem: Why is Your Video Out of Focus?
Before diving into the solutions for fixing out-of-focus issue, it's essential to understand the root cause of the blurriness. Identifying the problem will help you choose the most appropriate approach to fix it.
- Incorrect Focus: This is the most common reason for out-of-focus videos. It happens when the camera's focus is not accurately set on the subject.
- Camera Shake: Movement during recording, especially handheld shots, can lead to blurry footage.
- Lens Issues: A dirty or damaged lens can significantly impact image quality.
- Compression Artifacts: Excessive video compression can introduce blurriness and other artifacts.
- Shallow Depth of Field: This occurs when only a specific part of the image is in focus, while the rest is blurry.
Fixing Out-of-Focus Videos in Premiere Pro
Premiere Pro offers a versatile toolkit to enhance the clarity and sharpness of your footage. From basic sharpening tools to advanced options like Unsharp Mask and Lumetri Color, you can refine the details of your video. However, it's important to note that while these tools can significantly improve mildly out-of-focus footage, they may not be a miracle cure for severely blurry videos. Excessive sharpening can also introduce unwanted noise and artifacts, so a delicate balance is essential.
Step-by-Step Guide: How to Make an Unfocused Video to Be Focused in Premiere Pro
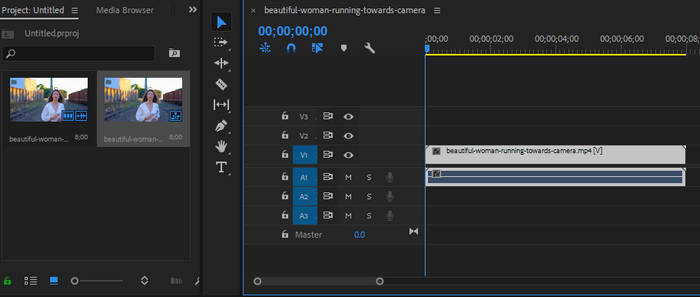
Step 1. Create a new project and import your out-of-focus footage
Open Premiere Pro and create a new project. Then begin by importing your out-of-focus video into your Premiere Pro project. Ensure the footage is accessible and organized for efficient editing. Drag and drop your footage to the Timeline menu. As bellow, you’ll see the video clip on it, which appears as a light gray bar. This gray bar controls where your clip fits into your overall project; where it stops, starts, and more.
Step 2. Analyze the footage Click the Up arrow on the keyboard to move the playhead to the first frame in the clip. Then press the Space to start playing the footage. Carefully examine the blurry areas of the video to determine the extent of the problem. Understanding the nature of the blurriness will guide your approach.
Step 3. Try the following methods to remove out-of-focus blurriness
Method 1: Stabilize the Footage
If camera shake is the culprit, applying stabilization can significantly improve image clarity. Premiere Pro's built-in Warp Stabilizer is a powerful tool for this purpose.
1. Open Effect controls, choose Video Effects, then find Wrap Stabilizer VFX under Distort column.
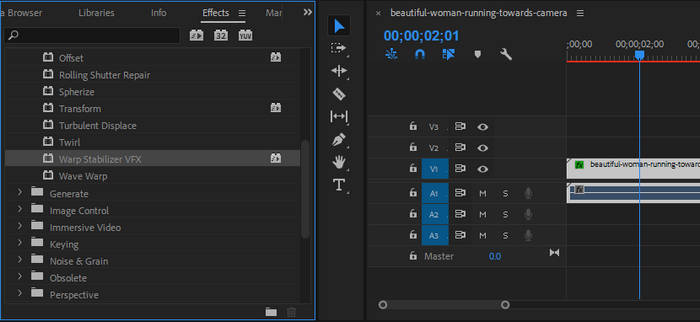
2. Drag and drop it to the clip on your timeline. It will start analyzing your footage automatically in the background.
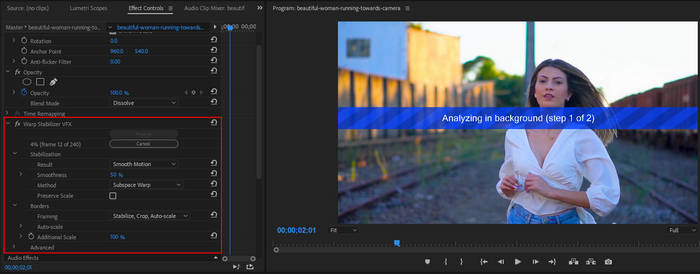
3. Experiment with different presets and settings to find the optimal stabilization level.
Method 2: Sharpen the Footage
For videos with mild blurriness, sharpening can enhance details. However, excessive sharpening can introduce noise and artifacts.
1. Still in the Effect section, selecting Video Effects > Blur & Sharpen > Sharpen. Drag and drop it to your video clip on the timeline that has out-of-focus issue.
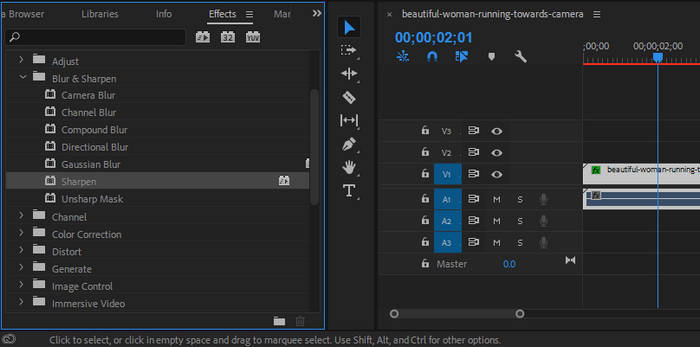
2. Adjust the "Amount" parameter carefully to avoid over-sharpening.

Method 3: Use the Unsharp Mask Effect
The Unsharp Mask effect provides more control over sharpening compared to the basic Sharpen effect. This is the ultimate way to see how to sharpen video in Premiere Pro. It’s an extremely powerful effect that you can modify to your exact needs.
1. Apply the Unsharp Mask effect from the Effect menu.
2. Adjust the "Radius" and "Amount" parameters to fine-tune the sharpening.
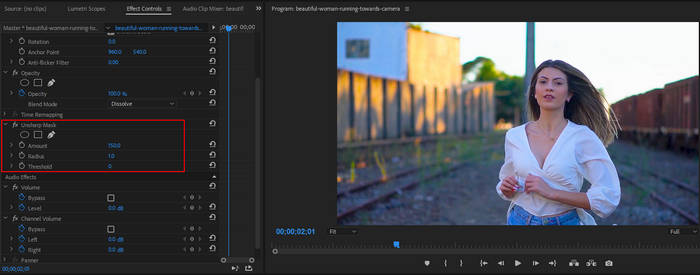
- Amount determines the intensity of the sharpening effect. Higher values increase contrast between pixels, providing a more pronounced sharpening effect. This is the primary control for most sharpening adjustments in Premiere Pro.
- Radius defines the area of pixels affected by the sharpening process. Use this setting cautiously as even slight adjustments can drastically alter the video's appearance. However, for severely blurred or hazy footage, carefully increasing the radius might help restore details.
- Threshold acts as a sensitivity control for the sharpening effect. It specifies the level of detail change required to trigger sharpening. By adjusting the threshold, you can fine-tune the application of sharpening to specific areas of the video.
Mastering the Amount, Radius, and Threshold sliders is essential for effective focus correction in Premiere Pro. The Amount slider is the primary tool for adjusting sharpness. For instance, increasing the Amount value from the default 50 to 150 in this video noticeably reduces blurriness while maintaining a natural look. Observe the changes in the Program Monitor to see how these adjustments impact the overall image quality.
By the way, you can also experiment with Other Sharpening Filters in Premiere Pro, such as "Fast Blur" and "Gaussian Blur," which can be used creatively to achieve different effects.
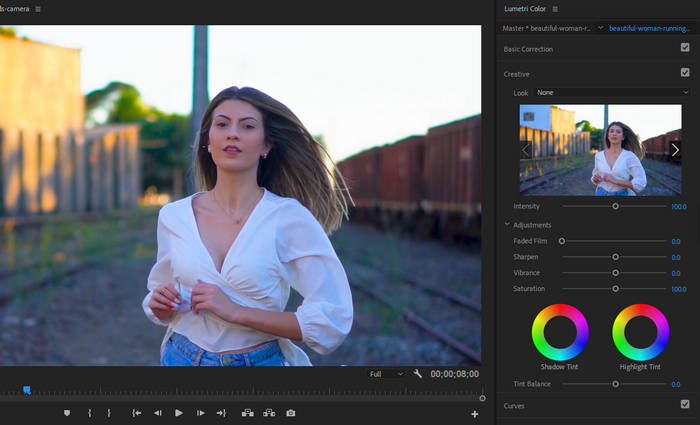
Method 4: Leverage the Lumetri Color Panel
The Lumetri Color panel is not just for color correction; it also includes tools for image enhancement. Apply the Lumetri Color effect to your video clip. The sharpen option also helps you correct slightly blurry videos when adjusting colors.
Method 5: Mask and Refine
If the blurriness is localized to specific areas, create masks to apply sharpening or other effects we've mentioned above selectively. This helps prevent unwanted changes to other parts of the video.
Of course, you can also use several methods at the same time, constantly adjust the parameters to achieve your satisfaction.
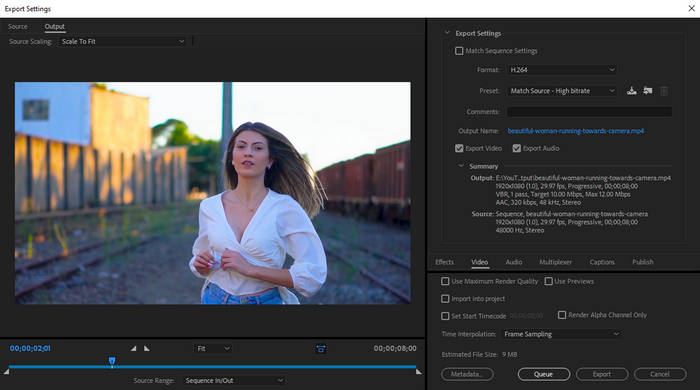
Step 4. Render and Export
Once you're satisfied with the results, render the video to preview the final output. Then, export the video through File > Export > Media. In the newly popped up window, set the video to your desired format and resolution, and tap Export button to save your fixed the blurry video.
Limitations of Premiere Pro
Premiere Pro excels at refining image quality, but it has limitations when tackling severe focus issues. Overzealous sharpening can introduce unwanted noise and visual distortions, diminishing the overall video quality. For footage with pronounced blurriness, consider exploring alternative methods or tools designed specifically for focus restoration.
Winxvideo AI: AI-Powered Alternative to Fix Out-of-Focus Blur
AI-powered video enhancement tools like Winxvideo AI offer a promising alternative to traditional video editing software. By harnessing the power of advanced algorithms, these tools offer a fresh approach to improving video quality. Unlike traditional video editors, Winxvideo AI can intelligently analyze and enhance various aspects of a video, including focus. It excels at identifying and correcting blurriness, often delivering results that surpass manual methods.
Key features of Winxvideo AI:
- Automatically detect and remove blur from your videos, as well as eliminate noise, and other video imperfections.
- Upscale videos by 2x, 3x, and 4x, or directly to HD or 4K with improved clarity and detail.
- Process multiple videos simultaneously to save your time greatly.
- Real-time preview allows you to see the results of your adjustments instantly.
- User-friendly interface, easy to use, even for beginners.
 Free Download
  Free Download
Winxvideo AI is for PC, while Macxvideo AI (from our MacXDVD brand) is for macOS.
Also see: how to sharpen a video
How to Use Winxvideo AI to Sharpen Videos That Are Out of Focus
Step 1. Download and Install Winxvideo AI
Begin by downloading Winxvideo AI on your computer. Once installed, launch the software and select the "Video AI" module.

Step 2. Import Your Out-of-focus Video(s)
Click the Add Video button or simply drag and drop your desired video files into the software. You can process multiple videos simultaneously for batch enhancement.
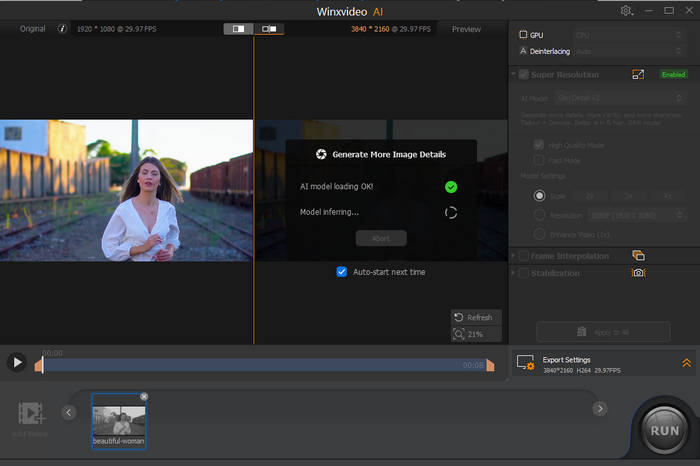
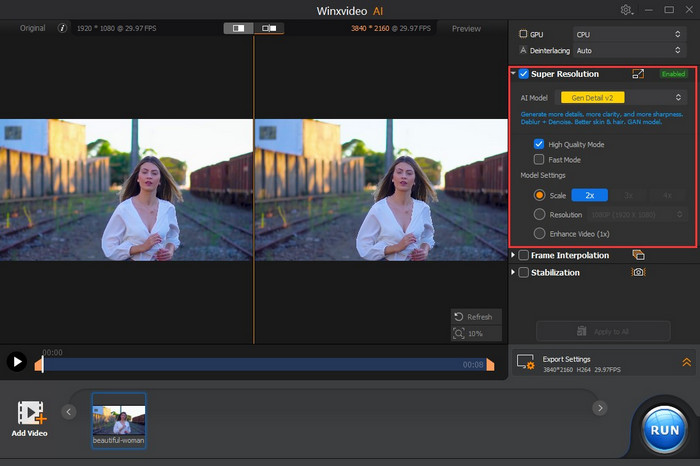
Step 3. Adjust Settings
Enable the Super Resolution feature and select the appropriate AI model based on your source footage. Usually, we choose Gen Detail v2 for more details.
Choose a scaling factor, by Scale, Resolution or Enhance Video (1x) to improve sharpness without upscaling. Winxvideo AI automatically analyzes and removes noise, blur, and artifacts during the video upscaling process.
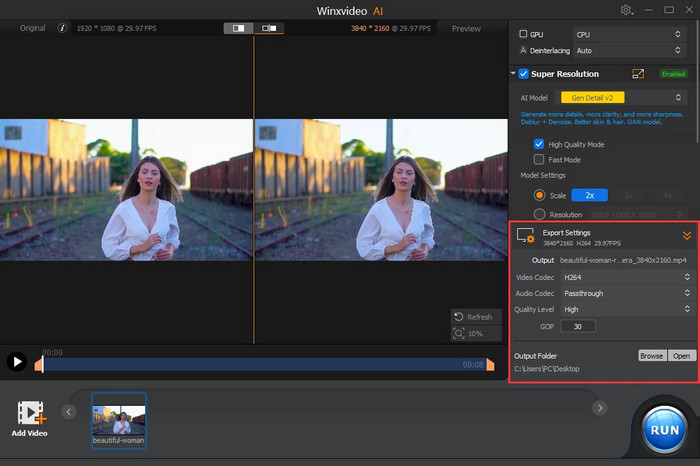
Step 4. Preview and Export
Preview the enhanced video to assess the results. Once satisfied, configure output format, quality, and destination folder in the Export Settings. Finally, click the RUN button to initiate the video sharpening process.
Related reading: why are videos sent to me blurry on iPhone?
Conclusion
Fixing out-of-focus videos requires patience and experimentation. While Premiere Pro offers a range of tools to improve image quality, it may not be sufficient for severely blurred footage. Winx Video AI provides a fast and user-friendly solution for improving video quality. Whether you're dealing with slightly out-of-focus footage or simply want to enhance the overall sharpness of your videos, this AI-powered tool can help. Its automated processes make it a convenient choice for users seeking efficient video enhancement without the complexities of traditional video editing software.


