How to Get Good Quality with CapCut on PC, iPhone/Android, and Online
 Mike Rule
Updated on
Summary: Struggling with video quality in CapCut? This guide explains how to improve video clarity, highlights the platform’s limitations, and shares tips to get the best export results—ensuring your videos always look sharp and professional.
Started using CapCut yesterday because I wanted to edit a few videos from a trip. However, when I export the video (1080p 30 frames no HDR), it’s pixelated and the bricks in the video have these black lines moving across them. How can I get good quality on CapCut?
CapCut is a fantastic choice for casual video editors, especially those creating content for platforms like TikTok, Instagram Reels, and YouTube Shorts. Its user-friendly interface, free features, and powerful tools make it a convenient and accessible option for enhancing your mobile video editing experience. When exporting the edited videos from CapCut, users will want to keep the most possible quality. So how to get HD/4K quality on CapCut? Below we will show the detailed steps to use CapCut to increase video quality to HD/4K on computer, iPhone/Android, and online.
Note: While CapCut offers basic video quality improvements by upscaling to HD or 4K, it doesn't address common issues like noise, grain, compressed artifacts, pixelation, etc. If you're not satisfied with the CapCut output quality, try third-party tool like Winxvideo AI to enhance old, low-quality, noisy or blurry videos to 4K.
Part 1. How to Get Good Video Quliaty on CapCut?
As CapCut is available on Windows, macOS, iPhone, Android, and online, below we will show the detailed steps to enhance video quality with CapCut on different platforms.
How to Get High/4K Quliaty with CapCut on Windows/Mac?
Compared to advanced editors such as Premiere Pro and Davinici Resolve, CapCut desktop editor provides a user-friendly solution for casual creators and those new to video editing. It will create social media videos where basic quality improvements suffice.
Step 1. Download Capcut on your computer and launch it. Click Start creating to start a new session. Then click on Import to choose and load the source videos that you want to edit.
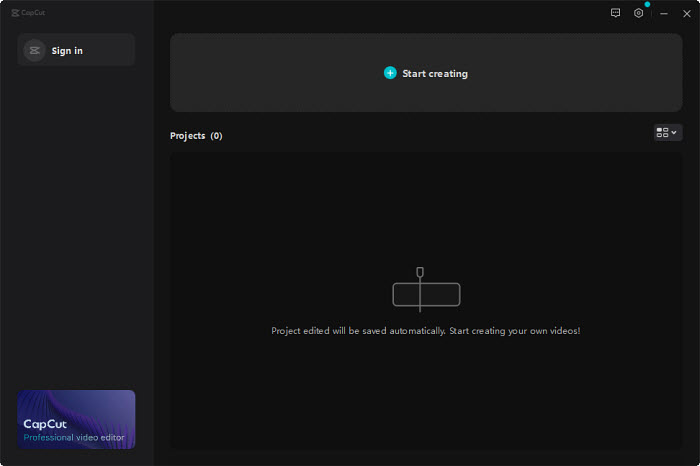
Step 2. Drag the video into the timeline. Then you can adjust the video/audio, add effects/filters/transitions, remove background, trim, and more as you need. To get good quality on CapCut, click on the Adjustment tab, drag it to the timeline.
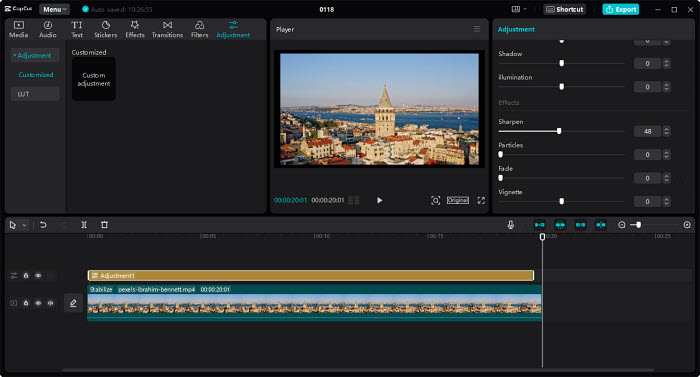
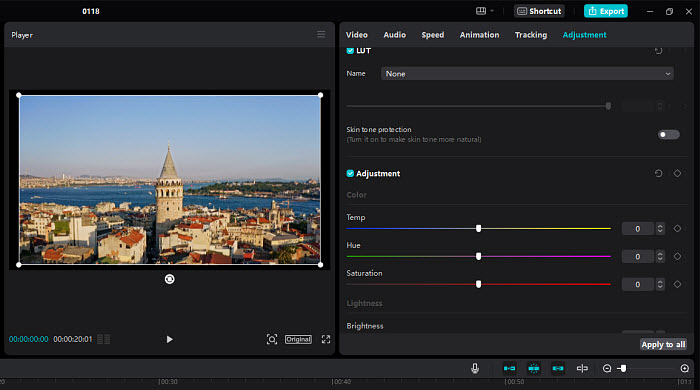
Step 3. On the right panel, you will see the Adjustment settings. You can adjust the color, saturation, contrast, brightness etc. to enhance video quality in CapCut. More importantly, find the Sharpen effect and move the slider to improve the video quality.
Step 4. After the above settings, click on Export. An export setting window will pop up. Open the Resolution drop-down menu and choose to export videos in 4K. CapCut will save the video in 4K quality. In addition, set the frame rate to 60fps.
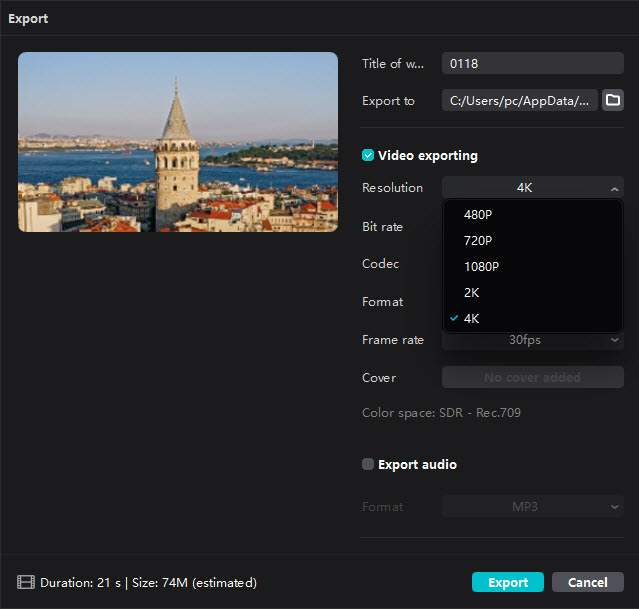
Step 5. Next, click Export. CapCut will start to increase the video quality and then save the enhanced video in the folder that you just set.
How to Get High/4K Quliaty with CapCut on iPhone/Android?
CapCut app for iPhone and Android offers a surprising amount of editing power for a mobile app. Easy-to-use tools like trimming, cutting, splitting, and speed adjustments allow you to create dynamic and engaging videos. It also provides customizable video settings to let users enhance video quality on Capcut and get HD and 4K output.
Step 1. Go to the App Store and download CapCut on your mobile. Open the app and create New Project. . You can choose from various aspect ratios to suit your platform, such as TikTok or Instagram. Then import the video you’d like to edit.
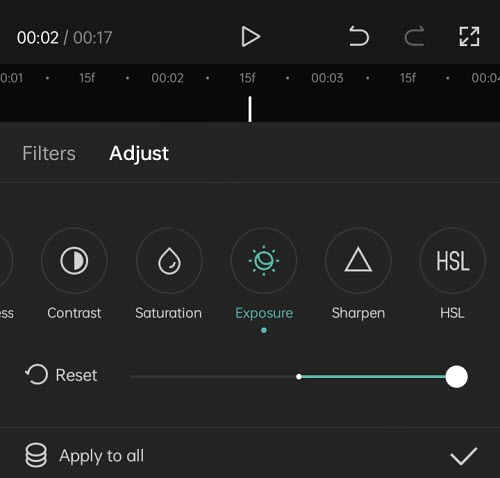
Step 2. Edit the video as you need. For good output quality in CapCut, tap on Adjust, then adjust the Auto adjust, Brightness, Contrast, Suturation, Exposure, Sharpen, and other settings based on the previewed video for the best quality.
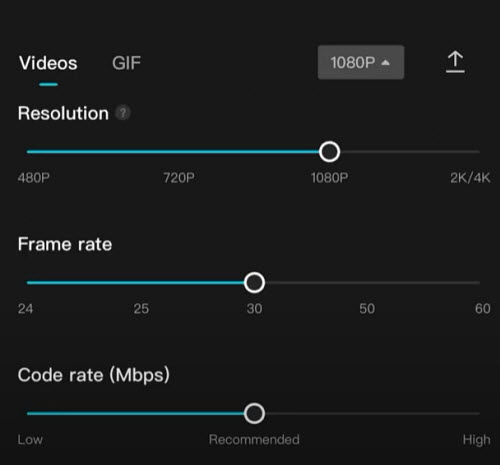
Step 3. To let CapCut increase video quality to 4K or HD 1080P, tap the 1080P button on the top screen. Then move the slider to Resolution to 1080P or 2K/4K. Also change the frame rate and code rate to the highest setting.
Step 4. Then tap on the Export button which is an upload icon. Capcut will save the enhanced video in your photo gallery
How to Get High/4K Quliaty with CapCut Online?
Capcut editor has an online version. To get 4K quality on CapCut, we will need its AI upscaler. CapCut’s online AI video upscaler can enhance video quality to 4K resolution without quality loss. It will also fix blurry videos and restore the original details.
Step 1. Go to Capcut AI Video Enhancer at https://www.capcut.com/tools/ai-video-upscaler. Click on Upload video to upload your video to the CapCut online video quality enhancer.
Step 2. Once your video is uploaded, select an output resolution like 1080P, 2K, or 4K. Then click "Upscale" to initiate the process. It prompts you to sign up, though. Just click “x” to skip this.
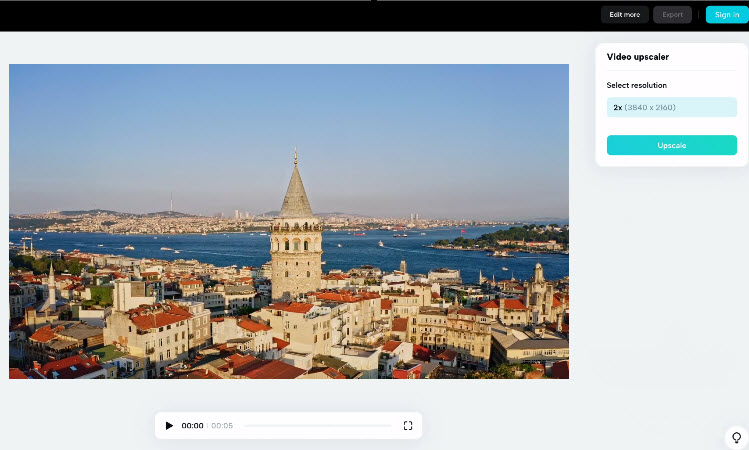
Step 3. Then it takes a while to upscale the video. Also you can click on the “Edit more” button and add text or other elements into your video. Once finished, click "Export" to download the enhanced video.
Part 2. Limits using Capcut to Enhance Video Quality
While CapCut offers a convenient way to edit videos on different devices, it has limitations when it comes to significantly enhancing video quality. Here's a breakdown of its shortcomings:
- Limited upscaling options: CapCut offers the ability to upscale videos to HD (720p) or even 4K (3840 x 2160 pixels). This can technically increase the resolution of your video, but it's a one-click process and doesn't address underlying issues affecting clarity. It essentially stretches the existing pixels, which may not improve sharpness or detail if the source video lacks them.
- No noise reduction: A significant limitation of CapCut is the lack of noise reduction tools. Video noise, also known as grain, appears as flickering or random variations in brightness and color. Noise can make a video appear blurry and obscure details. Without noise reduction capabilities, CapCut can't effectively enhance videos plagued by this issue.
- Limited sharpning control: While CapCut offers a sharpening tool, its functionality is basic. There's only a single slider to adjust sharpening intensity. This lack of fine-tuning makes it easy to over-sharpen your video, resulting in unwanted artifacts like halos around edges, which can further degrade video quality.
Pixelation Removal: - No solution for pixelation: Pixelation occurs when a video is compressed too heavily, resulting in blocky or blurry visuals. Unfortunately, CapCut doesn't offer functionalities like pixelation removal, which can significantly improve the quality of compressed or low-resolution videos.
Part 3. How to Get Best Quality with CapCut Videos?
Want to take your CapCut creations to the next level? Winxvideo AI offers advanced video quality enhancement that goes far beyond CapCut’s capabilities. It can upscale CapCut videos to 4K quality, stabilize footage with AI interpolation, and remove pixelation, noise, and compression artifacts. With tools like format conversion, file compression, screen recording, and GPU-accelerated editing, it’s a complete video editing solution.
The newly released Winxvideo AI 4.0 brings major upgrades. Its Super Resolution model delivers a 40%–80% boost in processing speed. Two new AI models—Gen Detail V3 for enhancing fine textures, and Real Smooth V3 for smoothing animations—ensure professional-grade results. A new DPI setting also allows for optimized image output, even for print-quality needs.
 Free Download
  Free Download
Winxvideo AI is for PC, while Macxvideo AI (from our MacXDVD brand) is for macOS.
[Guide] How to Enhance CapCut Videos for Better Quality?
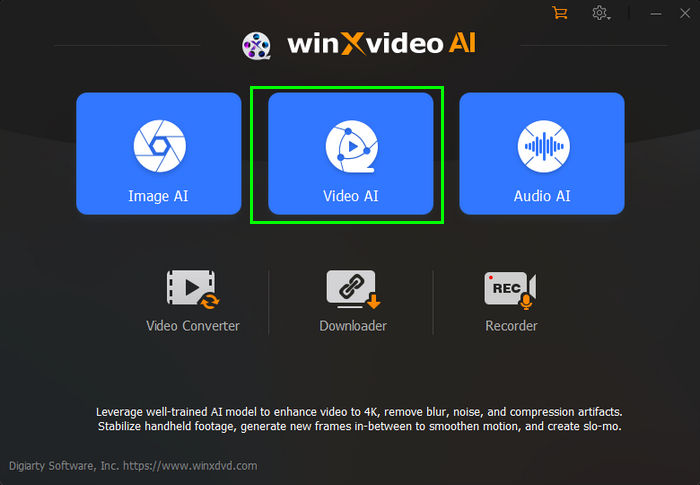
Step 1. First, download and install Winxvideo AI on your computer. Once installed, open the software and click "Video AI" on the main interface.
Step 2.Click the "+ Add Video" button to import the video you want to enhance from your CapCut project or any other source. You can import multiple CapCut videos for batch enhancement.
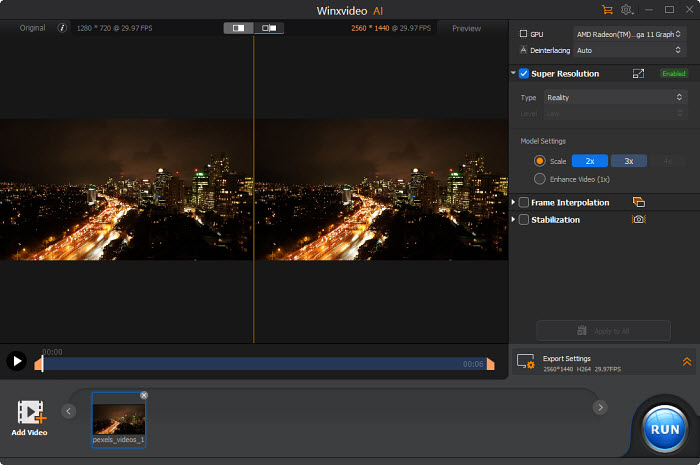
Step 3. On the right panel, focus on the "Super Resolution" section to improve overall quality of CapCut videos.
- AI model : Choose an AI model from Gen Detail, Real Smooth, Anime, and Zyxt. The four AI models are designed for different videos. For the best CapCut video quality, choose Gen Detail, as it's tailored to improve overall video resolution and sharpen fine details.
- Scale resolution: Select the desired upscaling level. 2x or 3x are good starting points, while 4x offers the highest resolution boost (choose "Enhance Video (1x)" to maintain original resolution). This technology enhances resolution, removes blur and video artifacts, making it ideal for improving older or low-quality CapCut videos.

Step 4. If your CapCut video suffers from shakiness, check the "Stabilization" option. Choose the appropriate analysis mode and preset for optimal results. Alternatively, enable "Frame Interpolation" and increase frame rates by up to 5x for smoother playback.
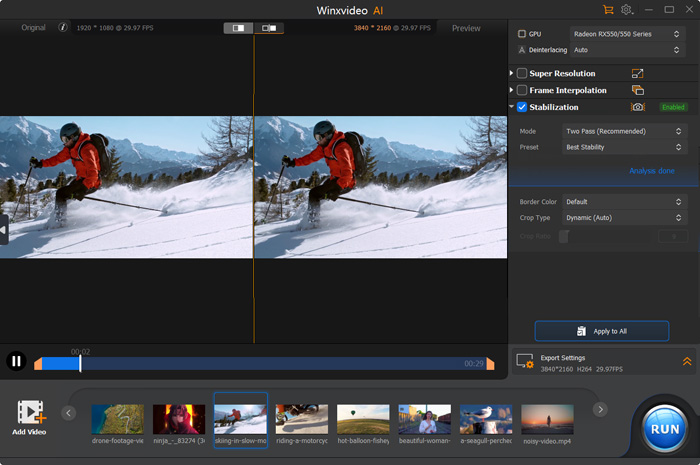
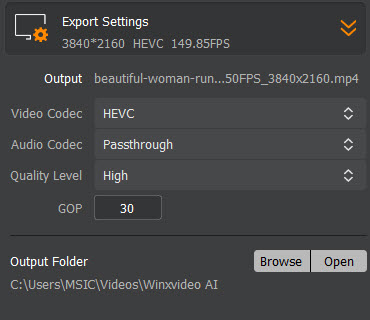
Step 5. Once you've adjusted the settings, preview the enhanced video to ensure you're satisfied with the results. Then, click "Export Settings" to define your desired output format, quality level, and destination folder. Finally, hit the "RUN" button to start processing and improve your CapCut video.
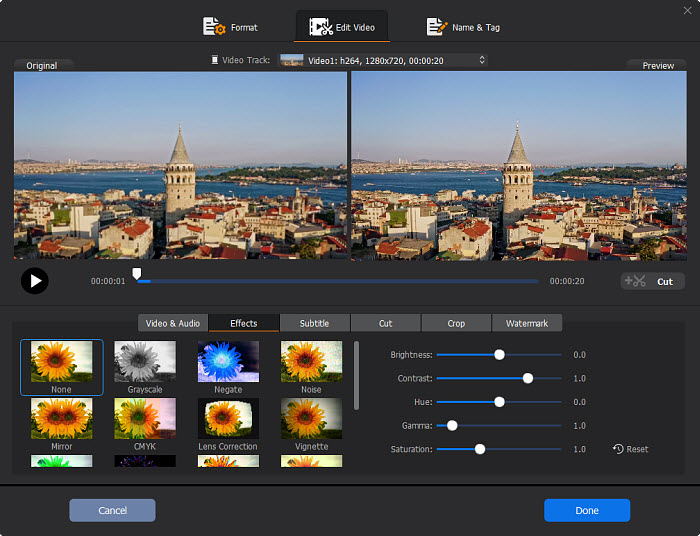
Optional: For extra control, navigate to "Video Converter" > load your video > "Effects". Here, you can adjust brightness, contrast, and saturation for further refinements. You can also apply the "Sharpen" filter for additional clarity enhancement (use this cautiously to avoid artifacts).
Conclusion
CapCut offers a user-friendly platform for creating and editing videos across various devices. With its basic adjustments and AI upscaling features, you can improve the overall visual quality with CapCut creations. Remember to follow the detailed steps outlined in this guide for specific platforms (Windows, macOS, iPhone, Android, and online) to achieve the desired results.
However, keep in mind the limitations of CapCut for advanced clarity enhancement. It lacks features for noise reduction and pixelation removal, which can significantly impact video quality. Additionally, its upscaling process is a one-size-fits-all approach.
For better video quality of CapCut videos, consider exploring a third-party tool like Winxvideo AI. This software offers a comprehensive set of features specifically designed to tackle issues like noise, blur, and pixelation. It utilizes AI technology to deliver exceptional results, making your CapCut videos shine even brighter.
 FAQs
FAQs
"Whenever I try to export a video on CapCut(I edit videos) it uses to look fine, I’d export it on 4K 60fps. But recently as I’ve been doing this, when I finish the edit then export it and watch it, it looks like shit. The transitions aren’t smooth and it isn’t in 4K even though I put it on that mode. Can anyone explain please?"
If you're experiencing poor output quality with CapCut, try the following fixes:
- If you're using CapCut on iOS or Android, try switching to the PC version. You can also try to reinstall the CapCut.
- It's suggested to use GPU to render the file. So you can try another driver or another computer to edit your video and see if it make any difference.
- Check the output codec that you're using. Make sure you export the CapCut video in the recommended codec for the best output quality.
- See if there is an update and get the latest CapCut version.
CapCut empowers you to tailor your video output to your specific needs. It offers a wide range of video resolution options, allowing you to strike the perfect balance between quality and file size. You can save CapCut video in SD, HD, and 4K. And you can also customize file name, frame rate, as well as export quality and format for the best output quality.
If you're using CapCut on iOS or Android to edit for Tiktok, here are our recommended settings to get the best quality:
- Make sure you're editing in 9x16 vertical video.
- Under Adjustments, change Contrast to 6 and Saturation to 6.
- Change Sharpen to 14. As TikTok will compress any uploaded video from 4K to 1080P, so you're suggested to keep all the pixels at 1080P.
- Next, change the frame rate to 30fps and turn smart HDR off.


