


How to Colorize Black and White Photos Photoshop [Photoshop Tutorial]
 Mike Rule
Post on
Photoshop, a cornerstone in the digital imaging world, has consistently evolved with groundbreaking tools. One such addition that revolutionized image editing is the Neural Filter. Introduced in 2020, this filter can handle a wide range of tasks, from turning black & white pictures in their natural colors or even altering facial features. We’ll guide you through how to colorize black and white photos in Photoshop (working as a professional AI photo colorizer) and frequently asked questions.
How to Colorize Old Black and White Photos in Photoshop
Before you start to learn how to put color in a black and white photo Photoshop, it’s essential to know that manual adjustments will often be necessary though the tool can analyze your image and apply colors intelligently. Here’s how to how to convert a black & white image into a color one in Photoshop with the Neural Filter. By following these steps and incorporating the provided tips, you can achieve impressive results in colorizing your old black and white images using Photoshop's Neural Filter.
Step 1. Prepare Your Image
If possible, find color photos of similar subjects to guide your color choices. Basic knowledge of color theory can help you make informed decisions.
- Image Quality: The higher the resolution of your black and white photo, the better the results. A clean, sharp image will provide more detail for the Neural Filter to work with.
- Black and White Conversion: If your image is already in color, convert it to black and white using the desired method (e.g., Desaturate, Black & White adjustment layer).
Read more: How To Upscale Old Low-resolution Photos in Photoshop
Step 2. Apply the Colorize Filter
- Open your image in Photoshop.
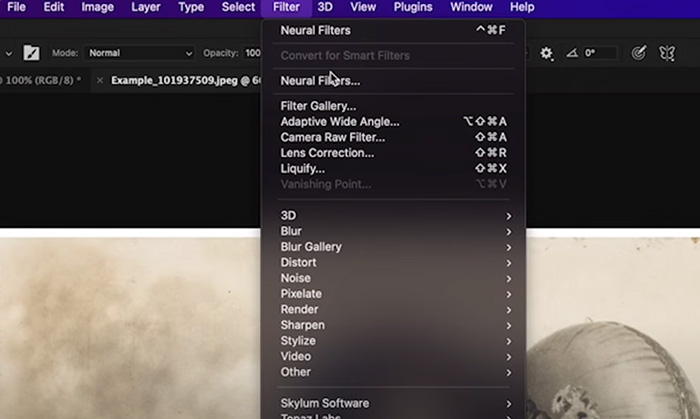
- Go to Filter > Neural Filters.
- Select Colorize. If you haven't downloaded the filter, you'll be prompted to do so.
- The Neural Filter will automatically apply colors to your image. This is often a good starting point, but it's rarely perfect.
Step 3. Refine Colors with Focal Points
- Identify areas for adjustment: Look closely at your image and determine which areas need color correction.
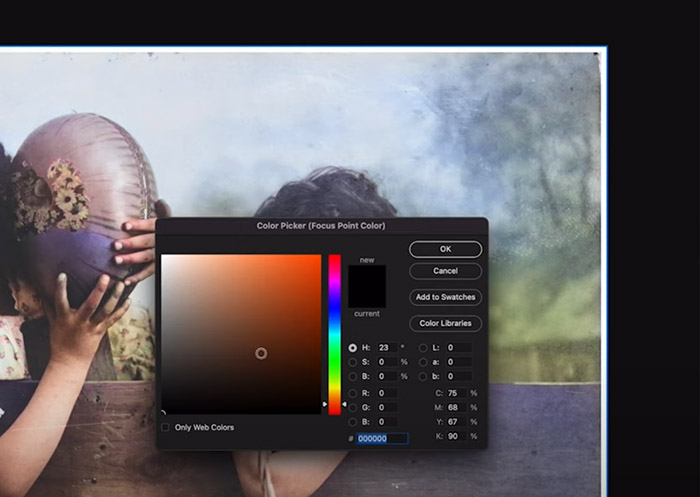
- Use Focal Points: In the Neural Filters window, click on the area you want to adjust.
- Choose a new color: Use the Color Picker to select a desired color.
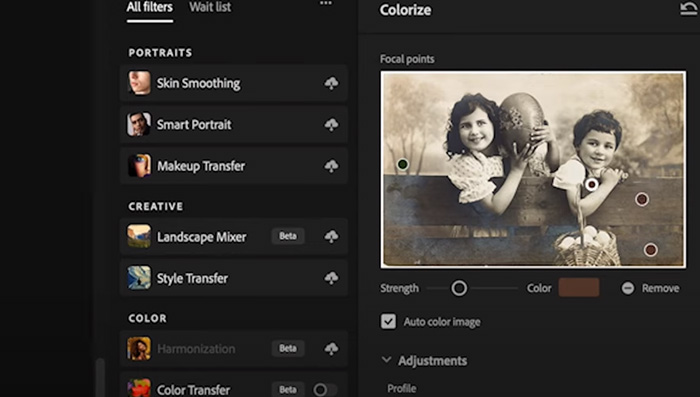
- Adjust strength: Use the Strength slider to control the influence of the new color.
- Add multiple focal points: You can add multiple focal points to fine-tune different areas of the image.
Step 4. Adjust Overall Color Balance
Keep your layers organized for easy management and adjustments. Regularly save your work to prevent accidental loss. The more you practice, the better your colorization skills will become.
- Open Adjustments: Below the Focal Points preview, toggle open the Adjustments options.
- Tweak settings: Use sliders for Saturation, Temperature, Tint, and Exposure to adjust the overall color balance. Experiment with different values to achieve the desired look.
Step 5. Create a New Color Layer
- Preserve original image: Click "Output as a new color layer" to keep the original black and white image intact.
- Make adjustments: You can now paint or adjust colors on the new color layer without affecting the original image.
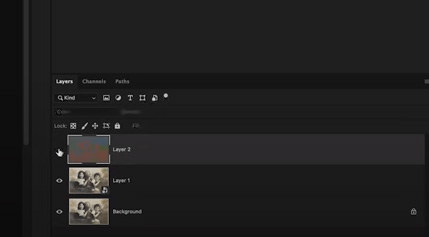
Step 6. Fine-Tune with Layers
- Add adjustment layers: Create adjustment layers (Hue/Saturation, Curves, Levels, etc.) above the colorized layer to make targeted color corrections.
- Use masks: Mask out areas of the adjustment layers to apply changes selectively.
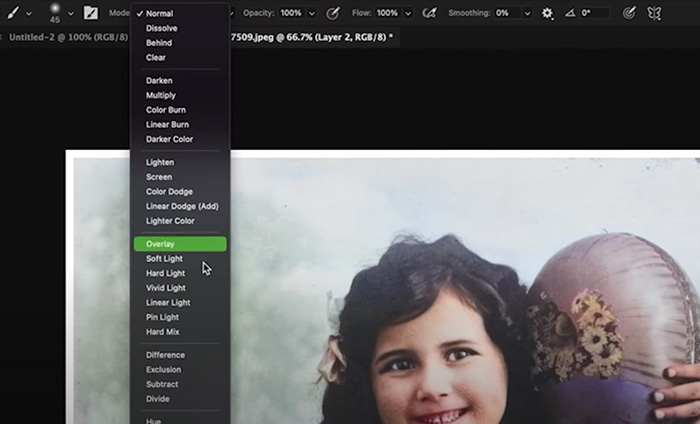
- Blend modes: Experiment with different blend modes (e.g., Soft Light, Overlay) to achieve subtle effects.
Step 7. Exporting Your Image
- Choose export format: Go to File > Export > Export As to save your image in the desired format (JPEG, PNG, TIFF, etc.).
- Adjust export settings: Control image quality, size, and color profile as needed.
The Neural Filter can also be used to restore old photos, learn how to restore old photos in Photoshop.

Photoshop Colorize Neural Filter Doesn't Work? Fixed
While the Colorize Neural Filter in Photoshop is a powerful tool, it can sometimes encounter hiccups when you start to learn how to colorize black and white images photoshop. Here's a breakdown of potential reasons and tips. By addressing these potential causes and following the tips, you can fix the issue when you learn how to do black-and-white photo colorization in Photoshop.
1. Image Compatibility and Size
- File Format: Ensure your image format is compatible with the filter. Try converting it to PSD, TIFF, or DNG.
- Image Size: Extremely large or small images can cause issues. Consider resizing if necessary.
- Color Mode: As mentioned in the referenced thread, some users suggest having the image in RGB mode for processing. While this might not be universally required, it's worth checking your image's current mode (Image > Mode) and converting to RGB if needed.
2. Software and System Issues
- Latest Updates: Use the most recent version of Photoshop with the latest updates applied. Check for system updates as well.
- Restart Photoshop: A simple restart can often resolve temporary glitches.
- Reset Preferences: If settings are corrupted, resetting Photoshop preferences might help (Preferences > General > Reset Preferences on Quit).
3. Hardware Limitations
- GPU Compatibility: The Colorize filter utilizes GPU acceleration. Make sure your graphics card is compatible with Photoshop and has sufficient memory. Refer to Adobe's documentation for supported GPUs. (The user in the thread mentioned an unsupported Nvidia Quadro K2200 card.)
- CPU Performance: A slow CPU can impact the filter's performance.
4. Other Potential Issues
- Corrupted Filter: Try re-downloading the Colorize filter from the Neural Filters menu within Photoshop.
- Subscription and Cloud Storage: Ensure you're logged in to your Creative Cloud account and have a valid subscription that includes Neural Filters. Check for sufficient cloud storage space, as some processing might leverage cloud resources.
 FAQs about How to Upscale an Image in Photoshop
The Neural Filters is not available in Photoshop CS6. This feature is exclusive to newer versions of Photoshop that utilize Adobe Sensei, Adobe's artificial intelligence and machine learning technology.
You might not have Neural Filters in Photoshop due to a few reasons:
Photoshop Version: Neural Filters are available in newer versions of Photoshop, typically CC and later. Older versions like CS6 and some CC versions might not include this feature.
Subscription Status: If you have a subscription-based version of Photoshop, ensure your plan includes access to Neural Filters.
Filter Download: Some Neural Filters might require downloading before use.1 Check if the filter you need is downloaded and enabled.
Yes, Photoshop CC and later versions typically have access to Neural Filters. However, the availability of specific filters might vary depending on the Photoshop version and your subscription plan.
Neural Filters should be automatically available in Photoshop 2024. If they're missing, try:
Checking for updates: Ensure you have the latest Photoshop version installed.
Verifying subscription: Make sure your subscription includes access to Neural Filters.
Restarting Photoshop: Sometimes, a simple restart can resolve the issue.
Downloading filters: If specific filters are missing, check if they need to be downloaded within the Neural Filters menu.


