Top 5 Ways to Make Horizontal Video Vertical (TikTok, Reels, Shorts etc.)
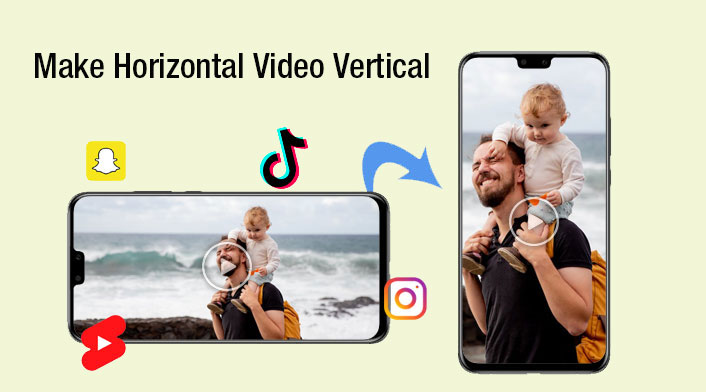
In today's increasingly popular short video, the shift to vertical video is indisputable. As social media platforms like Instagram, TikTok, YouTube, and Snapchat embracing videos in 9:16 aspect ratio, creators need to adapt their content to meet audience preferences. This article will guide you through the process on how to make horizontal video to vertical content using popular tools such as Winxvideo AI, iMovie, Premiere Pro, Clideo, and even leveraging native iPhone settings.
Table of Contents
- Part 1. Why Vertical Videos Matter
- Part 2. How to Make Horizontal Video Vertical Using Winxvideo AI
- Part 3. How to Make Horizontal Video Vertical in iMovie
- Part 4. How to Make Horizontal Video Vertical Premiere Pro
- Part 5. How to Convert Landscape Video to Portrait with Clideo
- Part 6. How to Make Horizontal Video Vertical on iPhone
Part 1. Why Vertical Videos Matter
Before diving into the horizontal to vertical video converters, let's briefly explore why vertical videos matter in today's digital landscape. It's all about where you want to present your video to your viewership.
Firstly, people use phones a lot today.
Then, social media platforms like Tik Tok, YouTube Shorts, Reels, and Snapchat all recommend videos in 9:16 to enhance user engagement, offer a better viewing experience on mobile devices.
Next, vertical video is powerful in data espectally for social media marketers. Specifically, it's important because:
- Visibility: On mobile devices, vertical videos occupy more screen real estate, which increases their prominence and ease of viewing.
- Completion rate: Videos that are vertical are more likely to be completed than those that are horizontal.
- Engagement: Viewers on mobile devices may have a better and more engaging experience with vertical videos.
- Reach: Compared to horizontal videos, vertical videos can reach up to 58% more people.
- Brand recall: Vertical videos have been shown to improve brand recall among viewers.
Part 2. How to Make Horizontal Video Vertical Using Winxvideo AI
Winxvideo AI stands out as a versatile tool for video conversion, but it's also excellent at converting horizontal videos to vertical. You can convert any landscape videos, be it 16:9, 4:3, 3:2, 1.85:1, 2.4:1 to 9:16 or square to best fit with TikTok, Instagram, YouTube Shorts, and more. Its primary strength lies in its simplicity, offering an intuitive interface that is accessible even for beginners. The software supports a wide range of video formats, ensuring compatibility with various source files.
Pros:
- User-friendly interface makes it easy for users to navigate and perform video conversions without a steep learning curve.
- Known for its speedy conversion process, allowing users to transform horizontal videos into vertical format quickly and efficiently.
- Batch processing support, enabling users to convert multiple videos simultaneously, saving time for those with a large number of files to transform.
Cons:
- Basic editing capabilities. Users looking for extensive editing options may find this tool somewhat limited.
Winxvideo AI: A Comprehensive Guide to Convert Horizontal to Vertical
Step 1. Download and install Winxvideo AI on your computer. It's available both on Windows and macOS. Select "Video Converter" option.

Step 2. Open the program and click on "Add Files" to import your horizontal video. Or you can directly drag and drop to load the horizontal videos. BTW, batch processing is also acceptable.
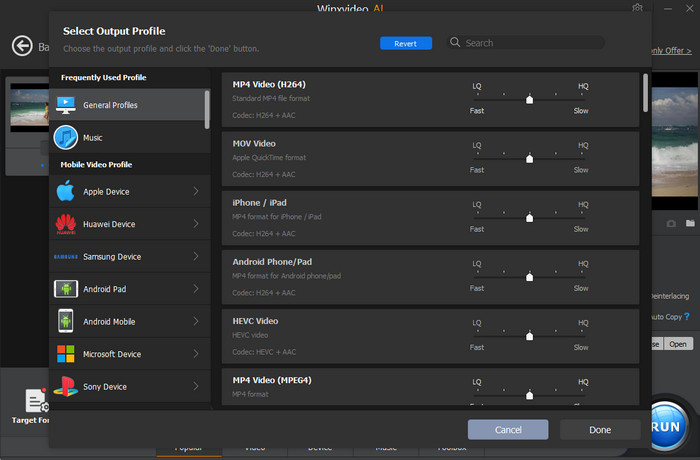
Step 3. Choose the desired output format such as "MP4 Video" from the automatically popped up window.
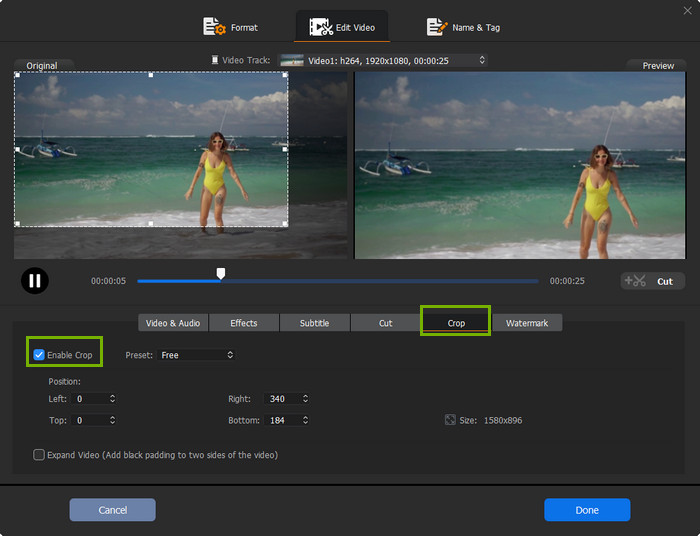
Step 4. Click the scissor-shaped "Edit" button to enter the video editing window. Click on the "Crop & Expand" column, then tick on the box of "Enable Crop", freely crop the video frame from horizontal to vertical orientation.
Step 5. Click "Run" to start the landscape video to portrait video transforming process.
Also Search: How to crop video on TikTok to make a hit >>
Part 3. How to Make Horizontal Video Vertical in iMovie
iMovie is a robust and user-friendly video editing software native to Mac devices. It caters to both beginners and intermediate users, offering a balance between simplicity and advanced editing features. However, iMovie does not yet support editing vertical videos by default. This implies that an iMovie project will letterbox, or add black bars to each side of a vertical movie, in order to fit the material to the 16:9 screen of the program. Given that, is it possible to convert a horizontal video with an aspect ratio of 9:16 into a vertical video with iMovie? Certainly, you can.
Pros:
- Intuitive interface.
- Advanced editing capabilities, allowing users to enhance their videos with transitions, effects, and more.
- Seamless integration with other Apple products.
Cons:
- iMovie is exclusive to Mac and iOS devices, limiting its accessibility for users on other operating systems.
Step-by-Step Guide to Convert Horizontal Videos to Vertical Ones in iMovie
Step 1. Open iMovie and create a new project.
Step 2. Import your horizontal video into iMovie. Then drag and drop to add it to the timeline.
Step 3. Select the horizontal clip in the timeline. Go to the toolbar menu to select the cropping tool.
Step 4. Choose the pop-up Rotate the clip clockwise button. By doing this, the horizontal video now transformed to be vertical.
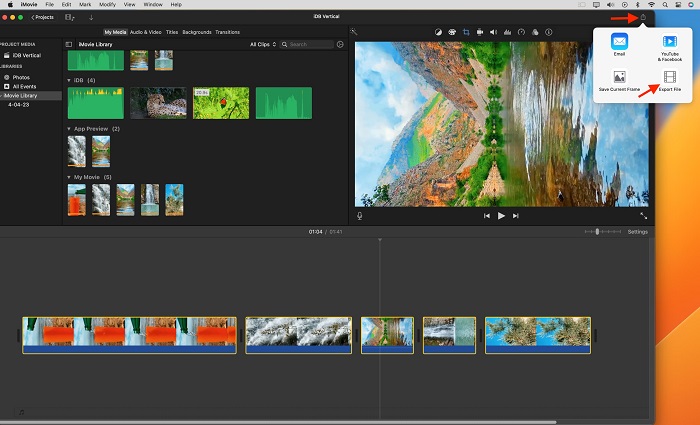
Step 5. Press the Share button on the right corner of iMovie. Select File. Set your preferred resolution, compressor, and quality if necessary. Choose Next. Now iMovie starts making horizontal the video to vertical for Tik Tok, Instagram, Shorts and more.
Read more: Understanding 16:9 Resolution: The Widescreen Standard
Part 4. How to Make Horizontal Video Vertical Premiere Pro
Adobe Premiere Pro stands as a pinnacle in the realm of professional video editing software, commanding the respect of filmmakers, content creators, and media professionals alike. As a robust and comprehensive tool, Premiere Pro's reputation is built on its capability to handle intricate video editing tasks. But it didn't overlook basic editing techniques, such as simply turning a horizontal video into a vertical one.
Pros:
- Premiere Pro provides a comprehensive set of tools for advanced video editing, including color correction, audio editing, and more.
- Customization options for precise control to achieve the desired result.
- Premiere Pro is available on both Windows and Mac platforms, providing flexibility for users with different operating system preferences.
Cons:
- Premiere Pro may have a steeper learning curve for beginners compared to more straightforward editing tools.
How-To Guide: Converting Horizontal Video to Vertical Using Premiere Pro
Step 1. Launch Premiere Pro and create a new project. Then import your horizontal videos into the project library.
Step 2. Right-click on your imported video and select "New Sequence from Clip." This automatically creates a sequence with dimensions matching your video.
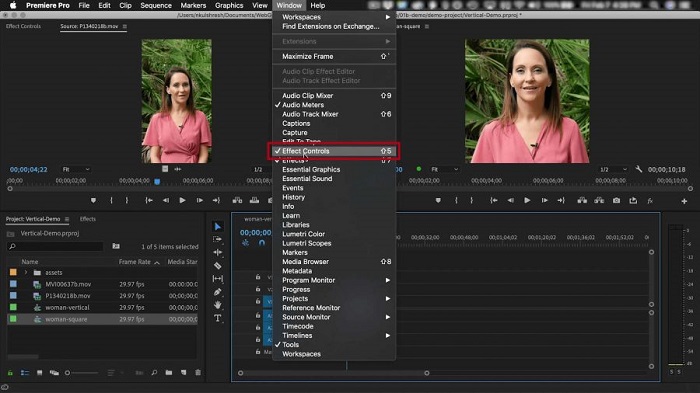
Step 3. Go to the "Sequence" menu and select "Sequence Settings." Here, you can manually adjust the frame size to create a vertical video.
Step 4. Drag your horizontal video clip into the timeline. Use the Motion effect controls to adjust the position and scale of the video within the vertical frame.
Step 5. Leverage Premiere Pro's advanced editing features to fine-tune your vertical video if needed, such as color corrections, adding transitions, adjusting audio levels, and incorporating any other enhancements.
Step 6. Navigate to the "File" menu and choose "Export" to save your video in the desired format.
What you may be interested in: How to Rotate Video in Premiere Pro
Part 5. How to Convert Landscape Video to Portrait with Clideo
Clideo stands out as an accessible and user-friendly online platform, offering a hassle-free solution for cropping horizontal videos into the vertical format. It addresses the needs of users who prioritize simplicity and efficiency, providing a streamlined online service that doesn't require the download or installation of additional software.
Pros:
- No need for software installation.
- User-Friendly interface.
- Accessibility from any device with an Internet connection.
Cons:
- Relies on Internet speed for processing.
- File size and number limits. Clideo maximumly allows videos of 500MB for rotating horizontal video to vertical orientation.
How to Rotate Landscape Video to Portrait Online
Step 1. Open Clideo’s horizontal to vertical video converter in any browser.
Step 2. Click on the designated area to upload your horizontal video file. Clideo supports various file formats, ensuring compatibility with a wide range of source materials.
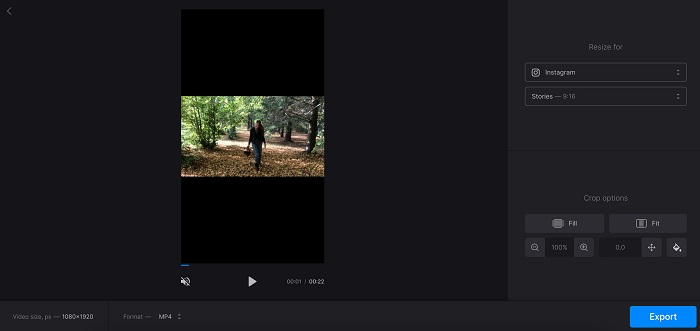
Step 3. Once your video is uploaded, explore the output settings. Configure the frame dimensions to ensure a vertical orientation. You're recommended to convert horizontal video to 9:16.
Step 4. After adjusting the settings, initiate the conversion process by clicking the "Export" button.
Step 5. Once the process is complete, Clideo will provide a download link for your newly converted vertical video.
Part 6. How to Make Horizontal Video Vertical on iPhone
Utilizing native iPhone settings for shooting and optimizing vertical videos offers a seamless and intuitive solution. Ideal for users who appreciate the simplicity of leveraging their iPhone's built-in features, this method streamlines the process of adapting horizontal videos to the vertical format with just a few quick adjustments.
Pros:
- No additional software required.
- Seamless integration with iPhone camera settings.
- Quick and easy adjustments.
Cons:
- Limited post-production editing options.
How-To Guide: Cropping Horizontal Video to Vertical on iPhone
Step 1. Launch the Camera app on your iPhone, typically found on the home screen.
Step 2. Swipe left or right on the camera interface until you reach the "Video" mode. This ensures that your iPhone is set up for video recording.
Step 3. Rotate your iPhone to a vertical position to start recording in the desired orientation. The camera interface will adapt to the vertical frame, optimizing your video for platforms that favor this format.
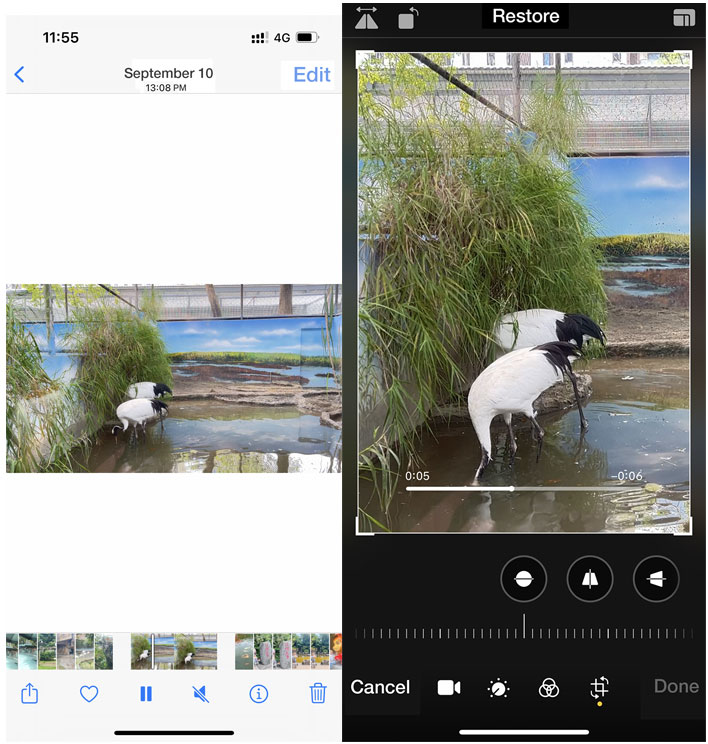
Step 4. For existing horizontal videos, open the Photos app on your iPhone and locate the horizontal video you wish to convert. Tap "Edit" to access the editing tools, then use the crop tool to crop video to vertical orientation on iPhone. After you've done, save the edited video to apply the changes.
In Conclusion
The methods explored for converting horizontal videos to vertical offer diverse solutions. Winxvideo AI offers a comprehensive way to change video oritation and format, Adobe Premiere Pro caters to professionals seeking advanced customization, Clideo provides a quick and accessible online platform, and native iPhone settings offer a user-friendly, on-the-go approach.
The user's choice depends on their specific needs and preferences. Winxvideo AI focuses on a variety of outputs besides rotating horizontal videos. Clideo's simplicity and iPhone's native settings stand out for quick adjustments, while Premiere Pro offers unparalleled control. This diversity underscores the flexibility required in content creation today. No matter which method to choose, the ability to seamlessly convert horizontal videos to vertical ensures users to reach audiences with engaging and optimized content.


