


17 Fixes for OBS Encoding Overloaded while Streaming or Recording
 Mike Rule
Updated on
When using OBS (Open Broadcaster Software) for streaming or recording, many users have encountered the frustrating "Encoding Overloaded" warning. This error typically points to performance issues, resulting in lag, dropped frames, or even disrupted streams. Whether you're streaming or recording, this problem can significantly affect your workflow. Across online communities, users share their experiences and solutions, offering various tips and tweaks to combat the issue. In this article, we'll delve into the causes of the problem and how to resolve it for smoother performance.

What Is Encoding Overloaded in OBS and Why Does It Appear?
In OBS, the "Encoding Overloaded" message appears when the software detects that your system's hardware isn't able to encode video frames fast enough for real-time streaming or recording. This happens when more than 0.1% of frames are skipped by the encoder because it couldn't process them within the time limit needed for smooth output. For example, at 60 frames per second (fps), each frame must be encoded in under 16.67 milliseconds. If the necessary computing power isn't available, frames are skipped, triggering the "Encoding Overloaded" warning.
Related: How to Fix OBS Recording Choppy/Lagging Issues
The encoding overload usually results from a few key factors:
High Data Processing Needs
Higher resolution (such as 1080p or 4K) and higher frame rates (like 60 fps) require more computing power. If the CPU or GPU can’t keep up with the demand, the encoder struggles to process the video frames in time.
System Resource Competition
If you're running a game or application that’s already heavily using the GPU or CPU, OBS might not get the resources it needs. A common issue arises if the GPU is transferring a large amount of data between the CPU and GPU memory (such as for a game), causing a bottleneck in the PCI-Express bandwidth. This can limit OBS's ability to efficiently transfer and process video data, leading to encoding overload.
Encoder Type
If you use x264, which relies on the CPU for encoding, the overload indicates that your CPU lacks the power needed for both the encoding and other tasks.
If you're using hardware encoding, the impact varies based on your GPU type:
- NVIDIA NVENC: NVENC has a dedicated encoding circuit on the GPU with fixed encoding power. If you exceed its capabilities, it will stall, regardless of how much 3D rendering power is available for other applications. This means even if your GPU is running a game smoothly, NVENC can still hit its limits for encoding tasks.
- Intel and AMD GPUs: These GPUs use shared resources for both encoding and 3D rendering. If you're running a resource-intensive game or application, both the game and OBS’s encoder will compete for the same resources, which can result in an encoding overload.
Also see: OBS Stuck on Stopping Recording Issues
Lagged Frames
Another possible cause of the encoding overload could be "lagged frames," which occur when OBS is unable to composite a frame in time due to a lack of GPU resources. This can be caused by a complex scene setup, too many video filters, or the system being overwhelmed by transferring media files over a network or writing output to a slow or external hard drive.
How to Fix Encoding Overload in OBS While Streaming or Recording
If you're encountering the "Encoding Overloaded" message in OBS, it means your system is struggling to handle the load of streaming or recording. Fortunately, there are several solutions that can help fix this issue.
1. Quick Fix: Run OBS as Administrator (Windows Only)
Running OBS as an administrator on Windows can give it priority access to system resources, helping to prevent GPU overload. Here's how to do it:
- Close OBS Studio.
- Right-click the OBS Studio shortcut.
- Select "Run as Administrator."
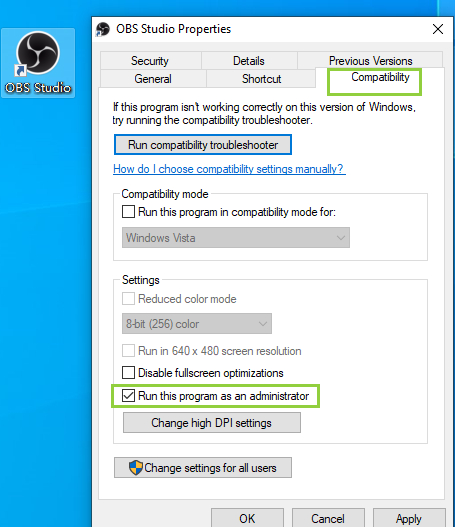
This can resolve many issues related to GPU resource allocation, so try this first before moving on to other fixes.
2. Close Other Programs Using the GPU
Other programs running in the background may be hogging GPU resources, leaving little for OBS. To free up resources:
- Open Task Manager (Windows) or Activity Monitor (macOS) and check for programs that are using a lot of GPU power.
- Close unnecessary programs, especially if you're running multiple GPU-intensive applications, such as games or editing software.
Tips:
- Don't close programs unless you're certain of their purpose (i.e., only close the ones you have intentionally opened.
- If you're attempting to capture two games at once, try lowering the graphical settings of one or both games, or consider capturing them one at a time instead of simultaneously.
3. Limit the Game's Framerate
If you're running a game alongside OBS, uncapped framerates can overload your GPU. Limiting the game's framerate to match your monitor's refresh rate or enabling V-Sync will help free up GPU resources for OBS. Here's what you can do:
- Set the game's framerate to match your monitor's refresh rate (e.g., 60 Hz or 144 Hz).
- Enable V-Sync in your game settings.
If you still experience performance issues, try matching the game's framerate to the framerate you're using in OBS.
4. Reduce the Game's Graphical Settings
Playing games on max settings can be fun, but it consumes a lot of GPU resources. Lowering the graphical settings of the game you're playing will free up processing power for OBS. After adjusting the settings, be sure to monitor the performance of both the game and OBS to ensure optimal functionality.
5. Disable Game Capture Multi-Adapter Compatibility (Windows Only)
If you're using multiple graphics cards or running SLI/CrossFire setups, you might have enabled this option. However, for most users, it's unnecessary and can consume additional resources. So, you should go to your game capture source's properties in OBS and uncheck "Multi-adapter Compatibility".
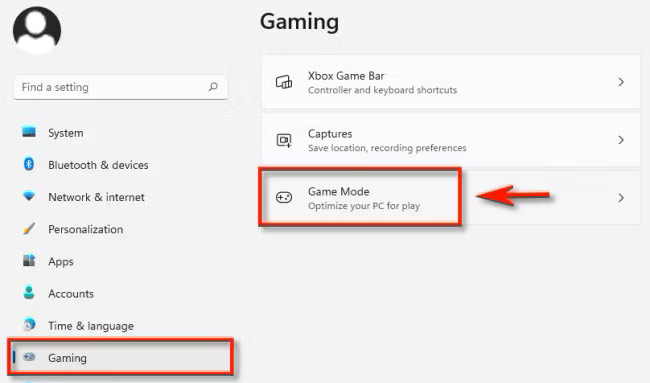
6. Disable Windows Gaming Features (Windows Only)
Although Game Mode can enhance the performance of certain games by prioritizing system resources like the CPU and GPU, it may adversely affect other applications such as OBS Studio.
For users on recent versions of Windows 10, it's generally safe to keep Game Mode enabled. However, if you're using a version older than 1809, it's advisable to disable Game Mode to prevent Windows from diverting resources away from OBS Studio.
To disable Game Mode on Windows 10 "Redstone 5" 1809 (October 2018) or newer, go to Settings App > Gaming > Game Mode > set Game Mode to "Off", reboot your PC.
For Windows 10 version 1803 or earlier, Game Mode must be disabled either globally through the Registry or on a per-game basis. It is generally recommended to disable it globally for better performance.
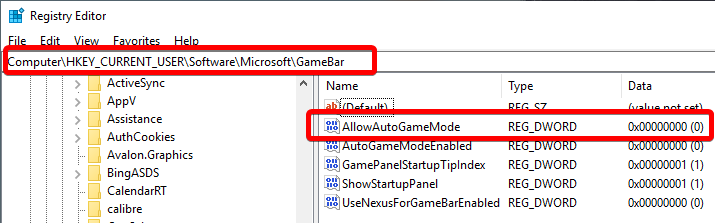
Disabling Game Mode Globally via the Registry
The following steps require Administrator access:
- Press Windows + R, type regedit, and press OK/Enter. Alternatively, you can open the Start Menu, type "regedit" or "Registry Editor," and launch the application.
- In the Registry Editor, navigate to HKEY_CURRENT_USER\Software\Microsoft\GameBar. You can paste this path directly into the address bar at the top for quick access.
- In the GameBar folder, look for a key named AllowAutoGameMode in the right panel. If it is not present, you will need to create it.
- To create the key, right-click inside the panel, select New > DWORD (32-bit) Value, and rename the new key to AllowAutoGameMode.
- To disable Game Mode, set the value of AllowAutoGameMode to 0. Close the Registry Editor and reboot your PC.
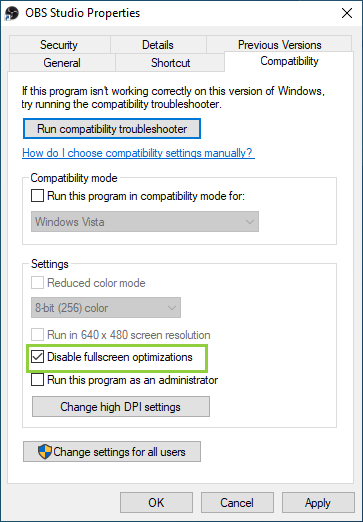
Disabling Game Mode Per-Game
To disable Game Mode for individual games, follow these steps:
- Right-click on the shortcut or executable file for the game and select Properties.
- Navigate to the Compatibility tab and check the box for Disable full-screen optimizations.
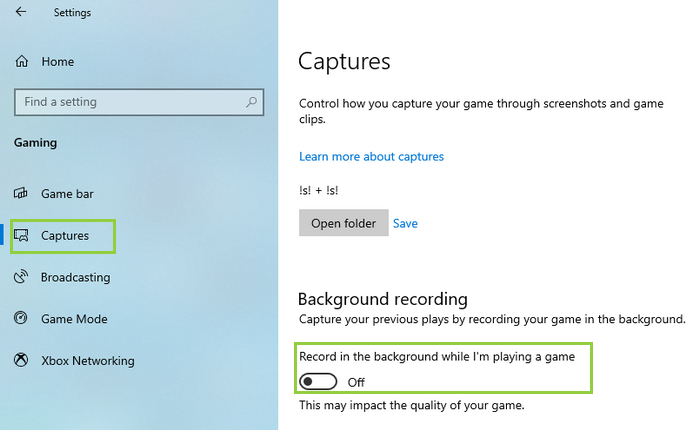
Additionally, the Game DVR (or Captures, depending on your version of Windows 10) feature, which allows Windows to record gameplay footage in the background similar to OBS Studio’s Replay Buffer, can consume valuable system resources. Therefore, if you are actively using OBS Studio, it is advisable to disable this feature as well.
To disable Game DVR/Captures, open the Settings app, navigate to Gaming, select Game DVR or Captures, and then set "Record in the background while I'm playing a game" to "Off".
7. Reduce Output Settings in OBS
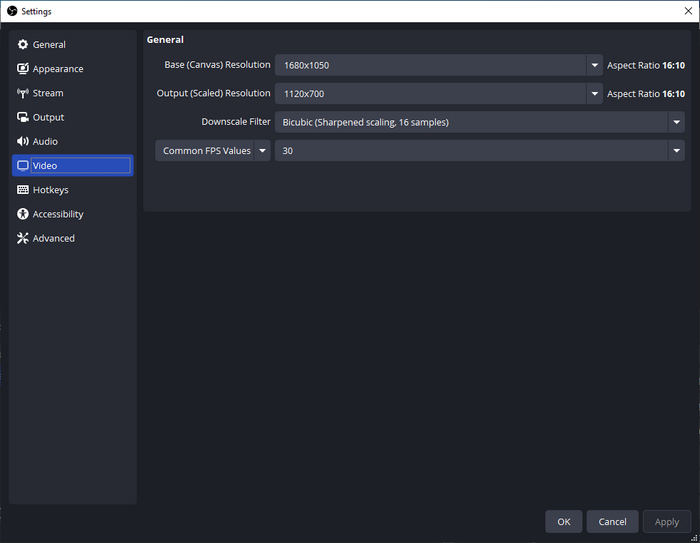
Reducing the output resolution and framerate in OBS will lessen the load on your GPU:
- Go to OBS Settings > Video.
- Reduce the Output Resolution: Lowering the resolution can significantly reduce GPU usage.
- Lower the Frame Rate: If 60 fps is causing issues, drop it to 30 fps.
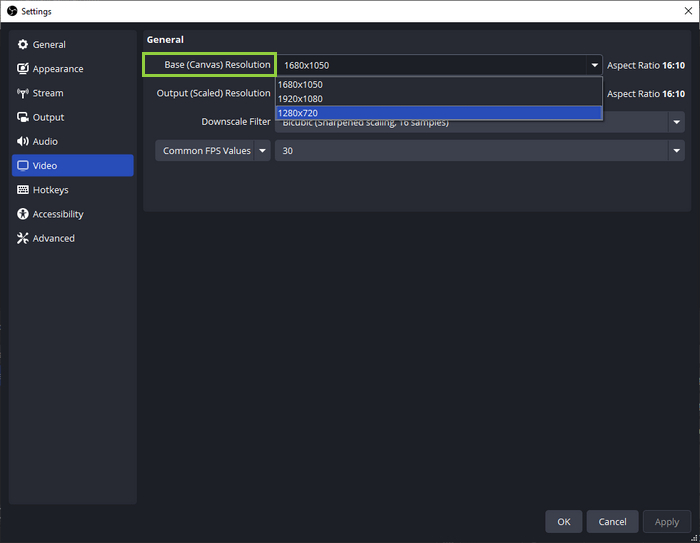
8. Reduce the Base (Canvas) Resolution
Reducing the Base (Canvas) Resolution can help alleviate GPU strain, but it's generally not recommended since it complicates asset management and the capturing process. It's advisable to consider this option only if you are severely limited in GPU resources.
To safely reduce the Base (Canvas) Resolution, follow these steps:
- Create a new Scene Collection and switch to it.
- Go to OBS Settings > Video and change the Base (Canvas) Resolution to a lower setting.
- After adjusting the resolution, you'll need to reposition and resize your sources to fit the new canvas dimensions effectively.
9. Build Simpler Scenes
Complex scenes in OBS, with many sources and filters, can overwhelm your system. Simplifying your scenes and reducing the number of sources can make a big difference:
1. Limit Sources:
- Use Lower Resolutions: Opt for lower resolutions in video capture and media sources to reduce the strain on your system. For example, there's no need to use 4K video if you're streaming in 1080p.
- Smaller Sources: Instead of one large source, break it down into smaller, appropriately scaled sources to save resources.
2. Reduce Filters:
- Disable Unnecessary Filters: Filters like color correction and sharpening add extra load. Remove or deactivate any that don't significantly enhance the scene.
- Apply Filters Sparingly: Focus on applying filters to specific elements rather than an entire scene to minimize resource usage.
3. Minimize Browser Sources:
- Limit the Number of Browser Sources: Reduce the number of browser-based elements like chat overlays or animated alerts, as these can be resource-intensive.
- Optimize Size: Decrease the resolution of browser sources by adjusting their width and height to fit your layout without consuming extra resources.
- Switch to Alternative Sources: For static images or video, use image or media sources instead of browser sources to cut down on system load.
By simplifying your scenes and managing your resources wisely, you can maintain smoother performance and avoid system slowdowns during streaming or recording.
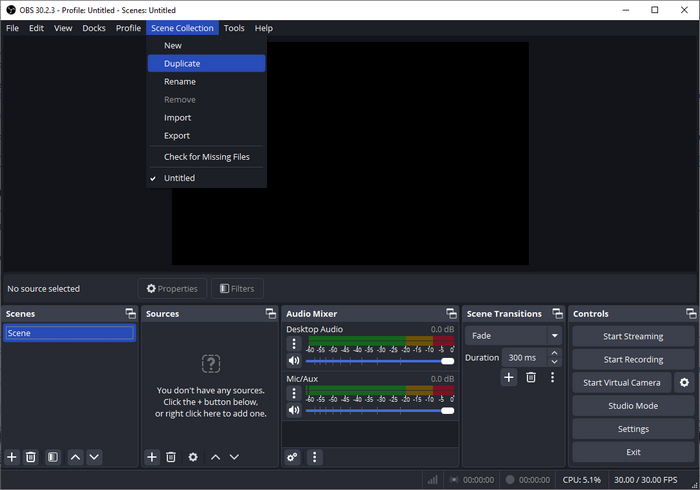
10. Keep Scene Collections Small and Focused
Over time, large scene collections can bog down OBS. Consider splitting your scenes into multiple scene collections:
- Go to the Scene Collection menu in OBS.
- Create or duplicate collections to separate out the scenes you don't frequently use.
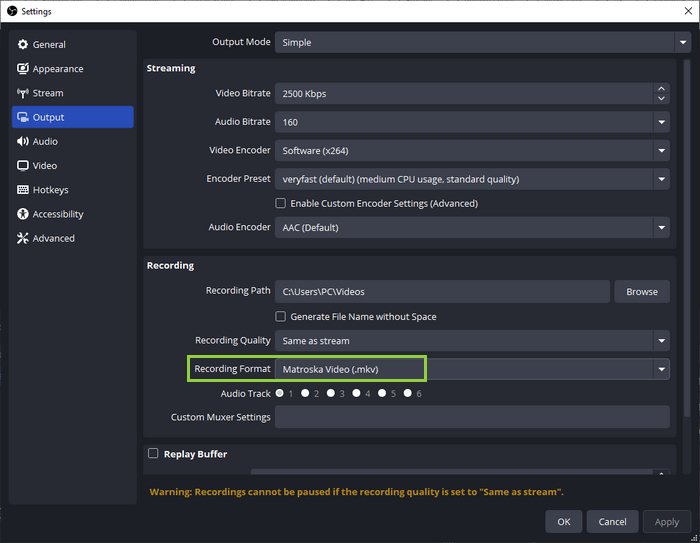
11. Use MKV as Output Format
Changing your output format from MP4 to MKV may be also a helpful fix for encoding overload error. Recording in MKV format prevents encoder overload from corrupting the entire file, as MKV is more resilient to interruptions. OBS also has a built-in feature that can automatically remux (convert) MKV files to MP4 after the recording is finished. So, if you need your recordings in MP4, you can rely on this feature without worrying about file corruption.
Additionally, if you're only seeing 0.1% encoder lag, it's a very minimal issue, especially when recording to MKV, and likely won't affect your final output.
12. Change the Encoder Preset
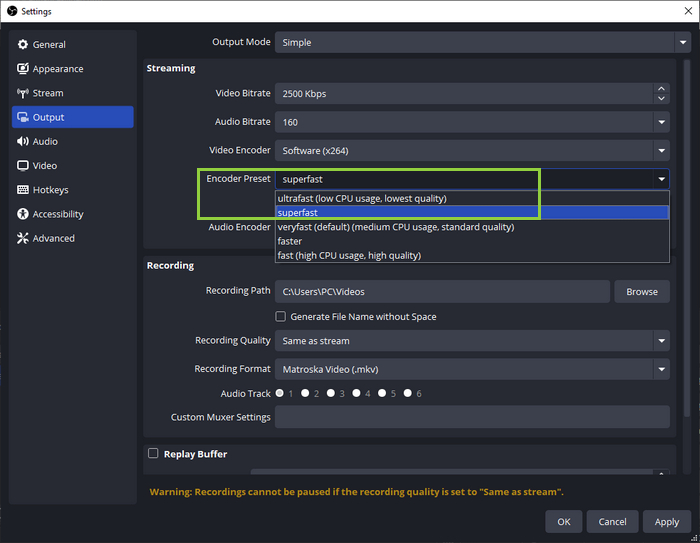
By default, OBS uses the x264 encoder, which is the best open-source video encoding library available. It comes with several presets that balance CPU usage and video quality. The default setting, "veryfast," typically offers a good balance between speed and quality. However, if your PC is struggling, you can try an even faster preset, like "superfast" or "ultrafast," which reduces CPU usage at the cost of video detail. Keep in mind that "faster" in this context means less attention to detail, not better performance.
To change the encoder preset, go to Settings > Output and select Advanced Encoder Settings. Ensure the encoder is set to Software (x264) and adjust the preset as needed. Be cautious when lowering the preset, as faster options use less CPU but result in lower video quality.
13. Use Hardware Encoding
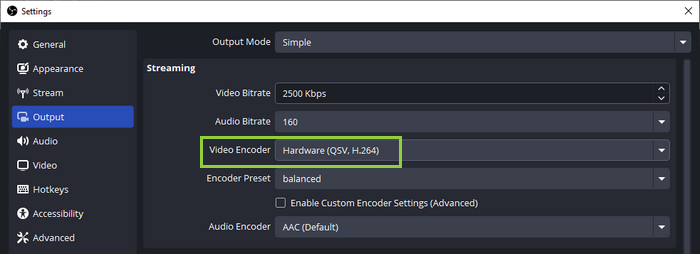
Switching to hardware encoding can help reduce CPU load and prevent the encoder overload error. OBS supports hardware encoders like AMF (for AMD GPUs), QuickSync (for Intel), and NVENC (for Nvidia). These GPU-based encoders reduce pressure on your CPU by offloading the encoding process to your GPU, though video quality may be slightly lower at the same bitrate.
To enable hardware encoding:
- Open OBS and go to Settings > Output.
- Choose the hardware encoder available for your system, such as Hardware (QSV, H.264).
If a hardware encoder isn't available, check if your integrated graphics (iGPU) is enabled in your BIOS.
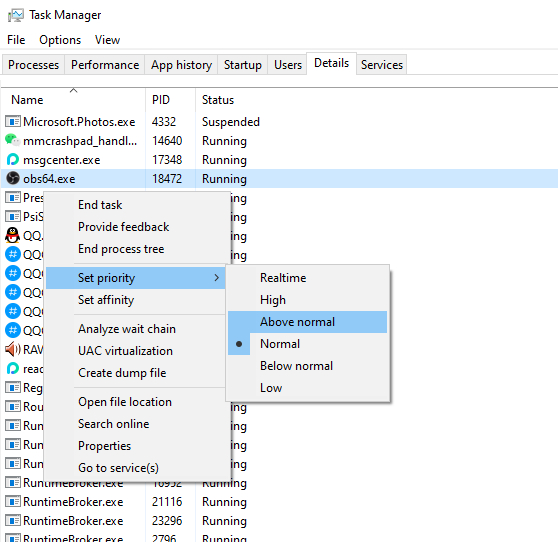
14. Change Process Priority
OBS may not be prioritized by your CPU, which can lead to insufficient processing power and cause encoding overload. You can improve OBS performance by increasing its process priority in Task Manager:
- Press Ctrl + Alt + Del and select Task Manager.
- In the Processes tab, locate and right-click on OBS, then choose Go to details.
- In the Details tab, right-click OBS, go to Set priority, and select Above normal to give it higher priority.
15. Free Up Disk Space
OBS requires a considerable amount of storage space for recording and streaming. A lack of available disk space can cause errors or performance issues. To free up space:
- Open File Explorer and right-click on the drive you want to clean up.
- Select Properties, then click Disk Cleanup from the General tab to remove unnecessary files.
16. Use an OBS Alternative for Recording
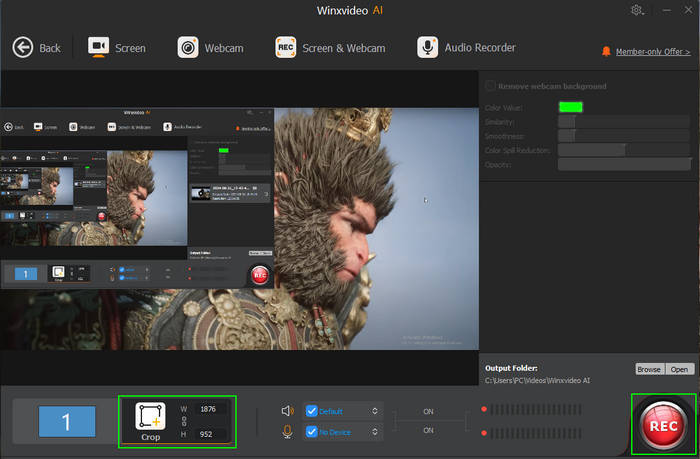
If you've tried all the suggested fixes and are still facing the encoding overload issue in OBS, it may be time to consider switching to an OBS alternative, like Winxvideo AI. This tool allows you to record various activities on your computer, such as games and meetings, without encoding overload issue.
Key Features of Winxvideo AI:
- Record your screen, webcam, or both simultaneously, with or without audio (customizable based on your needs).
- Capture system audio or microphone input.
- Remove webcam backgrounds for a cleaner video appearance.
- Record full screen or customize the recording area.
- Annotate your videos with arrows, outlines, notes, and other visual elements.
 Free Download
  Free Download
Note: AI tools for Mac are currently unavailable, but they're coming soon. Stay tuned.
17. Upgrade Your Hardware
If you've tried all other solutions and still encounter encoding overload, it might be time to upgrade your hardware. Encoding video, especially at high resolutions or frame rates, can be resource-intensive, and an older or underpowered CPU may struggle to keep up. Upgrading your CPU or GPU can allow you to maintain high-quality recordings or streams without having to reduce resolution or frame rate.
The Bottom Line
When it comes to tackling the OBS "Encoding Overloaded" issue, a variety of factors can play a role, from high-resolution settings and intense system resource competition to encoder type and complex scene setups.
To fix this issue, try running OBS as an administrator, adjusting output settings, switching to hardware encoding, etc. If tweaking settings doesn’t resolve the problem, you might need to upgrade your hardware or consider an OBS alternative. By experimenting with these solutions, you’ll be on your way to smooth, high-quality recording without the frustration of encoding overload errors.


