How to Fix OBS Virtual Camera not Showing Up?
 Mike Rule
Updated on
"I've just installed the newest version of OBS (no other plugins) and started the new Virtual Camera... but it doesn't show up in any other applications (Chrome, Zoom, Teams, etc.). What might I be doing wrong?" - from OBS Forum
OBS (Open Broadcaster Software) is a popular free and open-source screen recorder used for recording and live streaming. One of its powerful features is the virtual camera, which allows you to use OBS as a video source for other applications like Zoom, Teams, Discord, or Google Meet. However, users sometimes encounter OBS virtual camera not showing up issues in these applications. This article will delve into the reasons behind this problem and provide step-by-step solutions to help you resolve it.

Why is OBS Virtual Camera not Showing Up?
There are several reasons why your OBS virtual camera doesn’t appear in your applications. Here are some common causes:
1. Lack of administrative privileges: OBS may require administrative privileges to access certain Windows resources and your camera. If you're not running OBS as an administrator, it might not have the necessary permissions.
2. Misconfigured output settings: The output settings within OBS itself might be incorrect. Ensure that the virtual camera is enabled and the resolution and frame rate match your desired settings.
3. Outdated version of OBS: Using an outdated version of OBS can lead to compatibility issues and bugs. Make sure you're using the latest version.
4. OBS is not working with proper resolution or FPS settings: If OBS is not configured with the correct resolution or frame rate, it might not be compatible with your application.
5. Faulty or bad camera driver: A corrupted or outdated camera driver can interfere with the OBS virtual camera.
6. Misconfigured system settings: Certain system settings, such as display settings or privacy settings, might be preventing OBS from accessing your camera.
7. Conflicting applications: Other applications running on your system might be conflicting with OBS or using the same camera resources.
8. Permission barriers: Your operating system might have security restrictions that are preventing OBS from accessing your camera.
9. Graphic settings glitches: Issues with your graphics card or drivers can sometimes cause problems with the OBS virtual camera.
Solve OBS Virtual Camera Issue on Windows 11/10
Now that you know what may cause OBS virtual camera not showing up issue, you can find a solution here.
1. Check the OBS virtual camera settings
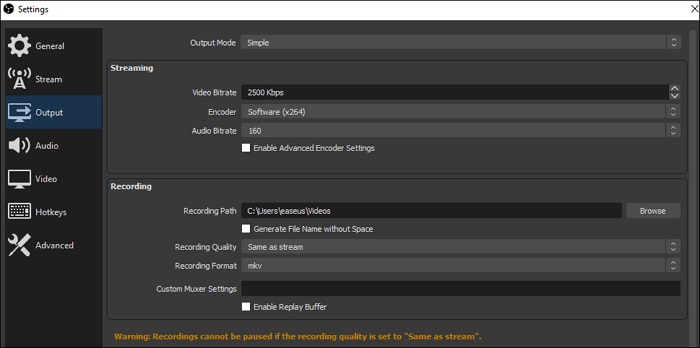
Step 1. Open OBS and go to "Settings" > "Output".
Step 2. Ensure that the "Virtual Camera" output is enabled and the resolution and frame rate match your desired settings.
Step 3. Click "Apply" and then "OK".
2. Ensure virtual camera is activated
Step 1. In your application like Zoom or Teams, go to the video settings and select the OBS virtual camera as your input device.
Step 2. In OBS, tap Activate button next to the Filters option.
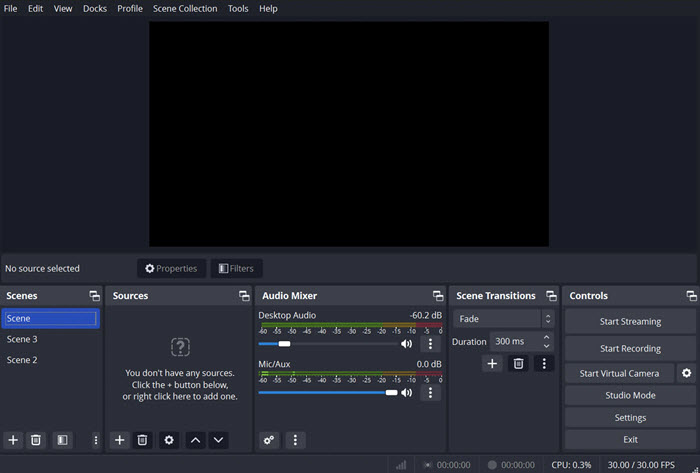
Step 3. Now tap on Start Virtual Camera under the Controls section to activate virtual camera.

3. Install virtual camera
If the Start Virtual Camera button isn't showing in the Controls dock, follow these instructions to install the virtual camera.
Step 1. In File Explorer, go to C:\Program Files\obs-studio\data\obs-plugins\win-dshow.
Step 2. Right-click virtualcam-install.bat and select Run as Administrator.
If you have installed OBS Studio to a different folder or you are using portable mode, you can:
Step 1. Right-click your OBS Studio shortcut and select Open File Location.
Step 2. In File Explorer, right-click virtualcam-install.bat and select Run as Administrator.
4. Run OBS as an administrator
Step 1. Right-click the OBS shortcut on your desktop.
Step 2. Select "Run as administrator" from the context menu.
Step 3. Verify if the virtual camera is showing up.
5. Restart OBS
Step 1. Press CTRL + Shift + ESC keys to prompt Task Manager.
Step 2. Find OBS Studio & Right click on it, then Go to details.
Step 3. Now right-click on OBS again and tap the End Process Tree option.
Step 4. Start OBS again as administrator.
6. Update OBS
If your OBS is out of date, there may be no virtual camera. So updating it may fix the problem.
Step 1. Head into Help options in OBS.
Step 2. Then click on Check for Updates.
Step 3. Tap on Update now if it's available.
7. Enable OBS Studio camera permissions
It is essential to enable Windows to provide permissions for third-party applications to access certain hardware components, such as a microphone or camera. This situation may arise when OBS is restricted from utilizing the camera functionality, and you can enable the permission to fix the not showing up issue.
Step 1. Press Windows + I to open Windows Settings.
Step 2. Head into Privacy settings.
Step 3. Find Camera settings and then toggle the OBS option to ON.
8. Check and update graphics settings
Ensure that your graphics card drivers are up-to-date, and try adjusting the graphics settings in OBS to see if it helps.
Step 1. Right-click on your desktop and select your graphics control panel.
Step 2. Ensure the settings are correctly configured to support OBS.
Step 3. Update your graphics drivers if necessary.
9. Change OBS Studio output settings: resolution, FPS, video format
To explore an alternative approach, we suggest that users adjust the output settings within their OBS application, specifically focusing on resolution, frames per second (FPS), and video format. Often, these elements can be the main contributors to any camera-related problems encountered in OBS Studio.
Step 1. Within OBS, navigate to File > Settings > Output options.
Step 2. Find Recording Format under Recording options and change MKV to MP4.
Step 3. Scroll down to Video section, change Base Canvas Resolution to a lower one, i.e., 1440p to 1080p, and change FPS from 30 to 60.
Step 4. Save settings and restart OBS.
Learn best OBS recording settings >>

10. Try an OBS alternative for screen recording
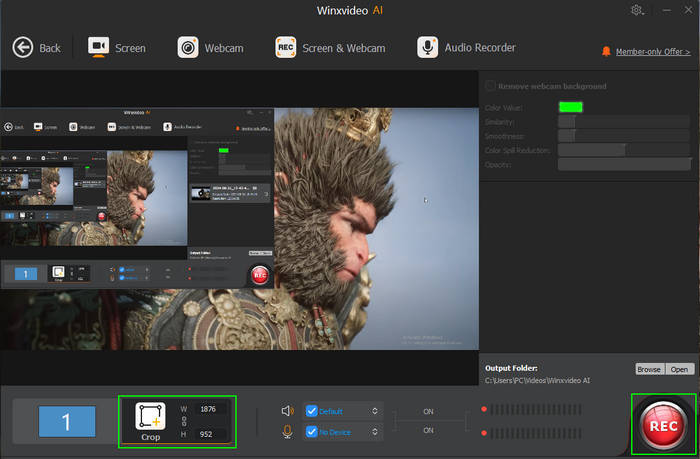
If you have any problem with OBS virtual camera when using it to record screen, you can consider using an OBS alternative screen recording software. Winxvideo AI is a reliable and stable OBS alternative to record screen, videos, gameplay, representations, etc. in impressive 4K 2160p, ensuring optimal visual quality. In contrast to OBS, Winxvideo AI delivers a seamless and lag-free experience, free from crashes.
- Record live stream from YouTube, Facebook, TikTok, Instagram, etc.
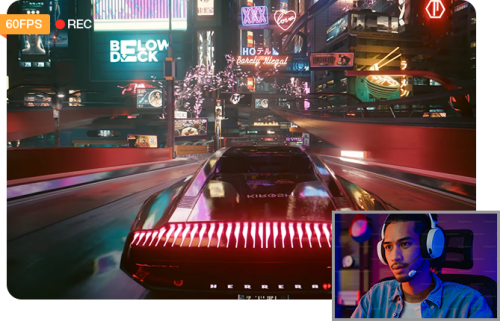
- Capture gameplay and create virtual background with Chroma key for live streaming.
- Record online meetings, conferences, webinars from Zoom, Microsoft Teams, Google Meet, etc.
- Record video calls from Skype, Facetime, Snapchat, Discord, WhatsApp with sound.
- Record instructional sessions, online courses, TED talks, and students feedback.
- Draw while recording full screen and custom screen in high quality.

 Free Download
  Free Download
Note: AI tools for Mac are currently unavailable, but they're coming soon. Stay tuned.
Solve OBS Virtual Camera not Showing up on Mac
1. Check application compatibility:
Ensure that OBS and your application are compatible with your macOS version.
OBS Studio 30.0 and higher running on macOS 13 ("Ventura") and higher include a new virtual camera component that is compatible with all Mac applications.
The virtual camera component in OBS 29.1 and earlier is not compatible with macOS 14 ("Sonoma") at all. If you require the virtual camera to work, update to OBS 30.0 (or newer) or stay on macOS 13 ("Ventura").
The version of the virtual camera component used for macOS 12 and prior may be incompatible with some applications. It is suggested to use the virtual camera with Chromium-based browsers (such as Google Chrome or Microsoft Edge) for best compatibility, especially for online services such as Discord.
2. Install virtual camera
On macOS (macOS 13.0+):
Step 1. When opening OBS for the first time, you will get a promt "System Extension Blocked". Click "Open System Settings". Alternatively, open System Settings > Privacy & Security > Security (macOS 13 and 14) or System Settings > General > Login Items & Extensions > Camera Extensions (macOS 15 and later).
Step 2. In the box "System software from application 'OBS' was blocked from loading", click "Allow".
Step 3. Authenticate to allow the system extension.
Step 4. Restart OBS.
On macOS (macOS 11 / 12):
The virtual camera will be installed when you first click on Start Virtual Camera.
By following these troubleshooting steps and addressing the potential causes, you should be able to successfully resolve the issue of the OBS virtual camera not showing up in your applications.


